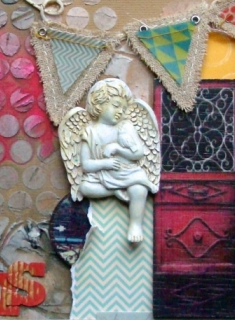
 by Debbie Hodge
Dimension (or depth) refers to the measurable extent to which something lifts off the page. Real dimension (as well as the illusion of it) can be added to your scrapbook pages. Dimension on your pages will engage the viewer’s sense of touch–and, thus, involve them more deeply in your pages.
Actual dimension on scrapbook pages
Add actual dimension with basic layering techniques including: stacking, curling, and pop-dotting. Use techniques and mediums to add not only dimension but texture to your pages. Check out:
- Texture and Dimension on Scrapbook Pages
- 7 Ways to Add Texture and Dimension To Your Scrapbook Pages
- Modeling Paste Techniques and Ideas for Your Scrapbook Pages
- Ideas for Using Tone-On-Tone Patterns and Layered Elements on Scrapbook Pages
- 3 Journaling Treatments That Add Texture and Dimension to Your Scrapbook Page
The illusion of dimension on scrapbook pages
Create the illusion of depth by manipulating shadows, light, scaling, overlaps, and perspective using software like Adobe Photoshop Elements or CS.Digital scrapbookers find out early on that the “shadow-work” on their pages can go a long way to making a page look pleasing and realistic. Celeste Smith recently shared this list of digital shadowing tutorials with the students in her Critique Workshop:
- To Shadow or not to Shadow? That is the Question (from The Daily Digi)
- Add basic drop shadows to your layouts using Photoshop Elements (from DigiDesignResort.com)
- Shadow File: The Basics (by Peppermint Granberg)
- How to Create Realistic Shadows (by Sahlin Studio)
- Shadow Suggestions and Common Mistakes (by SuzyQScraps)
Ideas for dimension on scrapbook pages
Amy Kingsford says, “When I was a paper scrapbooker, I liked a page with lots of dimension. Now that I’m a digital scrapbooker, I still like dimensional pages and make them with a number of approaches, including using lots of layers, bulky items like tulle, three-dimensional flowers or even wood veneer diecuts, and, of course, the right type of shadowing.”
“‘A Perfectly Imperfect Shot’ records a great shot that my son took. I combined layers, bulky items, and shadowing to make a soft yet dimensional page. One secret weapon I use to achieve this kind of dimension is a soft, yet deep, drop shadow.”
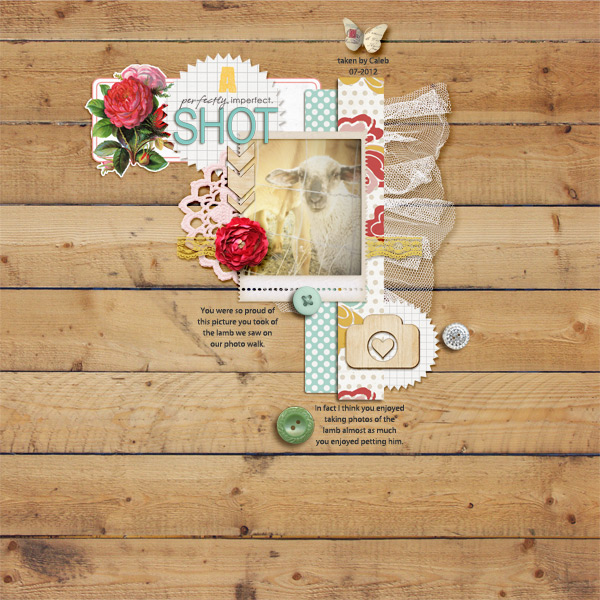
A Perfectly Imperfect Shot by Amy Kingsford | Supplies: Sahlin Studio: Wood Veneers: Shapes; Practically Perfect Collab (with Ju Kneipp); Fresh Collab (with One Little Bird); Kitschy Kitchen Collab (with Jenn Barette); Sara Gleason: Dandelion Templates.
Leah Farquharson says, “I have been ‘borrowing’ our son’s Instax Mini for the past year and finally grabbed one for myself. This was my first attempt at a ‘selfie,’ and, clearly, it’ll take a bit more practice!”
“I added dimension by building in layers. Starting at the foundation level with the stamps, then adding a journaling card and flat elements like sequins, papers and fabric tags. I finished by layering dimensional elements like flowers, chipboard elements, and the photos themselves.”
“No special tools are needed for this type of layering. Just learn to view your supplies by their thickness/dimension and layer accordingly.”
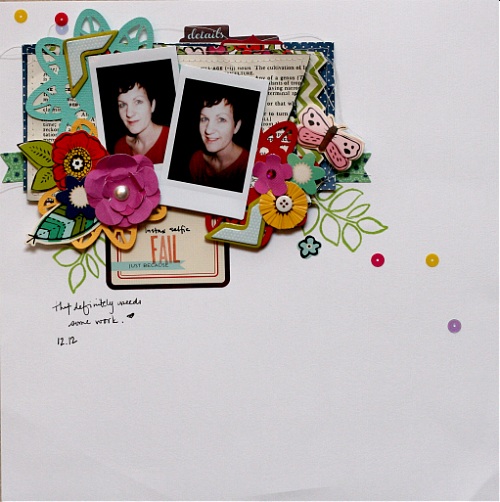
Instax Selfi-Fail by Leah Farquharson | Supplies | card stock: bazzill. Adhesive sequins: Pebbles, inc. stamps, journaling spots, ink, patterned papers, flowers, silhouette cuts, diecuts, chipboard elements, fabric tags : American Crafts
Marie-Pierre Capistran says, “This page is part of my December Daily album, and it’s about my little girl finally learning to sleep in her own bed. On the left page are the lyrics of the song she likes to hear at bedtime.”
Dimensional items here are embroidery, Thickers alphabets and scenery mounted on foam dots. “Before I stitched, I pierced holes around the sun’s edge with a paper piercer. A big sturdy needle works best with paper and cardstock.”
“To add realistic dimension to my sailboat, I used foam dots in the middle of the sail and glued the sides down with glue dots. For the other sail, I also placed a foam dot in the middle but glued only the top part of the sail to my background with a glue dot, leaving the bottom of the sail swaying. I also added dimension with paper layers, like with this little border I added to the side of the boat and with a small rhinestone. For the flag I used a piece of ribbon. Even though it’s flat, it adds texture. The little waves are punched in patterned paper and glued randomly, overlapping one another. The moon is in two pieces: a circle and a half moon using the same patterned paper for a tone-on-tone look.
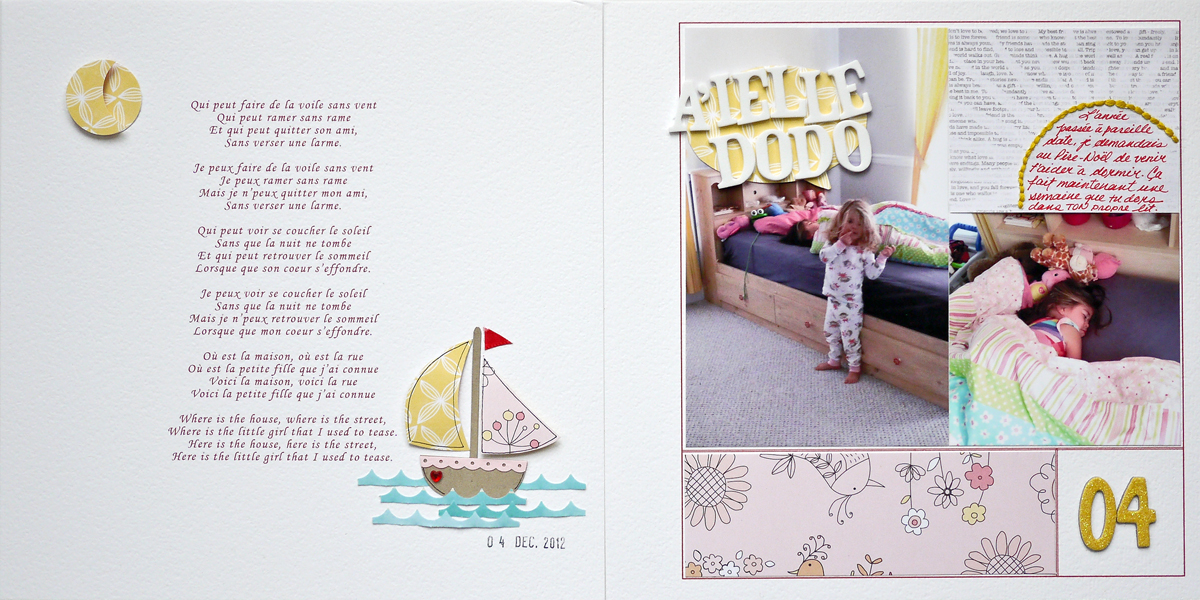
Arielle dodo by Marie-Pierre Capistran | Supplies: Cardstock: Bazzill; Patterned paper: Echo Park, American Crafts, SEI, Recollection; Thickers: American Crafts; Punch: Stampin’UP!; Others: Silhouette, embroidery floss, rhinestone, ribbon, date stamp.
Barb Brookbank says, “I used lots of layers and shadows and a textured background paper for dimension on ‘Warm & Cozy.’ I wove the word art together and added texture to the photo with a linen textured paper and soft light blending mode. The wool hat in the photo adds texture and dimension as well.”
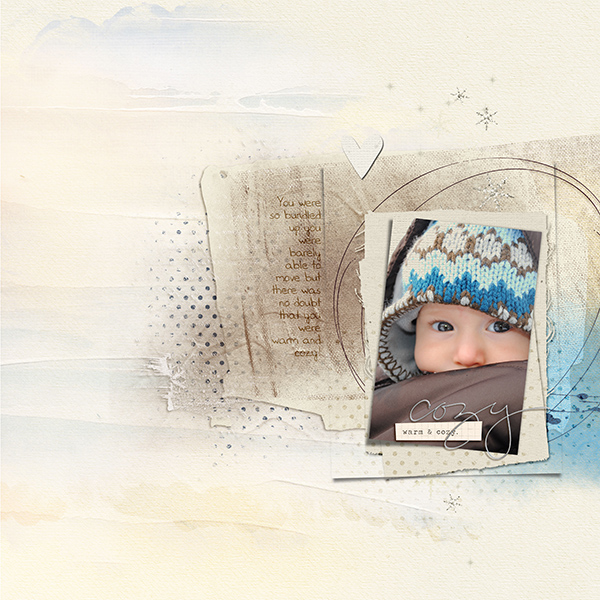
Warm & Cozy by Barb Brookbank | Supplies: Kit: Cozy Collaboration from Oscraps; Frayed mask: Boys and Toys from Digital Scrapper Designs; Font: I Love Me Some Heather by Darcy Baldwin
Kiki Kougioumtzi says, “At our mall, there was a ‘Wheel of Fortune’ set-up, and the kids had fun spinning the wheel. I added fake dimension to the photo, by shading around it with ink. I also hand-cut flowers from the background paper and raised them with pop-dots (on some, I used two layers of pop-dots to raise them even higher). The sticker banner on the top corner is also partially raised with foam dots. I placed the dimensional items are around my focal point photo.”
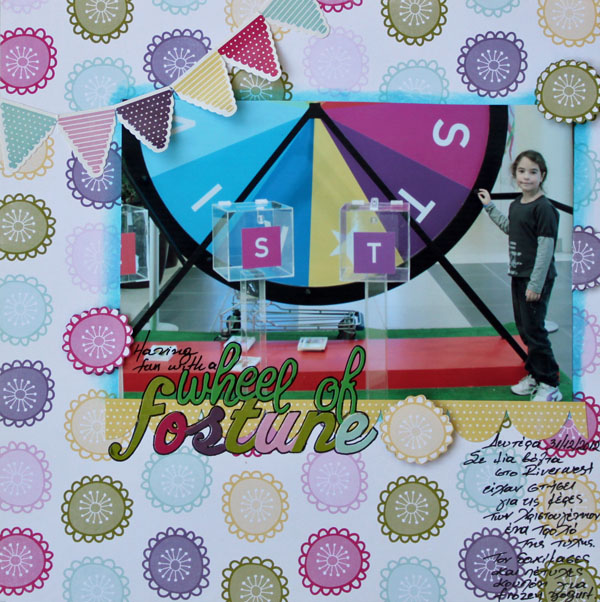
Wheel of fortune by Kiki Kougioumtzi|Supplies:Patterned paper, alpha stickers, stickers:Echo Park; Alphas:Webster’s Pages;Other:foam dots,pop-dots.
Jennifer Matott says, “This page was about letting perfection go, about not worrying about controlling it all. Everything happens for a reason.”
“I wanted lots of dimension and texture on this page. It’s completely random where I put texture here, but there is lots of it. I added modeling paste, gesso, twine, corrugated letters, a resin piece, and logs of distressed layers of paper along with the burlap banner.”
“First, I sprayed color on the cardstock over shapes and then allowed it to dry. I added splats of gold paint. Then I added light modeling paste through a dotted stencil using a palette knife (like frosting a cake). I took a pencil and drew lines through the paste for more interest. Once that dried, I added sprays of Faber-Castell Design Memory Craft Gelato mist in Bubble Gum and more dark mist. It settled between the dots and on the paste, highlighting some of the texture. I added the layers of paper and twine with the banner attached. I also added the title with corrugated letters brushed with gold paint.”
“If you want to add texture to your layouts, use stencils and a medium like Gesso or Modeling Paste to create defined areas of texture OR stamp into an applied area to create distressed looks.”
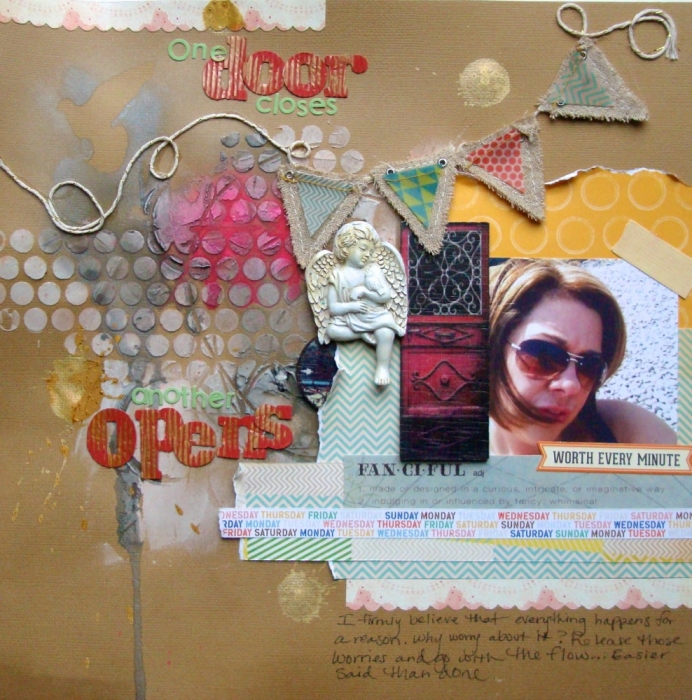
One Door Closes… by Jennifer Matott | Supplies: All papers and embellishments from Scrapbooking From The Inside Out “Release” kit. Faber-Castell Design Memory Craft Gelatos® in Black Licorice, Silver, and Bubble Gum; Faber-Castell Design Memory Craft Gelatos® mist making kit; Light Modeling Paste: Golden Paints; Adhesive: Helmar 450 Quick Dry; Gesso: Faber-Castell Design Memory Craft Textural Accents; Faber-Castell Design Memory Craft PITT Artist Pen in black.
Deborah Wagner says, “When I first started scrapping digitally, I didn’t think of dimension or texture; and my pages lacked realism and depth. Now I feel I am able to turn a 2-dimensional page into one with a 3-dimensional feel.”
“To add dimension to this page, I added strips of worn paper with stitching, a layered and taped frame, the banner, and, most importantly, shadowwork. By taking classes from Tiffany Tillman and Jana Morton, and tutorials from Cassie Jones, I learned how to use texture and make realistic shadows.”
“I especially love using shadows to make it look as if an element is lifting off the page.I changed the size, distance and opacity of each shadow on the paper strips because items that appear further from the background cast longer, lighter shadows.I warped the shadows on my title making it appear as if the word love is lifting off the page where the charm hangs on its end. I also lifted the shadows on the banners so it looked as if they were blowing in the ocean wind.”
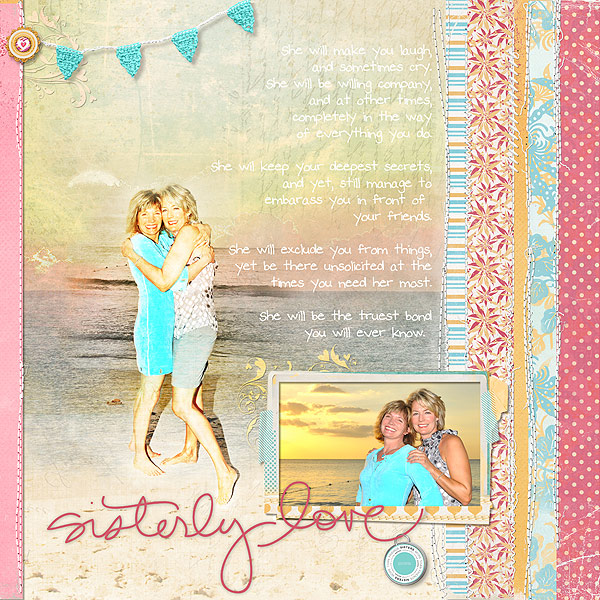
Sisters by Deborah Wagner. Supplies by Designer Digitals: Cassie Jones – Bending Shadows; Katie Pertiet – Destination Seaside No. 3, Hey There Kit, Assorted Messy Stitches White No.4, Assorted Messy Stitches Mega Pack No. 7, Simple Collage Frames No. 2, Flourished Love Brushes and Stamps No. 3, Color Inspiration 4-14-12, Editorial Inspiration 4-28-11; Lynn Grieveson – Summer Sunset Kit, Summer Sunset Distressed Add On; Ali Edwards – Sibling Brushes; Studio DD – Ready Made Circles You.
Katie Scott says, “I don’t like extremely bulky pages so I added dimension to this page by adding border strips with holes, washi tape, brads, bling, and the negative spaces of die cuts for the title. All of these layers add visual interest without adding too much bulk to the page.”
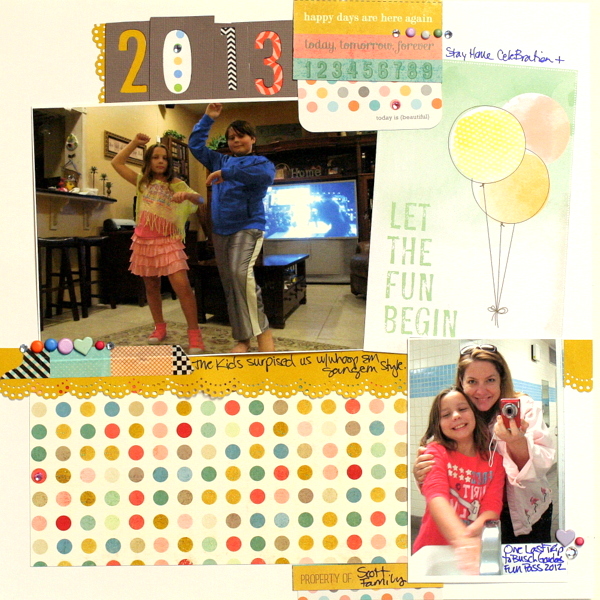
2013 by Katie Scott | Supplies: Quickutz Letters (Studio); Martha Stewart Border Punch; Recollections Neapolitan + Today/Tomorrow/Forever Paper Packs (they appear to be American Crafts brands being sold under the Micheal’s inhouse Recollections brand); Project Life Journaling Cards; Brads; Bling Dots; Sharpie.
Sue Althouse says, “This page is about a fascinating historic home we discovered along Lake Michigan. I added dimension to the layout primarily by layering, pop dotting, and choosing products that lift off the page. First I made sure the photo and title would stand out, and then I added smaller embellishing details forming a visual triangle. I chose Thickers, Twinkle Goosebumps, and pop-dotted stickers for more dimension. I finished the page with hand-stitching. When doing this kind of work, I strive to achieve a balance between flat and dimensional elements, making sure they overlap by layering on top and tucking behind.”
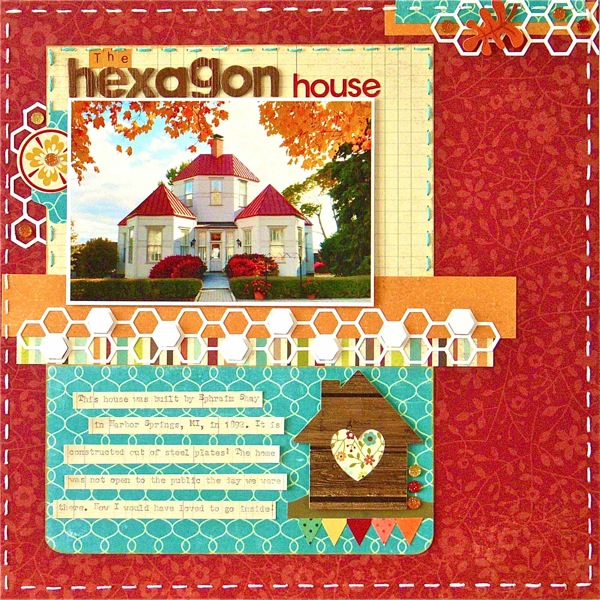
The Hexagon House by SueAlthouse | Supplies: Cardstock: Bazzill; Patterned Paper: Echo Park, Simple Stories; Hexagon Border: Silhouette; Alphabets: American Crafts, Simple Stories; Ink: Jenni Bowlin; Stickers: Crate Paper, Simple Stories, Lily Bee; Floss: We Are Memory Keepers; Twinkle Goosebumps: Queen & Co.; Tab Punch: McGill
[current]

