
by Debbie Hodge
This column is all about understanding design strategies and approaches for two-page scrapbook layouts.
In each Double Up, I’ll share: a two-page layout, design analysis of what makes this two-page design work, page sketch with measurements, and a layered template.
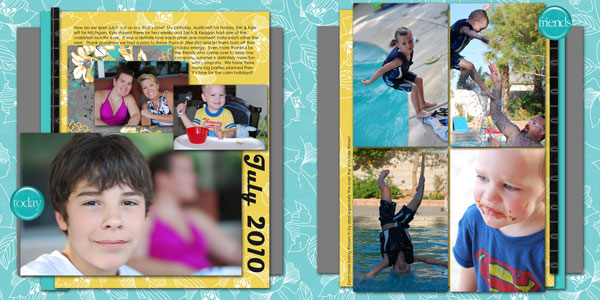
Make two one. The primary design idea for this two page layout is that you can make two one-pagers that could stand alone and/or together.

This is a digital page – see supplies in my DesignerDigitals gallery.
Use common product and even comment elements on each side. A square of patterned paper with a map design is the foundation for the grouping on each of the page sides. It’s the same patterned paper and it’s the same size. Notice also that the background cardstock, the orange cardstock and the blue rick-rack are repeated on each side.
Mind your gutters. Notice that the grouping on each side is pretty much centered on its side. THUS, the gutter between the two is double the side margins.By doubling up the center vertical gutter, we’ve got the sense of an opened book–we are cuing the viewer to understand that this in, indeed, two pages (something I don’t always do in my two page designs.
Bracket your combined pages. Take a look at the strip of blue cardstock and rick-rack on each side of the page. The are each placed toward the outer edge: they are mirrored. The effect is of bookends or brackets that house all of the elements between the two of them. This connects the two sides of the piece.
This is a sketch that Tami Taylor used in her August, 2010 post for One Month at a Time. Links for the pdf with measurements and the layered template are below the sketch image.
 open pdf with Sketch – download layered template
Here’s a page that Tami made with this sketch. She’s stuck to the placement as indicated in the sketch, repeated product and elements on each side, and bracketed the whole with strips of black patterned paper.
[lovesketches]
