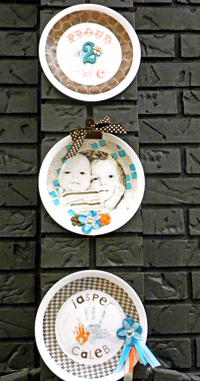
Make your mom a personalized and fun wall hanging for Mother’s Day.
This tutorial will show you how to make an extra special gift for your mom this year. You could also use it to help your children make their own gift for Mother’s Day. I’ve got a FREE template to help you with the band around the plate and printable for one of your plate centers.
- White Salad Plate(s)
- Printable Vinyl Cling Sheets
- Plate Hangers, Easels or Other Hanging Fixture
- Assorted Embellishments, Trims, etc.
- Digital Papers and Word Art
- Numeric Stickers
- Photos
- Paint
- Craft Knife or Scissior
- Hot Glue, Epoxy, Other Adhesives
NOTES: (1) This project can also be made with strictly paper supplies–check out my Decorative Plate Tutorial to see how! (2) I recommend printing a test outer ring and inner circle on regular paper to make sure your decals will fit nicely before printing on your vinyl cling.
1. Take measurements of your plates, including:
- the full diameter of the plate (I’m using 8″ plates)
- the diameter of the inner circle on your place
- the diameter of the outer ring (if it were filled in), and finally
- the width of your outer ring.
For example, the plates I’ve chosen to work with are 8″ salad plates. The inner circle I plan to fill is 5.5 in across, and the outer ring is 7.75 inches from side-to-side–but I cut out a 6.75″ wide circle from its middel to make it a ring that is 1 inch wide.
2. Make “clipping masks” in Photoshop / Photoshop Elements
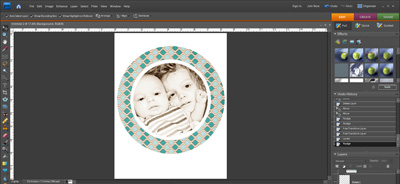
Use these plate measurements to create circles in Photoshop. You will then “clip” digital papers or photos.
For example, for one of my inner circles:
- I opened an 8.5″ x 11″ canvas in Photoshop
- I used the shape tool to make a 5.5″ wide circle
- I then opened a photo of my sons and dragged it to a layer above the circle
- I “clipped” it to the circle (CTRL+ALT+G in Photoshop, CTRL+G in Photoshop Elements, replace CTRL with CMD on a mac). In this way, the photo fills only the area defined by my circle.
3. Other ideas for filling the inner circle of the plate
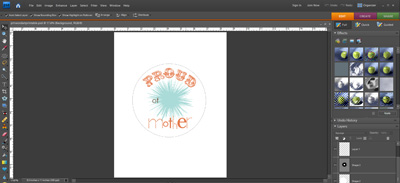
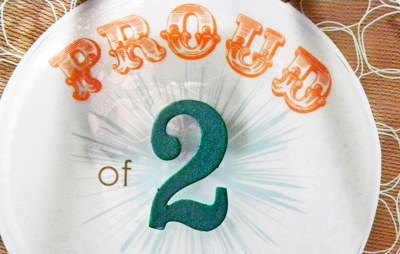
Design your own word art to fit inside the surface area of one of your plates or download the provided printable shown here. You can resize if necessary by changing the percentage in your printer settings.
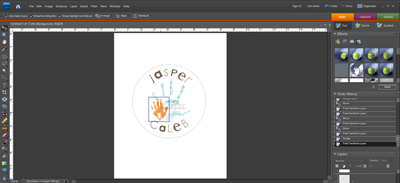
Make hand prints on paper and scan them.
Use a paint color for your handprint that will stand out against your plate. If you have younger children and are worried about getting a good print, try several times with dark paint on a white paper.
Pattie Knox has awesome tips for scanning artwork here. Open your scan in photoshop to print. You can use the Magic Wand tool to select a bit of the print and then >Select >Similar to select all of that color. Set your background color to the desired fill color and press CTRL + BKSPACE to fill it. If it doesn’t look good — press CTRL Z to undo.
Be sure to save your scanned handprint for other projects!
4. Create the “band” that goes around the plate
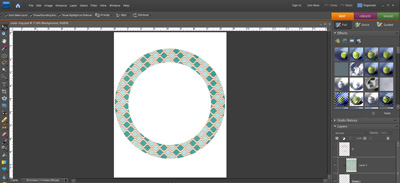
The easiest way to do this is to use my mask — which is a band you can open in Photoshop and clip papers to. It’s made for an 8″ plate.
If you want to do it yourself. Create a circle. Rasterize it (in Photoshop) or simply it (in Photoshop Elements). Create a smaller circle and position in the middle of the larger circle. Select the area it fills by CTRL + CLICKING on its thumbnail in the Layers Palette. Target the layer holding the larger circle and press DELETE to remove the inner circle. Delete or hide the layer with the smaller circle.
Drag a patterned paper over your band/template/mask and “clip” the paper to it as described in step 2 above.
5. Nest your images and print.
Combine inner circles and bands that will go on one plate and print to printable window decals.
7. Cut out each of your rings and surface designs
Cut them separately and adhere them to your plate making sure to smooth out all of the air bubbles. You may need to make a slit across your outer rings to accommodate the slope of your plate. This will help to insure a more precise fit. Start in the middle and smooth both ends around the plate. Then cut away any overlap if necessary.
8. If you’re using the printable image provided don’t forget to add your numeric sticker or chipboard!
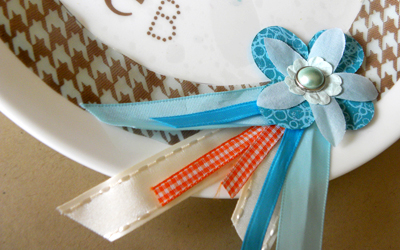
9. Embellish each of your wall hangings as you like.
10. Attach a hanger.
I’ve chosen to use heavy duty bulldog clips to hang my plates from, but you could also use plate hangers, a sawtooth picture hanger attached to the back of the plate with epoxy or you could even display these on your mantel or other surface with the use of small easels.
Now you’re ready to give your personalized wall art as a gift to the proud mom in your life to hang in their home for everyone to see!
***The digital designs used in my wall hangings are from Biograffiti’s Note to Self Kit and coordinating freebie Note to Self Add-On. My free printable also coordinates with these products!
[akingsford]

