Machine sewing on scrapbook pages is a great homemade touch. Read on for ideas and how-tos for getting your machine fired up and stitching on paper.
Prepare your page
Before you start sewing on your scrapbook page, you need to have the layers you are going to sew tacked together. The more you can keep adhesives out the needle’s path the better — so try to tack photos and papers at their centers or away from where the stitching is going to take place. If you are doing more than just an outline or edging you might give yourself some guide lines with pencil but know that going back to erase might be impossible so make them very light.
Practice first
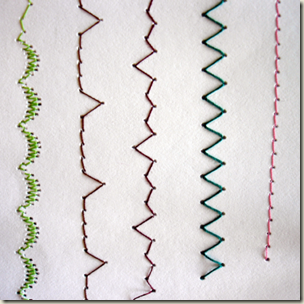
On my machine there are three main types of stitches: straight, zig zag, and decorative. With all of these, the stitch length may be varied.
Like any new skill you might want to practice first. Get out some scrap paper similar to what you want to sew on, and give it a try. Sew straight lines and curved lines. Make a sharp corner by stopping, lifting up the presser foot while the needle is in the paper, pivoting the paper 90 degrees, lowering the foot, and sewing in a new direction. Experiment with speed, stitch length, and styles while you are at it. One of the benefits to sewing on paper is there is no need to hit reverse to secure your stitching you just go straight into forward. At the end of this lesson I will tell you how to finish all your threads off to the back of your layout.
Stitch borders
Borders are an easy addition to any page. You can use your stitching as a border to the entire layout or you can use it right on top of photos and elements on your page to add outlines.
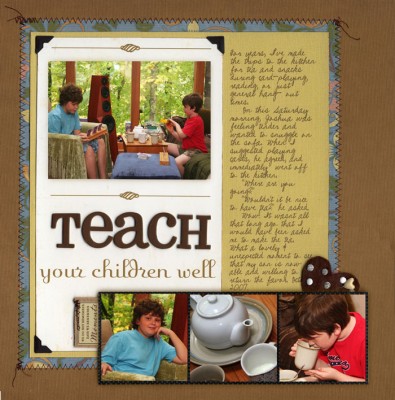
On “Teach Your Children Well,” Debbie used a zigzag stitch to attached the floral patterned paper mat to the page.
On this fun layout of my girls and my parents all squashed in a play tent I used stitching around the edges of my photo and patterned paper squares. I then tore and rolled the edges of the paper which added to the effect that the stitching was helping hold the paper to the page.
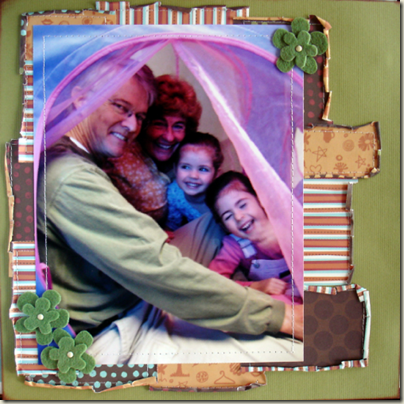 layout by Michelle Houghton
Stitch on embellishments
A decorative stitch over embellishments—handmade or store bought—can add one more layer to their appeal. I used both a scallop shaped stitch and an irregular zig zag stitch on top of handmade felt trees on my “All Here” layout. To do these I had to go very slow to get the smaller circles and I did them before I attached them to the page so I did not have to maneuver the whole 12×12 through the machine.
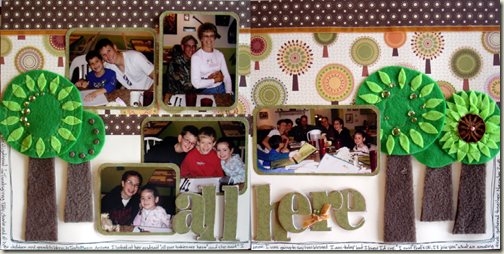 layout by Michelle Houghton
Stitch titles
Add your title with machine stitching. Here is a real challenge! We have gone over how to include hand drawn titles so start with those skills and up the difficulty level by creating them with your sewing machine. For my title on “My Eyes,” I first lightly wrote out the “eyes” on the blue block of paper, then I went over the letters two times with a straight stitch. I used a lot of handwheel control on the corners and had to adjust by lifting the presser foot and pivoting my paper several times, but I love the result of the silver thread for the title.
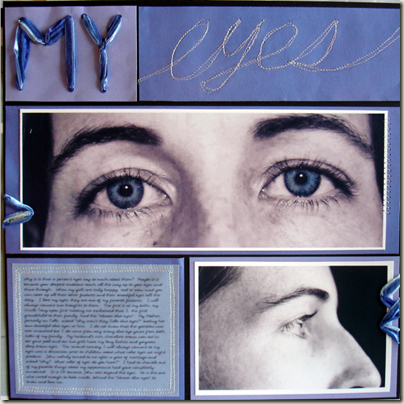 layout by Michelle Houghton
Stitch down ribbons and trims
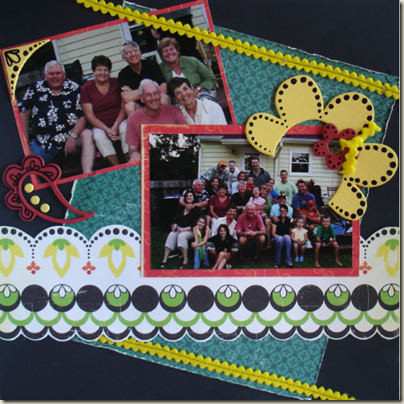
Adding ribbon and trims with a sewing machine is logical. Ribbons and trims are sewing notions themselves, so adding machine stitching on top of them just feels right. When I added the felt ric rac on this layout from a family gathering I tacked down the ric rac in two or three spots and then went over it with a straight stitch in contrasting thread. I also did some small border zig zag stitches to tie it all together.
Add ruffles
You can also add ruffles to your page with ribbon and trims, even with pleated paper. Stitching along the top edge of your ruffles helps to tack them down firmly and give them a finished look. On my layout “Full of Grace” my machine was not too happy with me. Not only was I stitching all over the edges of just about every layer of this layout, but I then added all of this gathered ribbon. For the ribbons I actually ran a tape runner the full length of where the ribbon would go and then attached the ribbon gathering as I went. To finish, I sewed a single straight stitch down the entire length of each ribbon. So I broke one of the cardinal rules of machine stitching on pages and went over a lot of adhesive. That rule is meant to help keep your machine and needle in good working order, but if you hit adhesives now and then, you probably will not ruin anything. You might get a little sticky and have to change your needle, but, to me, a beautiful layout is well worth this cost.
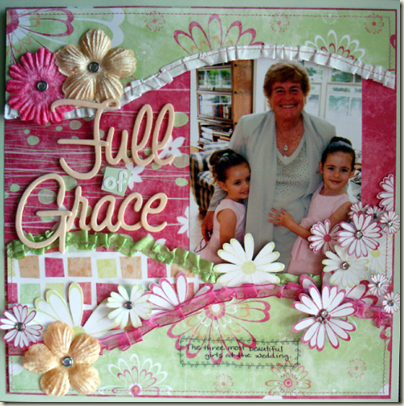 layout by Michelle Houghton
Finishing your stitching
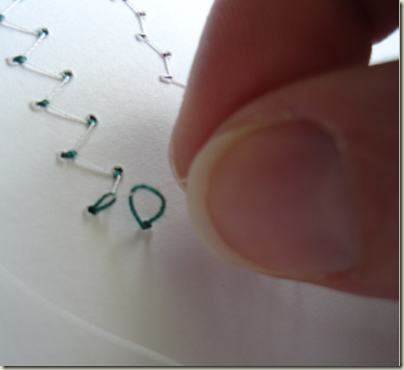
Once you have added machine stitching to your page you have one final step before your stitching is complete. You should have long threads on the front and back of your layout that need to be dealt with. If you start and/or finish your stitching at a page edge, you can tuck them around to the back, but that’s not often the case for me. To finish, I turn my page over and gently pull on each thread that is hanging from the back. As you pull gently on one, a small loop should pull through from the front side of your layout. Pull this loop all the way through to the back of your page. Trim the two threads to about 1 to 2 inches and tack them down to the back of your layout. Repeat this with every thread on the back of your layout. When you turn your layout back over to the front there should be no more loose threads.
Michelle Houghton is a wife, mother and artist living in Iowa. Teaching high school art, doodling, scrapbooking and Copics has been her passion for over 15 years. You can find Michelle’s classes at Creative Passion, her tutorials at Get It Scrapped and Tiffany Doodles, and her blog at Scrapweaver.

