Celtic Knots are an elaborate maze of twists and turns. The definition of Celtic Knots describes them as a knot without beginning or end. Celtic Knots are one of the few art forms left behind by the Celts and they are used readily in decorative art today. Ever wonder how to make those beautifully ornate knots?
I actually know how to draw them and I am going to show you a basic knot. I will also give you some fun ideas of what to do with them when you start resizing them for your own projects. You will need graph paper, a pencil, a ruler and one colored pencil or pen to start.
I’ll be honest this is complicated! But I have broken it down step by step just like I do everything, and I think the images will help you as much as anything so rely heavily on those!
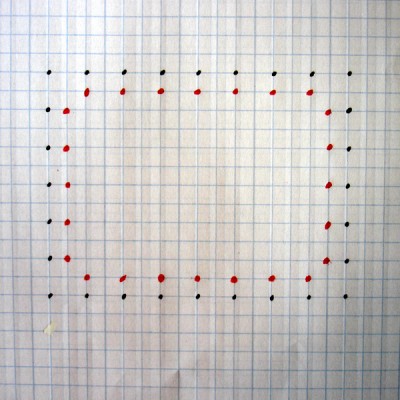
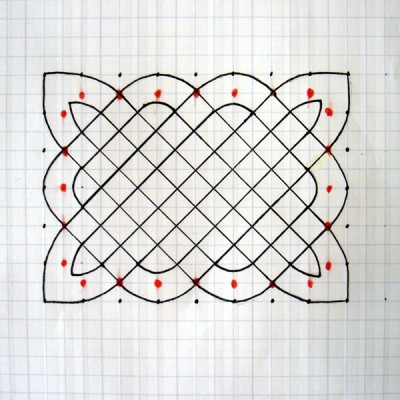
Step 1 – On your graph paper prepare a rectangle of dots. I am making mine 9 dots by 7 dots if you want to follow along exactly. You can choose any odd number per side. The dots appear at the corners of the squares on the graph paper and skip every other square.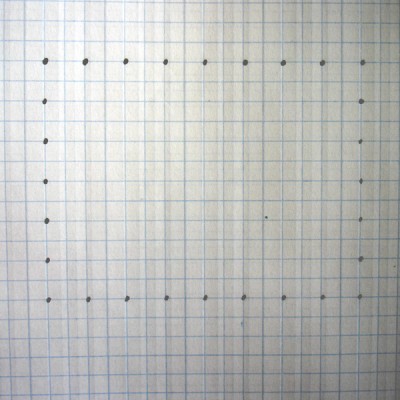
Step 2 – Use your colored pencil to create a second rectangle inside the first. These dots sit directly under the first ones do not skip a square. The original corner dots do not get a colored dot beside them.
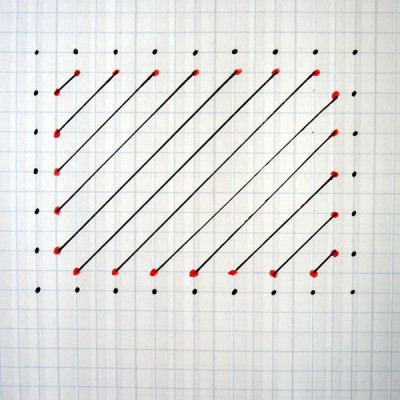
Step 3 – Start at one corner and use your ruler to connect the colored dots. They will create diagonal lines across your rectangle.
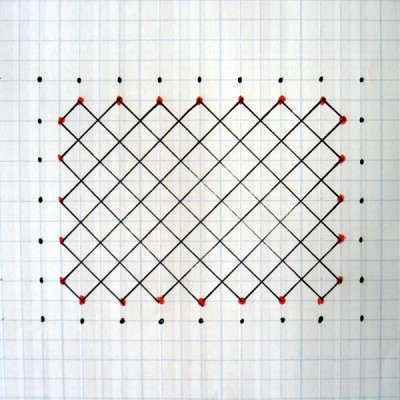
Step 4 – Go to the opposite side and connect the colored dots coming back the other direction. This will create a grid filling the center of your rectangle.
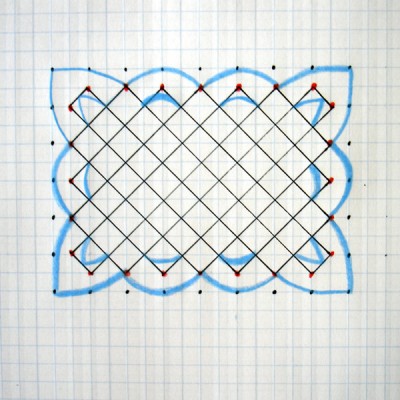
Step 5 – Now to create the outer edge. On my image I have done these new lines in a different colored pencil so you can see them but you can do this in your pencil. Start with the 4 corners, draw a line from the second colored dot up through the second pencil dot and out to the outside corner dot. Return this line to the adjoining side through the second pencil dot and down into the second colored dot. Clear as mud? Check the image. For the sides we are drawing curves starting again with the second colored dot up through the next pencil dot and then back down to the next colored dot. You are skipping every other dot with this process, again check out the image. Next, go back and create inner curves and corners underneath all the new lines you created. Step 5 is the hardest step to explain in words I am sorry!
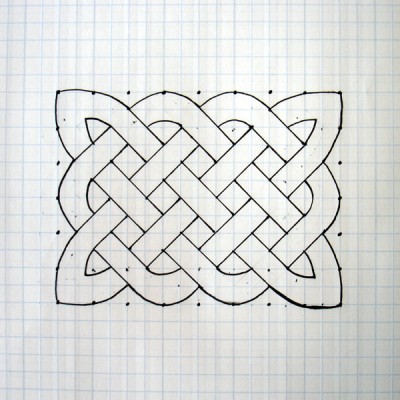
Step 6 – Erase the hard corners that we do not need any more.
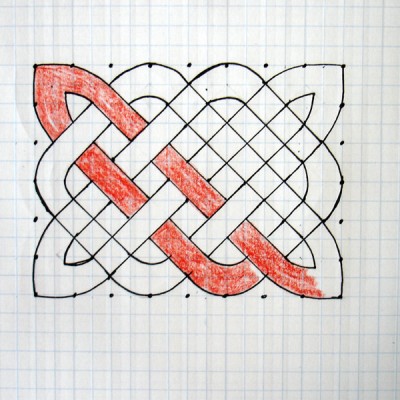
Step 7 – We are going to start weaving the lines. I have added some color to mine again so you can see what I am doing more easily but you are just erasing lines. Start in one corner and as you move out think of weaving under and over the bands you intersect with. Can you see how I have erased some lines to create the effect of the bands weaving over and under?
Step 8 – Wind your way through the whole knot until you have all the lines erased that need to be. Notice that as you wind your way over and under you will eventually end up right back where you started, that is the unending part of it.
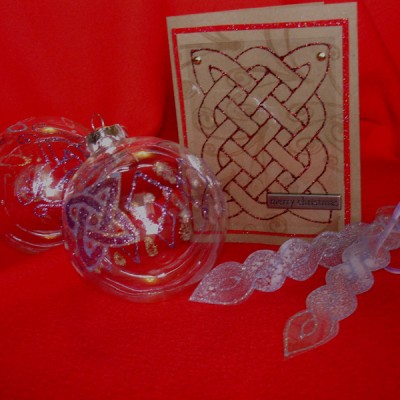
OK so there is the basic knot. If you made it through and ended up with a knot CONGRATULATIONS! Now what do you do with this? You can do different size knots and add them to projects. How about doing a long skinny knot and wrapping it around an ornament , or turning it into an ornament, think long icicles. Make it larger and use it for the background to a card, or on a layout. It could frame a photo on a layout or on your wall. Have fun with it!
Michelle Houghton is a wife, mother and artist living in Iowa. Teaching high school art, doodling, scrapbooking and Copics has been her passion for over 15 years. You can find Michelle’s classes at Creative Passion, her tutorials at Get It Scrapped and Tiffany Doodles, and her blog at Scrapweaver.
[designclass]


