 Big dots are trendy. Especially big dots rendered in fun ways with a variety of mixed media supplies.
The Get It Scrapped Creative Team took the challenge to make their own “big-dot” patterns here and share their scrapbooking ideas with you.
[hr]
make a big-dot pattern with Silhouette-cut drawn circles
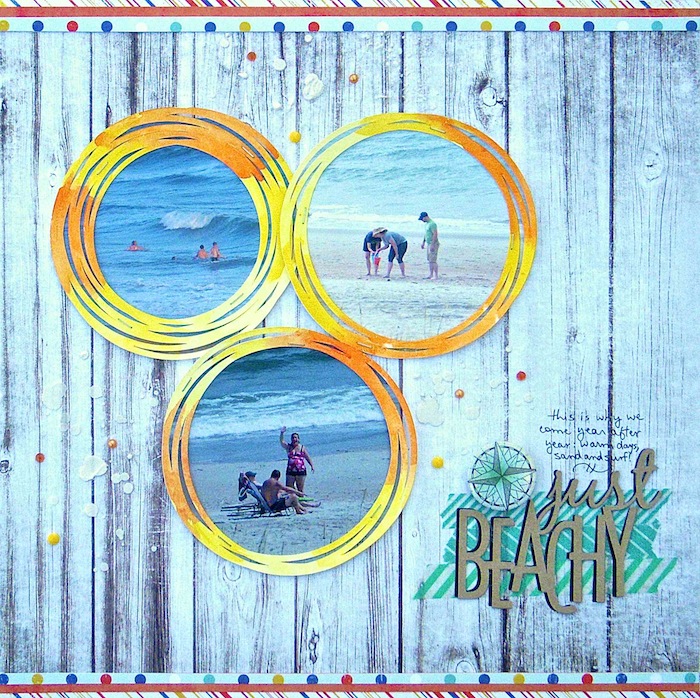
Just Beachy by Sue Althouse | Supplies: Cardstock: Bazzill, Canson Watercolor Paper; Patterned Paper, Flair: Fancy Pants; Circle Frames, Title: Silhouette; Stencil: The Crafter’s Workshop; Watercolors: Michael’s; Embossing Paste: Studio 490; Tools: Tim Holtz Tiny Attacher; Washi Tape: Freckled Fawn, My Mind’s Eye; Enamel Dots: Queen & Co.
Sue Althouse says, “This page is about our beach vacation this past summer. I die-cut the circle frames with my Silhouette and painted them with watercolors. This technique wraps the photos in the warm colors of sunshine and sets a fresh summer mood for the page.”
[hr]
make a grid of punched dots that reveal photos and papers below
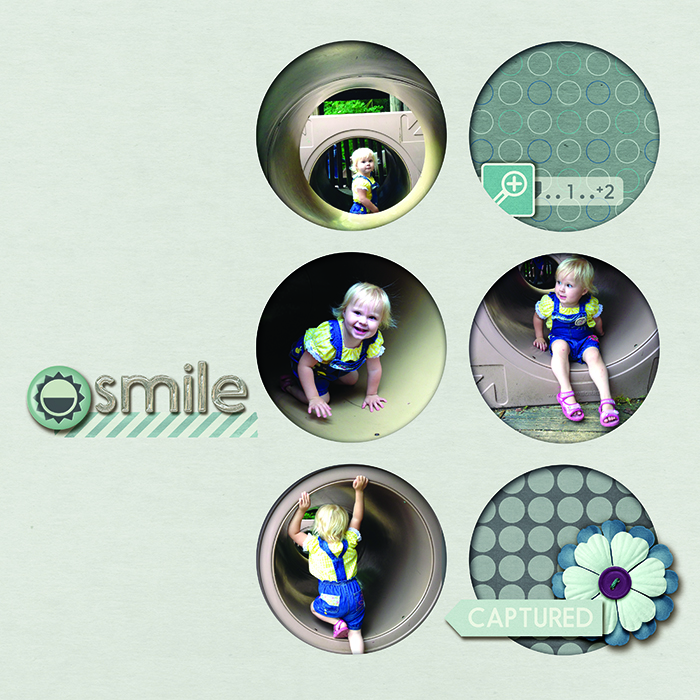
Vicki Hibbins says, “This page is about my daughter playing in the tube at a local playground so I used circles to echo the shape of the tube. I created the circles in a grid and added an inner shadow so that you would be looking into the circle.”
[hr]
doodle circle outlines with glue and press gold foil into them for a big-dot pattern
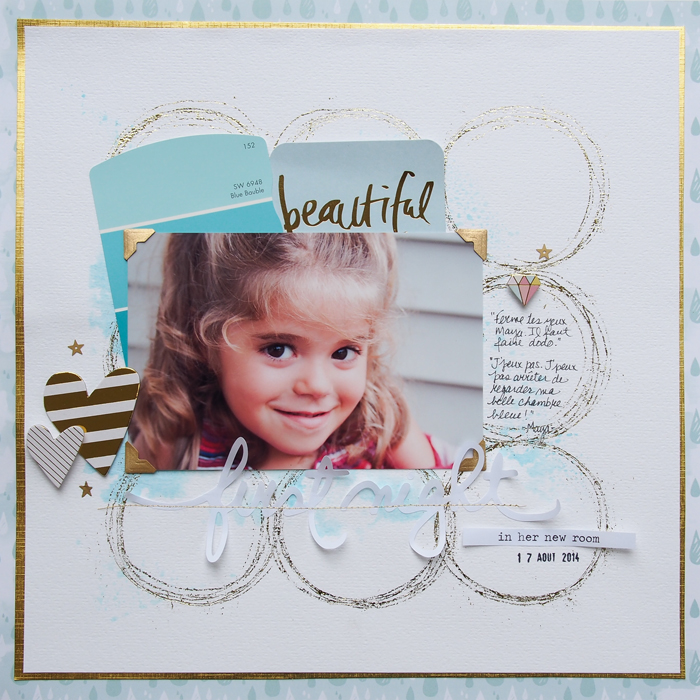
First night in her new room by Marie-Pierre Capistran | Supplies: Cardstock: Bazzill, recollection; Patterned Paper: American Crafts (Dear Lizzy); Project Life card: Heidi Swapp/Becky Higgins; Chipboard embellishments: Heidi Swapp/Becky Higgins; Golden Foil: Stix2; Others: Silhouette Cameo, copy paper, golden thread, photo corners and golden ink.
Marie-Pierre Capistran says, “This page is about my daughter’s first night in her new bedroom after the move. When I told her to close her eyes to go to sleep she said: I can’t. I can’t stop looking at my blue room!”
“I decided to trace 9 big golden circles and to place them to form a square to make for a stunning background for my picture. I then used one of the large circle to write my journaling. To make them I used a circle template (I used a spice box. I colored the edge with a pencil and pressed it on the cardstock) and I then drew around the circles a couple of times with a glue ballpoint pen. When the glue was almost dry but still sticky, I pressed a gold foil on it so that the gold attached to the glue.”
[hr]
make a big-dot pattern with layered copic ink drops
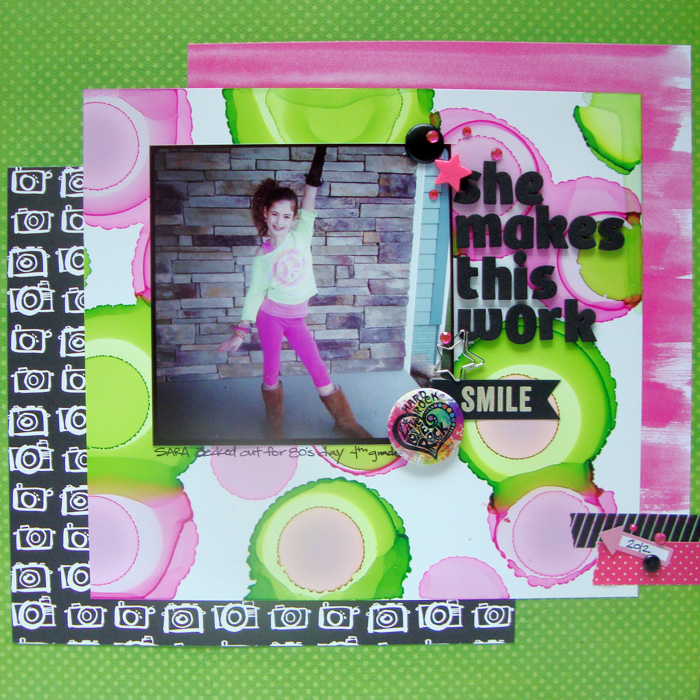
She Makes This Work by Michelle Houghton | Supplies: patterned paper; American Crafts Amy Tangerine and Bo Bunny, rhinestones; Kaiser Kraft, Washi tape; Bella Blvd. and Freckled Fawn, foam letters; American Crafts, star clip, arrow sticker and plastic star, Freckled Fawn, Smile banner; Pebbles, brads; SEI, flair; pin from Hard Rock Cafe, ink; Copic and Sharpie
Michelle Houghton says, “I shot this photo of my daughter Sara all dressed up for 80s day at school two years ago.I really wanted the page to reflect some of the crazy pattern and color trends of the 80s, and the big dots in the colors that Sara was wearing suit the loud decade perfectly.”
“To create the big dots on my page I used Copic ink refills and dripped them onto glossy photo paper. When trying this technique let each ink settle completely before adding the next layer. I used only 3 or 4 drops for the bottom colors and they spread 3 to 4 inches across the paper slowly. The large center dots are only a single drop of ink.”
[hr]
fill die-cut doodled circles with bold patterned paper
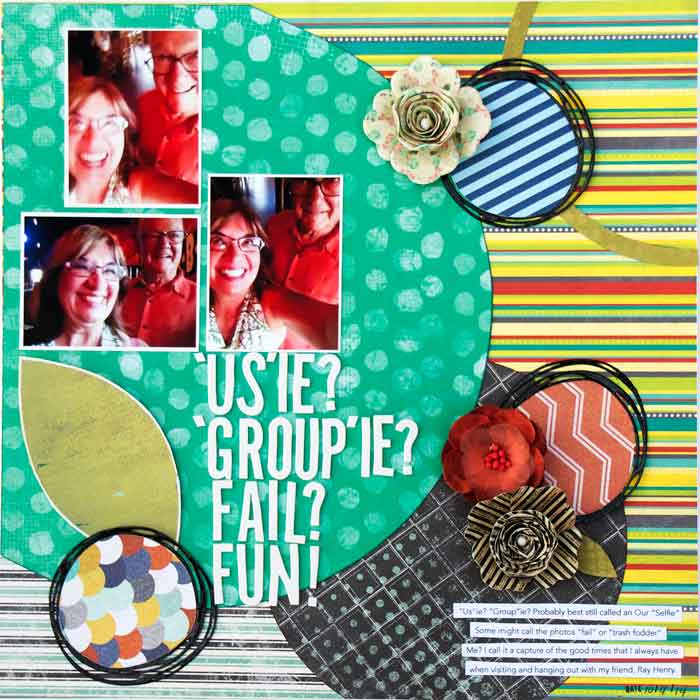
USi.e; GROUPie; FAIL, FUN?! | Supplies: Inspiration-Milhazes featured in Vogue, BoBunny-Our Little Monster, Authentique-Suave, stash, Pink Fresh, MME-Cut&Paste, Scrapbook Customs-Graffiti Dots, Prima, BoBunny, AC Thickers, Ranger Tim Holtz – Distress Ink, Glossy Accents, Amy Tangerine stamp
Karen Poirier-Brode says, “This page is about trying to take a photo with my iPad of myself with my buddy Ray amidst giggles, bad lighting, and our ineptness on an evening when we went to dinner with our spouses.”
“My plan for an original and striking way to incorporate my own large dot or circle pattern on a scrapbook page was to use the lovely art with circles by Milhazes that I found in a recent Vogue magazine as inspiration. I used my Pink Fresh Studio circle outline die on black card stock and then used it again on patterned paper for the centers. I used a paper plate as a guide on the large piece of polka dot paper but had to add to the edge by eye (use what you have when not at home.”
“I left one quadrant square to work on my page. I used my Creative Memories circle guides to cut the dotted charcoal paper and the green circle outline. The circles reminded me of bubbles and flash bulbs (especially with those Bokeh-like dots on the large green paper). I loved the vibrant energy in the art work and tried to replicate that with my papers to add to the sense of fun. The original art used a stencil-like flower pattern in the design but I went for more texture with dimensional flowers though I used the shape of the flowers in the art as inspiration. I did add Ranger’s Glossy Accents to the black cardstock for my “shine.” (Refer back to Lisa Dickinson’s in the GIS membership Oomph and Polish class for her “color, pattern, texture, shine” guidance for scrap pages.)”
[hr]

