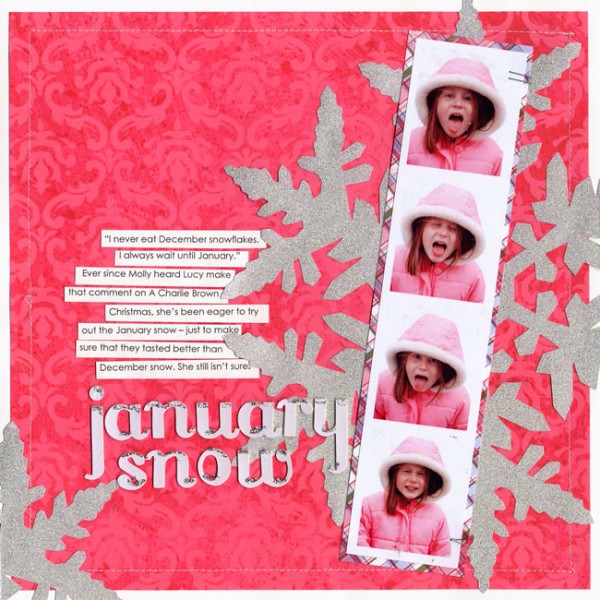
I’m always looking for scrapbook page ideas that give my page a great look and get me inspired. In this hybrid lesson, I’m going to show you how I created a photo strip for my page “January Snow.”
Instructions for doing this in both Photoshop CS and Photoshop Elements follow.
How to make a photo strip in Photoshop CS
- Create a new canvas 4″ x 20″, 300 dpi.
- Open the 4 photos that you want to include in your strip, and crop them each to 4″ x 5″.
- Drag each photo onto your larger canvas so that you have the 4 photos filling the canvas.
- Make the top layer active, and add a layer style (by clicking the f in a circle in the layers palette). Select >Stroke (the last entry in the styles box) and choose a size of about 50 px. Set the position to “Inside” and change the color to white (unless you want a red outline!). You should now see a white box around the first layer.
- Right-click with your mouse on that top layer and select “Copy Layer Style” from the fly-out menu. Again, in the layer’s palette, select the second layer and right-click with mouse to “Paste Layer Style.” Your second layer should have the white box around it.
- Repeat step 2 for all remaining layers.
- Flatten your image by selecting >Layer >Flatten Image.
- Drag your flattened image onto a new 8.5″x11″ canvas, and resize for desired print size. A typical photo booth strip is about 8 or 9 inches tall. I printed mine at 10 inches.
- Print, trim, and mount on page.
How to make a photo strip in Photoshop Elements
- Create a new canvas 4″ x 20″, 300 dpi.
- Open the 4 photos that you want to include in your strip, and crop them each to 4″ x 5″.
- Drag each photo onto your larger canvas so that you have the 4 photos filling the canvas.
- Ctrl+click on the top layer in the layers palette to make a selection from that layer (you should see marching ants around it).
- Create a new layer above the selected layer (using the New Layer icon in the layers palette). Go to >Edit >Stroke, and select a Width of 50 px. Set color to white and location to “Inside.” You should now have the white outline.
- You can copy this layer (right-click with mouse to select “Duplicate layer”) and move the copies over the remaining layers.
- Flatten your image by selecting >Layer >Flatten Image.
- Drag your flattened image onto a new 8.5″x11″ canvas, and resize for desired print size. A typical photo booth strip is about 8 or 9 inches tall. I printed mine at 10 inches.
- Print, trim, and mount on page.
[pgilarde]
[designclass]


