 Pom Poms have become trendy additions to clothes, jewelry, home decor, and party decorations. They add texture, shape, and color when they’re used. And whimsy, too!
And that makes them great additions to scrapbook page designs. Read on for a look at how our creative team is using pom poms on their scrapbook pages.
[hr]
Devra Hunt says, “I reluctantly agreed to a birthday party thrown for me by my husband and my sister. It wound up being a day to remember.”
“I think of pom poms as festive, and therefore perfect, for a party page. My initial thought was to use them as confetti, and place them into some of the die cut spaces to add dimension as well as color. The pom poms were too dimensional, though, and looked out of place on their own.”
“Instead, I used some as sprinkles and others as corner frames. Using the pom pom frame connects the free floating ones to the photo. After adding other embellishments with dimension, color and texture, the pom poms seemed to blend in better.”
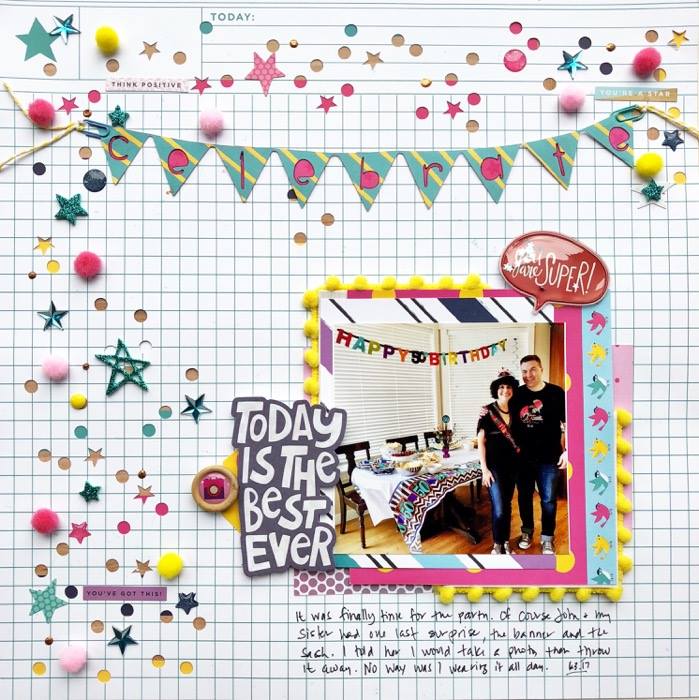
Supplies: Patterned paper, die cuts ephemera, stickers, Thickers, enamel dots-Shimelle for American Crafts, Filled With Joy cut file-Paper Issues, Happy Hooray Cut file, pom poms, acrylic stars-Maggie Holmes for American Crafts, Frame-Crate paper, twine and paper clips-Doodlebug Design
Christy Strickler says, “To document the year we made our own DIY spring tree home decor, I chose a bright, fresh color palette and spring motifs. The pom pom garland creates a flight trail from the dimensional butterfly. It worked well because the butterfly was also quite dimensional. I used small dots of Glossy Accents glue to adhere the pom poms. It helped that this particular ribbon had wire in it, but the glue also helped me keep the ribbon’s shape.”
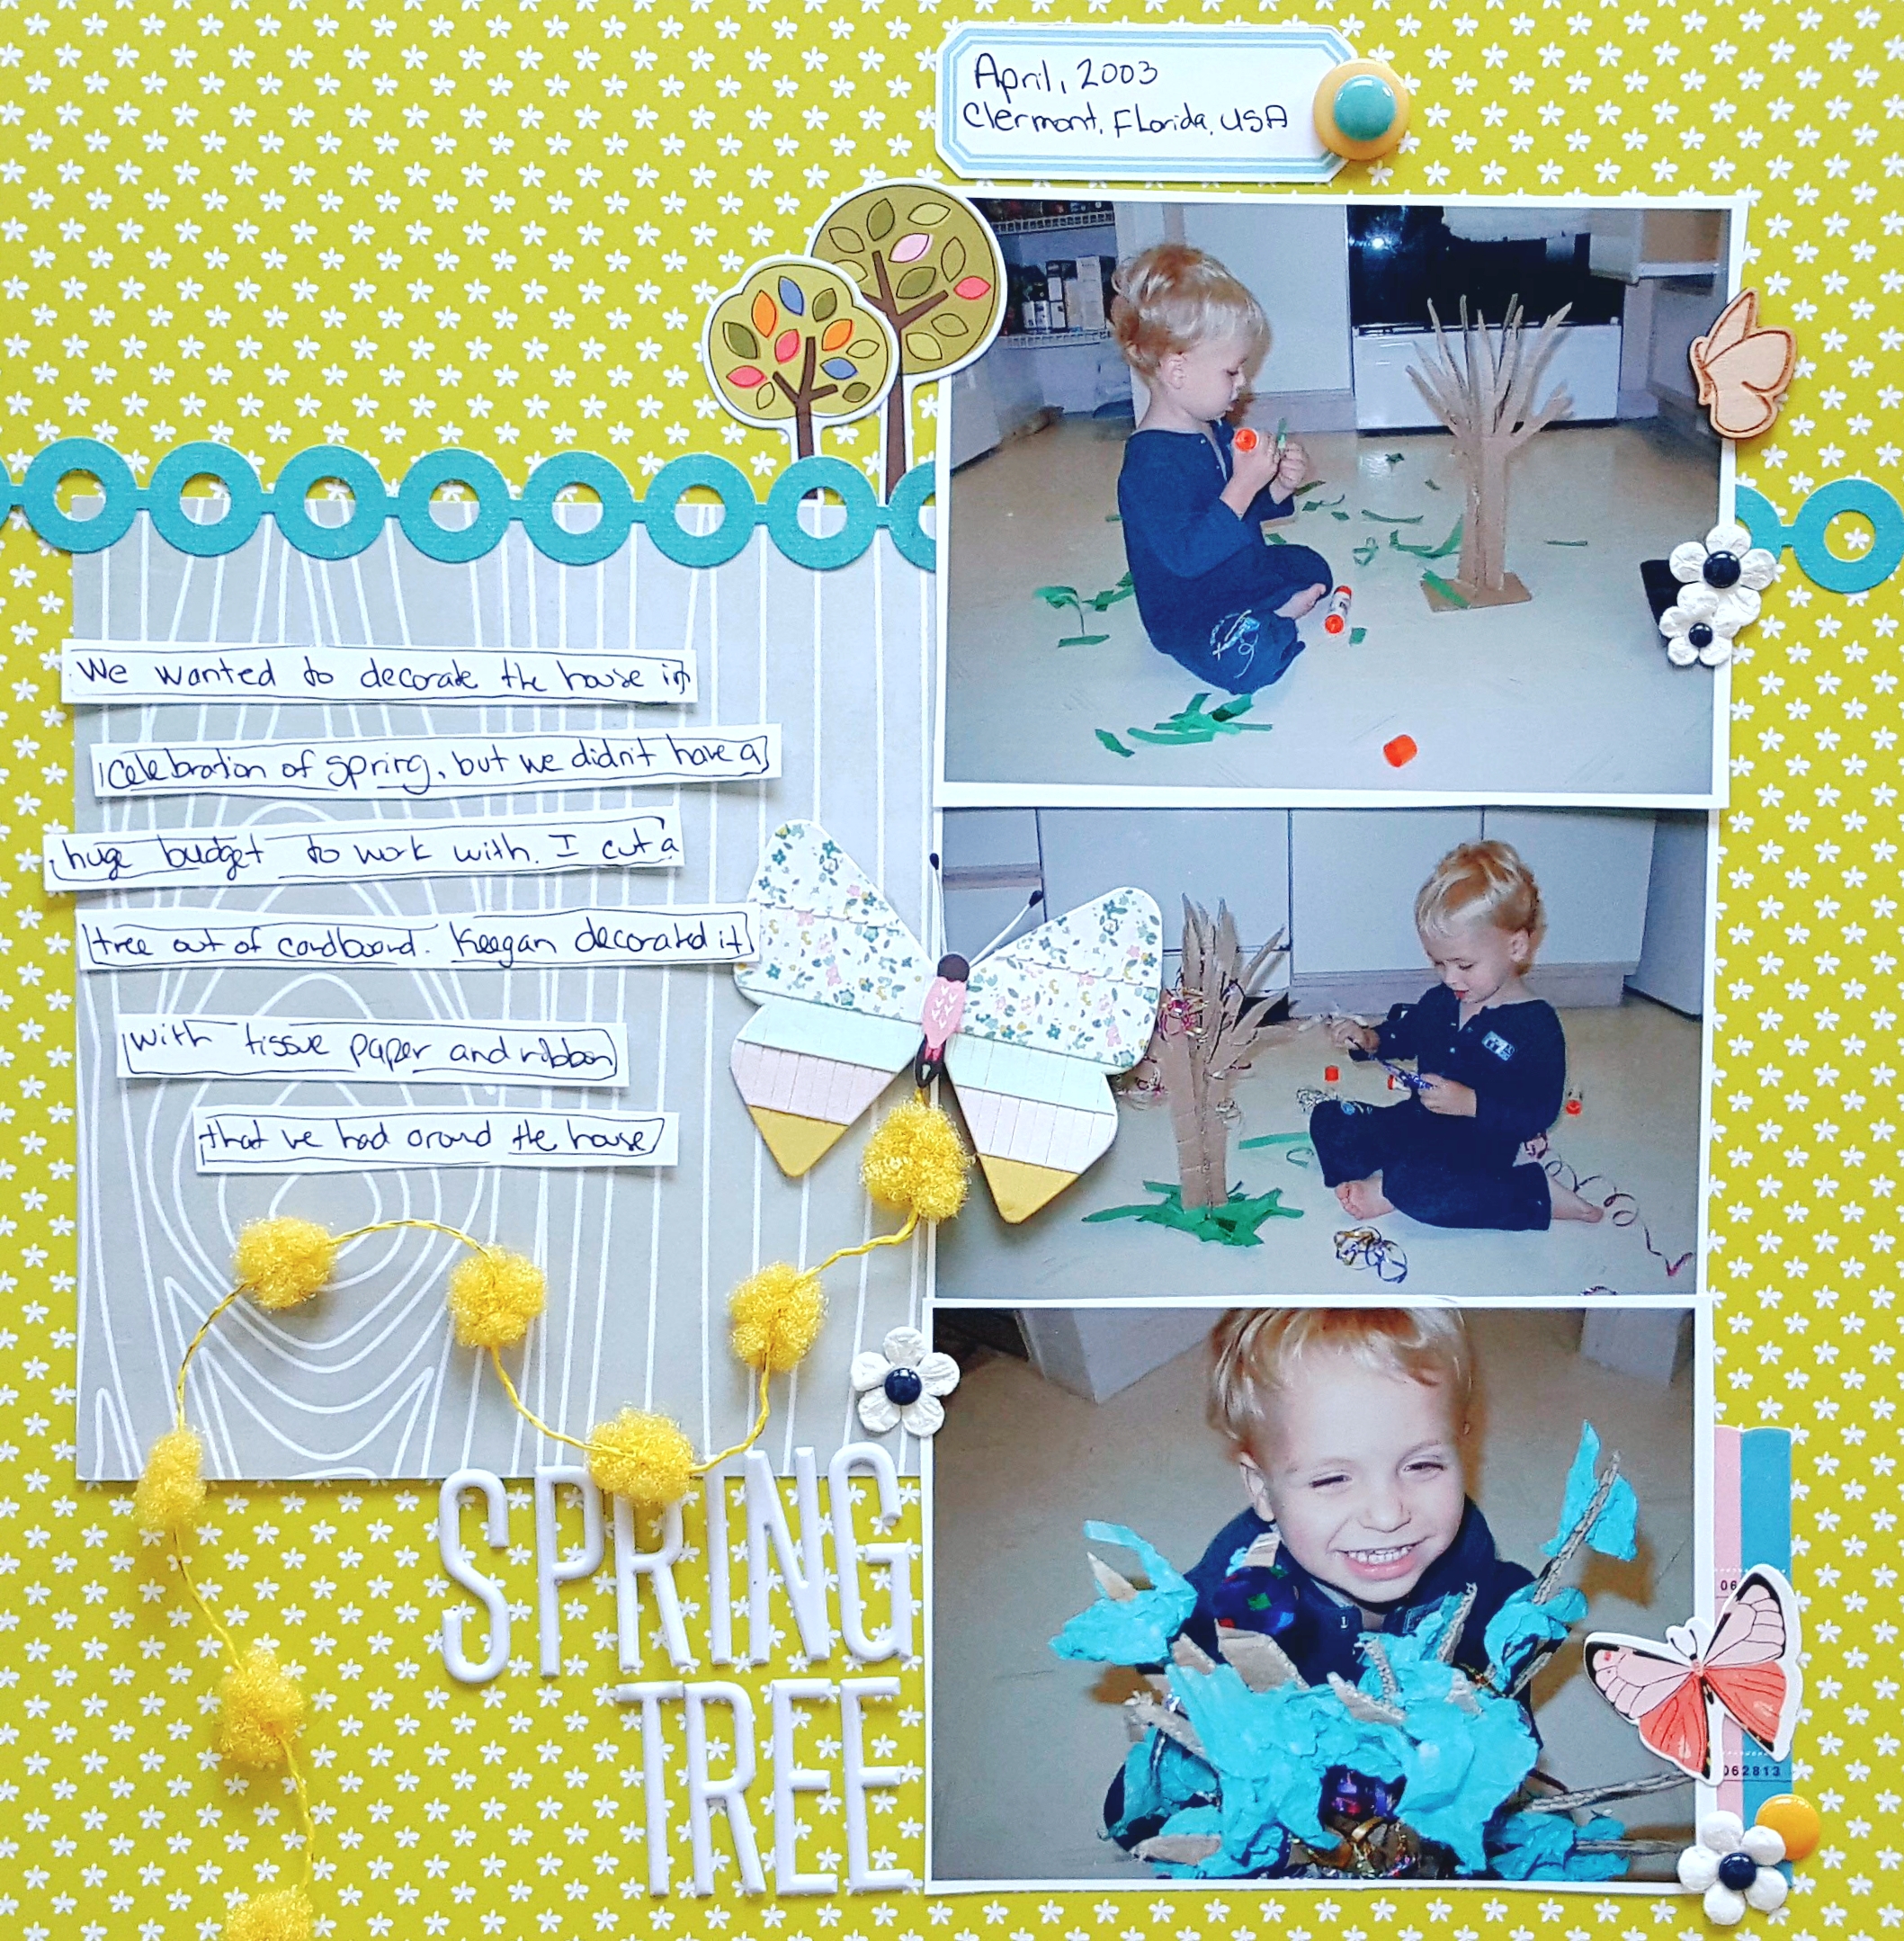
Spring Tree by Christy Strickler |Supplies Patterned Paper, Wood Veneer: Cocoa Daisy; Letters, Die Cuts: American Crafts; Flowers: Recollections; Stickers: American Crafts, Sassafrass, My Little Shoebox; Other: Pom Pom Ribbon
Deborah Wagner says, “This is a photo of my mom and dad in 1957, the year I was born. I recently scanned it, and have been wondering how to scrap it.”
“Although I decided to use mostly neutral tones, I wanted to add a touch of pink. The pom-poms were an excellent choice as the they had the baby-girl pink I needed, supported my heritage theme, and gave my page a touch of playfulness. Pom-poms are easy to work with and almost always give your page a whimsical feel. The only advice I have is if you are using pom-poms on a digital page, put the shadow on its own layer and play with the shadow a bit to give the pom-poms depth and dimension.”
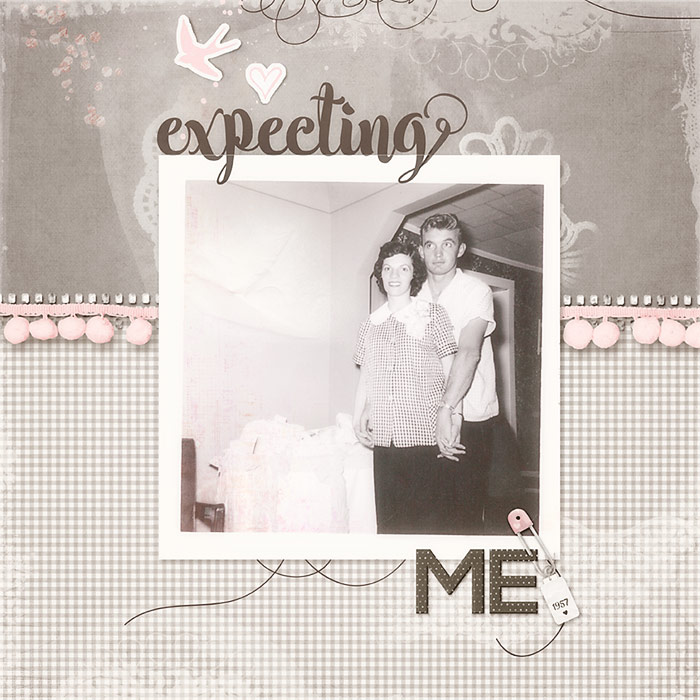
Expecting Me by Deborah Wagner | Supplies: Katie Pertiet- Bunny Slope Rosy; KimB – Precious Beginnings Girl, Girls Time Out; Tickled Pink – Time Capsule; Anna Aspnes – Posy, Vivacity, Salty Living, Doily Edge Overlays; Lynn Grieveson – Bee Curious; Alina’s Haberdashery – Jewels; Anita Designs – One for The Boys
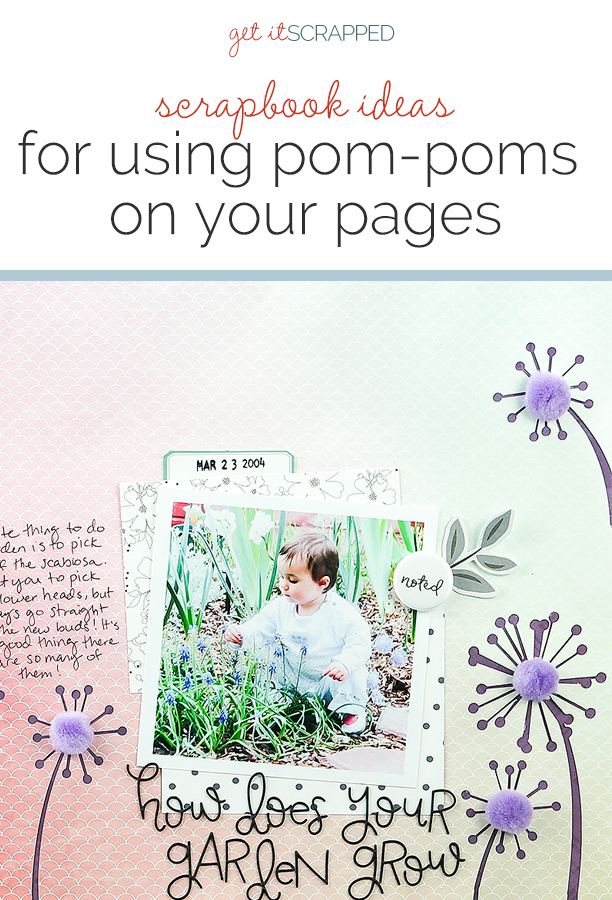
Iris Fox says, “This page documents a little quirky thing my daughter used to do when she was a toddler. In our old garden, she loved to take the buds off the purple flowers, in particular the scabiosa. We’ve told her this story and in fact last year bought her a scabiosa for her 14th birthday, but I had never written it down.”
“Back then I didn’t take as many photos as I do now, so this is the closest photo I could find for my story. Here she’s actually picking a different purple flower, but the scabiosa are right behind her. And they were the inspiration for how I used the pom poms. With lots of tight petals and little stamen sticking out between the petals, the flowers look like fuzzy balls.”
“I used a cut file of dandelions that has rounded ends. I duplicated and positioned them at the edges of my paper, so they would look grounded. I backed the cuts with dark purple paper and stuck lighter purple pom poms in the middle of each to add that fuzziness. They were easy to put on using glue dots.”
“My tip in using pom poms, in particular larger ones (these are 1/2” diameter), is that you can trim off one side to flatten them. You shouldn’t cut straight through the middle because that makes them fall apart, but you can trim off about a quarter of one side.”
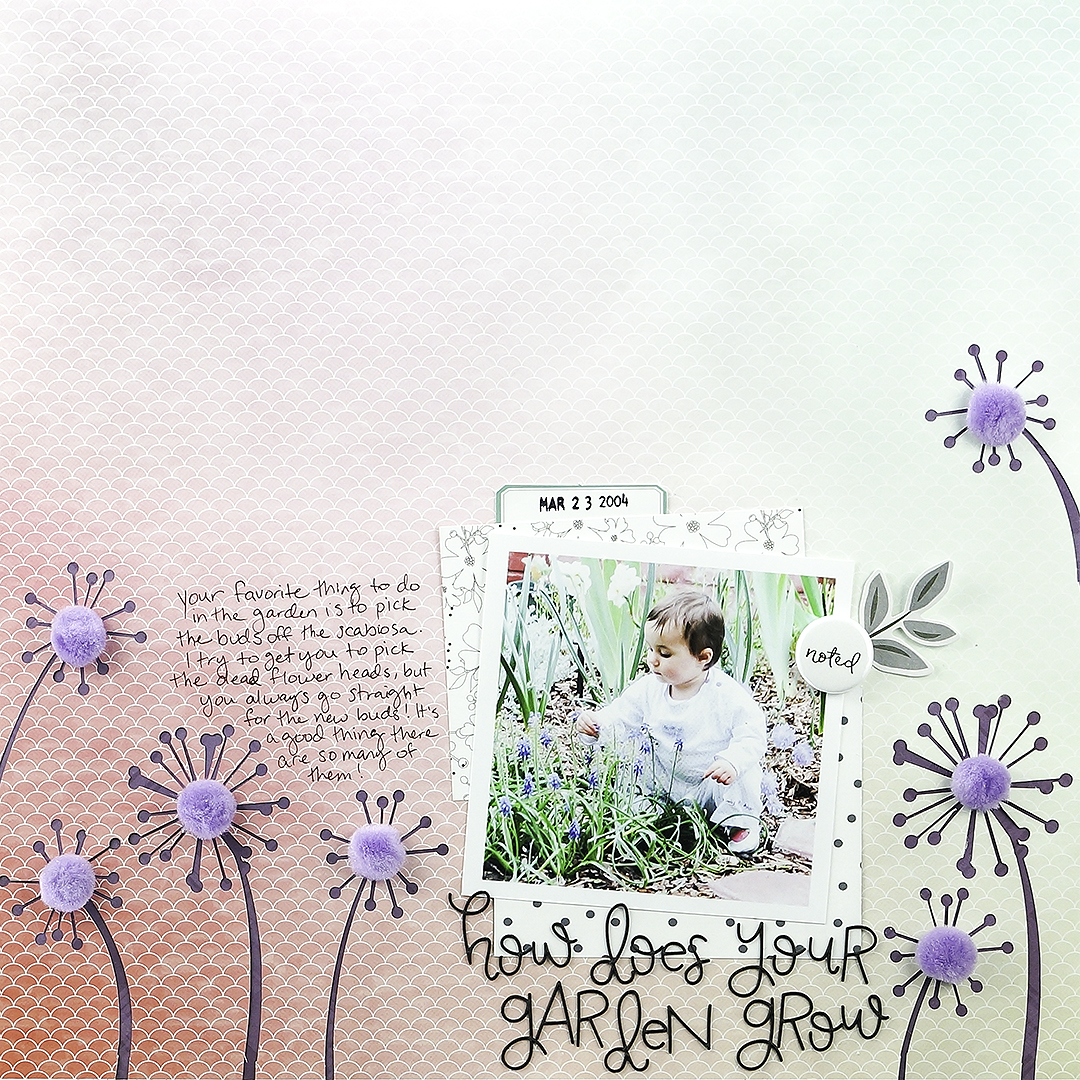
How does your garden grow by Iris Fox | Supplies: Pattern Paper: Pink Paislee, Felicity Jane, Michaels; Cut File: Silhouette Store; Pom Poms: Creatology (Michaels); Ephemera: Felicity Jane; Alphas: Freckled Fawn; Flair: Felicity Jane
Cara Vincens says, “Making birthday pages is a rare thing for me. And so are pages without any journalling! I had a lot of fun making this page that tells the story all by itself.”
“Until recently, I’ve thought of pompoms as sort of ‘granny-crafts.’ Maybe it’s because my grandmother and her friends were always using them in their crafts. Nowadays, I find them festive and happy. When I see those cheerful little pompoms on clothes, pillows or even on my friend’s wash bag, they make me smile. Especially when they are in such happy colors as these. Strung out like garlands or banners they really say celebration to me, so my little girl’s birthday was the perfect story.”
“It can be tough to get soft notions like pompoms to stick to paper. What you need is a bit of strong glue and patience. I laid the garlands down where I wanted them and then once I was happy, glued just an inch or so at a time to make sure I got the nice curve that I wanted. I love the way pompoms look layered with other pompoms, ribbons, lace and baker’s twine. you can’t go wrong with such a great mix of texture and color.”
“Along with the strung garlands of pompoms I’ve got individual ones sprinkled through out the page, just like any other embellishment.”
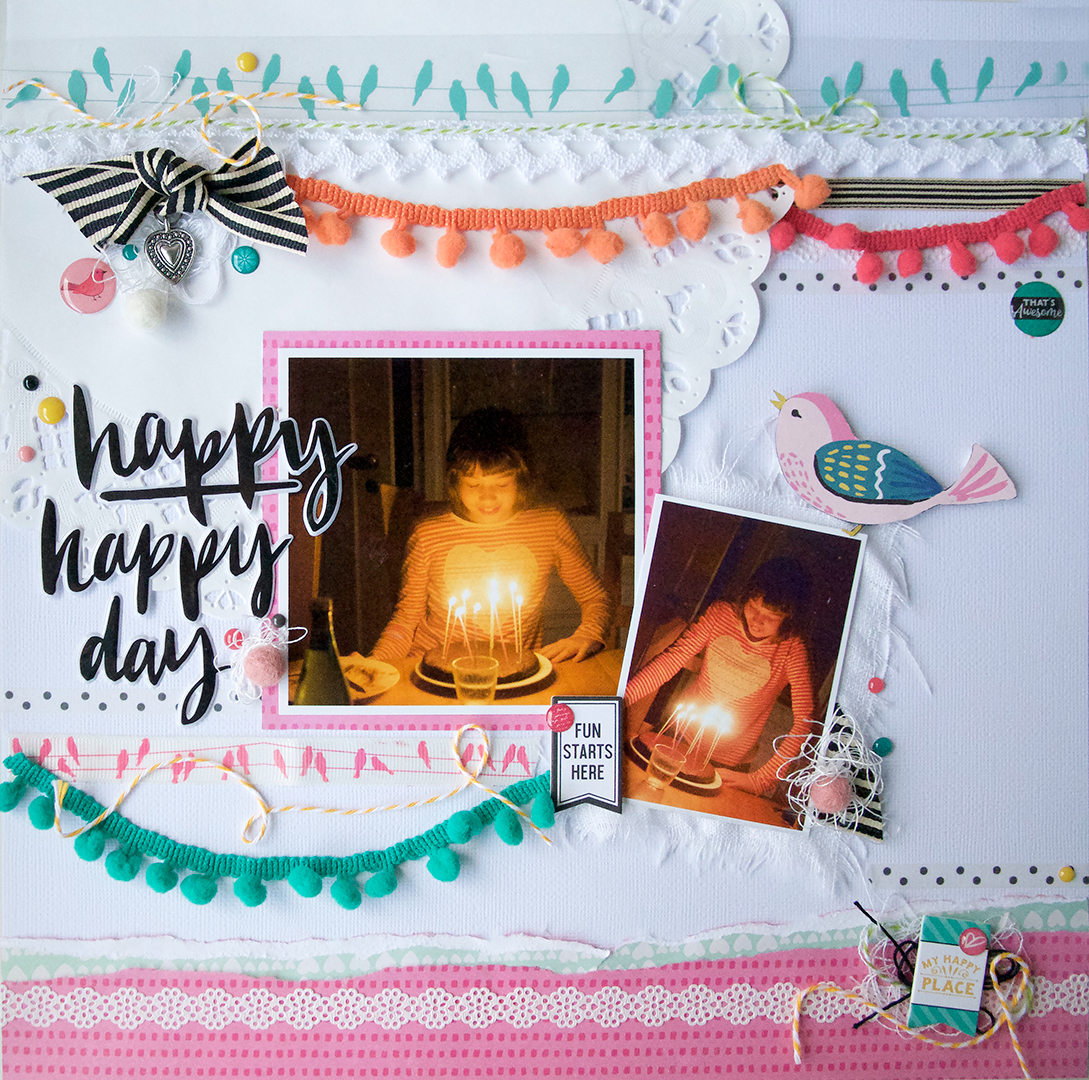
Happy Happy Day by Cara Vincens | Supplies: Pompoms – local craft shop; Patterned Papers – Crate Paper; Transparent overlay – Hambly Studios; Cardstock – Bazzill; Embellsihments – Vicki Boutin; Word Phrase Thickers – American Crafts; Washi – Lovely Tape; Ribbons – Webster’s Pages (birds) and local craft shop; Lace – local craft shop; Paper lace – Henzo; Baker’s Twine – DIY with TOGA; Embroidery Floss – DMC; Charm – local craft shop.
Kelly Prang says, “I wanted to share some helpful thoughts with my daughter as she is now in the midst of teenagehood. I found these sweet photos from years ago showing her happy, sparkling, and shining.”
“I felt the pom-poms would show a playful and happy tactile feel to the page. I think pompoms are a fun way to decorate pages- especially ones that can be used to hang up in your home. I plan to put this in my daughter’s closet so she can see it when she is getting dressed each morning and remember some happy lessons.”

Happiness by Kelly Prang | Supplies: American Crafts- Crate Paper- Good Vibes-papers and elements; Valorie Wibbens- Pom-Pom Happy- pom-poms; Pink Reptile Designs- Today- tassels: Memory Pockets Monthly- Charmed- number squares; Font- Gabriele Dark Ribbon
Hannah Lemieux says, “I took this picture of our friend’s dog who we were sitting at Christmas time. The dog had a really adorable Santa suit: it was perfect for the falling snow. He was great and let me get adorable shots of him sitting in the snow.”
“The pom poms I used were Christmas red, just like the dog’s suit and were absolutely perfect for the tone of the layout. The striking red against the white background mirrored the picture, which made it stand out well. I think the texture from the pom poms is really unique and a nice change from some of the other scrapbooking embellishments I normally turn too. I also tried making my own pompoms from embroidery thread in teal and pinks. They didn’t really turn out like pompoms but more like tassels. It was fun to experiment with materials to see if I could get a more commercial look on my own. I ended up using the tassels with the pompoms for a balance of color.”
“I added a strip of pompoms running down the right side of the layout layered in with patterned paper strips. I attached them with my sewing machine as I really felt like they needed to be firmly secured so they wouldn’t come off my page over time. The second area where I added the pompoms is on a tag in my paper layers behind my photo. I had to remove a couple poms from the row to get the ribbon part in the tag hole but this allowed me to tie the pom pom trim directly to the tag.”
“The pom poms are fun and dimensional, so I also added a few other elements that are raised a bit, so if you add it to a page protector they aren’t the only thing pressing against the top. This will allow more shadows on your layout and it won’t look smooshed.”
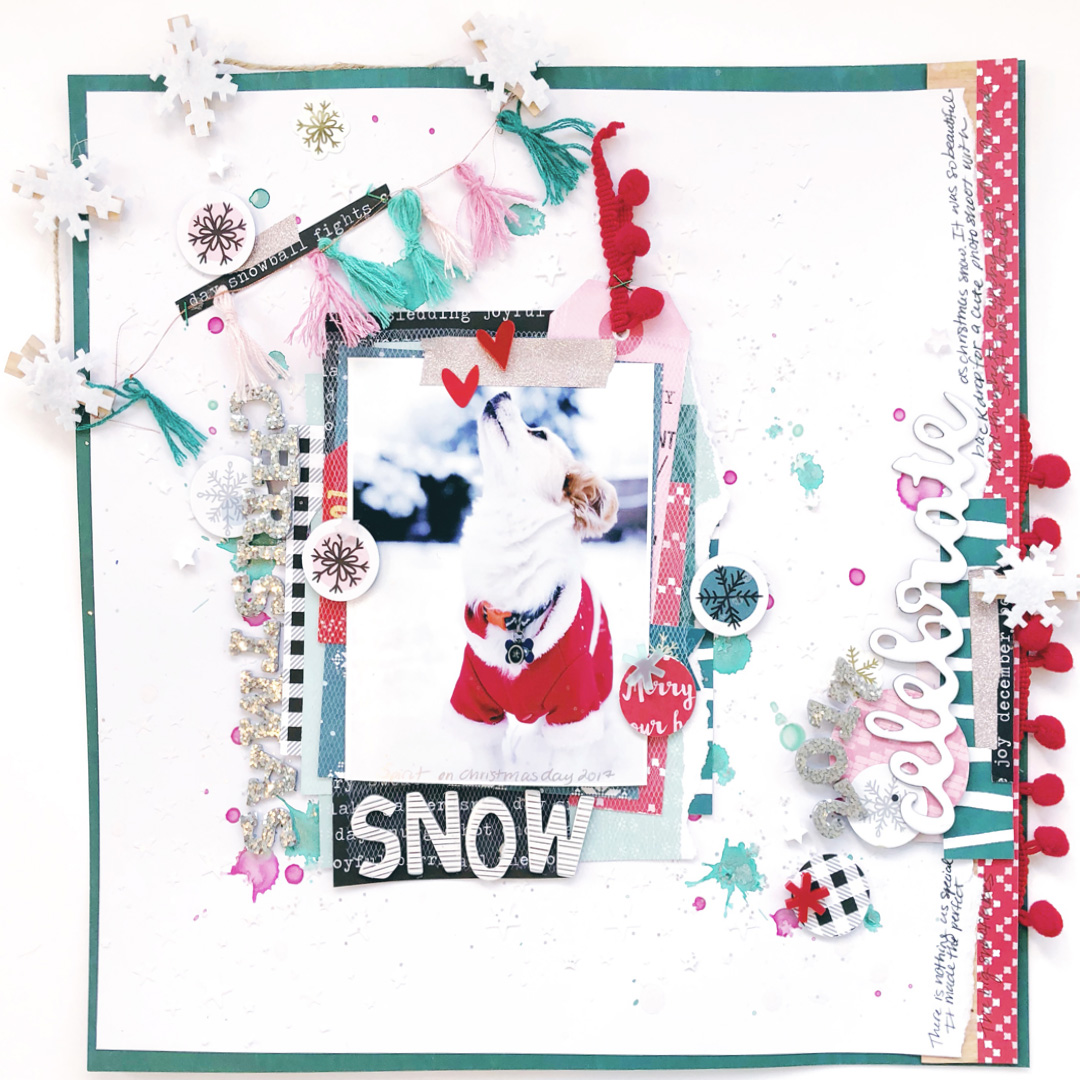
Snow by Hannah Lemieux | Supplies: White and light texture paste, Shimmerz Pasteez Puttin’ On the Glitz, Shimmerz Inklingz Holly Jolly, Shimmerz Creameez Berry Hot and Shimmerz Vibes Velveteen Green, Echo Park Star Stencil, Hiedi Swapp Sparkle glitter, Embroidery Thread in teals and pinks, Clique Kits exclusive Red Pompoms, Copper thread, Crate Paper Cool Vibes Cut apart Patterned Paper, American Crafts Dear Lizzy Stargazer Patterned Papers, American Crafts Sweater Weather Patterned Papers and Stickers, Silver glitter washi tape, tuile, Dear Lizzy Thickers Lemon Drop, Amy Tan Thickers Alyx, Color Cast acrylic shapes, dollar store snowflake garland, Heidi Swapp White Color Shine and American Crafts White Smooth Card stock.

