 This lesson from Dina Wakley first appeared as a part of the membership class “Canvas.” For that class and over 60 more, join us.
by Dina Wakley
Often before I even reach for patterned paper or photographs, I start a layout with acrylic paint or spray ink. Paint and ink are imperfect mediums…but they are oh, so fun! Paint and ink are great for a foundational layer because:
- they add a bright pop of color.
- they fill up that blank sheet of cardstock.
- they are a great base upon which to layer the the rest of your page elements.
Here are five fun ways to use paint and ink as your foundation layer:
1. Add a large rectangle or swath of color with acrylic paint.
Grab a sheet of cardstock, some acrylic paint, and a palette knife or paint brush. Use the knife or brush to add a good-sized rectangle of paint directly to your cardstock.
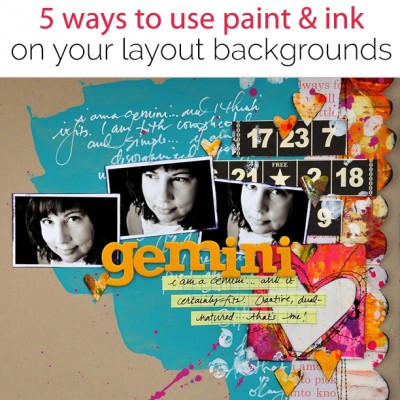
On “Mama,” I added a rectangle of orange paint. On “Gemini,” I added a large swath of turquoise paint that extends over a considerable portion of the page. When the paint dries, build your layout right on top! Add photographs, journaling, embellishments–anything goes. The paint will help draw the eye to the photos and gives them a grounding foundation.

2. Add stripes with ink.
Ranger’s Distress Stains come in a bottle with a handy felt-tipped top. Try grabbing a few colors and wiping them directly onto your cardstock. For this layout, I used several colors to create stripes. The stripes are loose and vibrant. I splashed some water onto the stripes and let it run down the cardstock–this created another interesting visual element. I added my photo and title right over the stripes. And I journaled right onto the stripes!

3. Create a custom, colorful watercolor background.
It’s easy to use your inks to create a custom, colorful background that looks like watercolor. For this layout, I first used a brush and gel medium to make large circles onto watercolor paper. When the gel was dry, I added ink and then went over the ink with a very wet paintbrush. The result is a fun, watercolor-inspired background.

4. Create a stenciled or masked background.
Use spray ink and a stencil or mask to add color to your cardstock. For the layout “Sweaty” I put leftover chipboard alphabet pieces onto my cardstock. I sprayed ink over the chipboard, and then removed it. When the ink was dry, I used a black pen to outline the alphabet shapes. I then built my layout right on top of my masked background. The background provides interest and pop.
I made “Love” in a similar way–I sprayed over leftover letters, then I used a wet paint brush to dissolve some of the spray and give it a watery look. I built my layout right on top of the inky foundation.
5. Use both ink and paint to create a foundation on patterned paper.
Remember you can combine both ink and paint for your foundations–and that you can use patterned paper rather than cardstock as the base. For “Sand Castle,” I first painted a swatch of blue paint on the patterned paper. Then I took an ink pad pressed it onto the paper underneath the paint. I repeated the pressing until I got a fun, unique pattern. I built my layout right over the paint and ink. The blues of the paint and ink help border the photographs and are a great foundation.
Try using a painted or inked foundation. I think you will love it!


