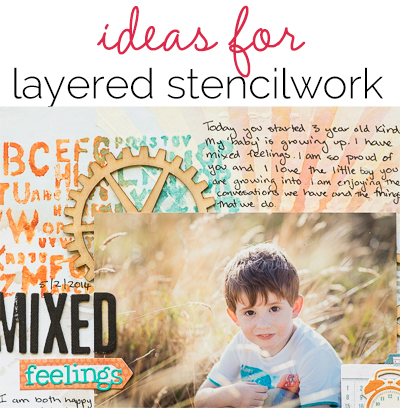
Adding layered stencilwork to your scrapbook layouts and art journaling pages is a great way to make them original–one of a kind. You’ve got motif, medium, dimension, texture, color, direction and more to work with.
create a foundation of layered stencilwork
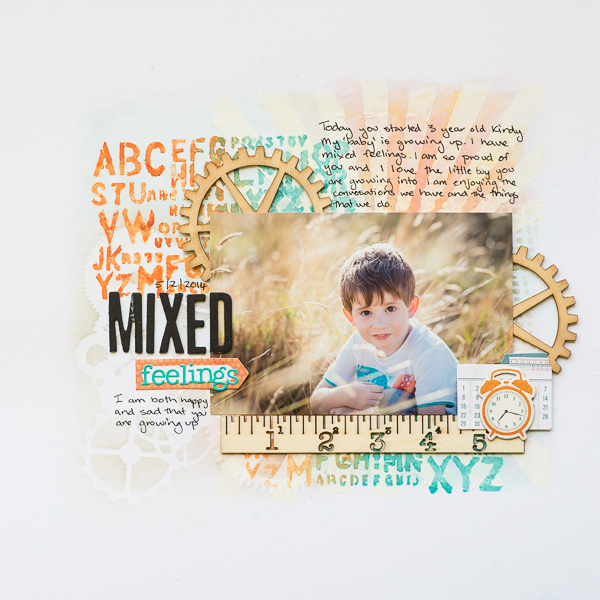
Mixed Feelings by Kristy T | Supplies: Chipboard: Tattered Angels; Alphas: Basic Grey, American Crafts; Stencils: Tim Holtz, Dylusions, The Crafters Workshop; Wooden Flourishes: Kaisercraft; Wooden Shapes; Prima; Chipboard Sticker: Simple Stories; Stickers: Simple Stories; Paints: Twinkling H2Os, Adirondack, Gesso; Distress Ink: Tim Holtz/Ranger, CD/DVD Marker: Pilot
Kristy T says, “I explore the mixed feelings about my youngest child growing up and heading off to Kindergarten on this page.”
“When visualizing a page with stencils, I think of the stenciled layering similarly to patterned paper layering. I used four different stencils and a combination of gesso, acrylic paint, twinkling H2Os and distress ink with the stencils to create a ‘layered block’ for my photograph and other elements to rest upon here. I used only two main colors in different shades along with neutrals grey, woodgrain, black and white. “
“My color inspiration came from the photograph, and it’s a mix of my and my son’s favorite colors. By using the cog stencil I was able to create repetition of circular elements with the embellishments and a visual triangle. I also used repetition of the alphabet stencil to frame my photograph. When layering stencils it’s important for each layer to be dry before adding another. Also keep in mind that water-based products may interact when they are re-wet with other water-based products. This is one reason I like using a mix of mediums. Another tip for those of you who don’t like to get messy): Sponging inks through stencils can give a soft look and you have more control over the color than when using spray inks.”
layer stenciled motifs that tell a visual story
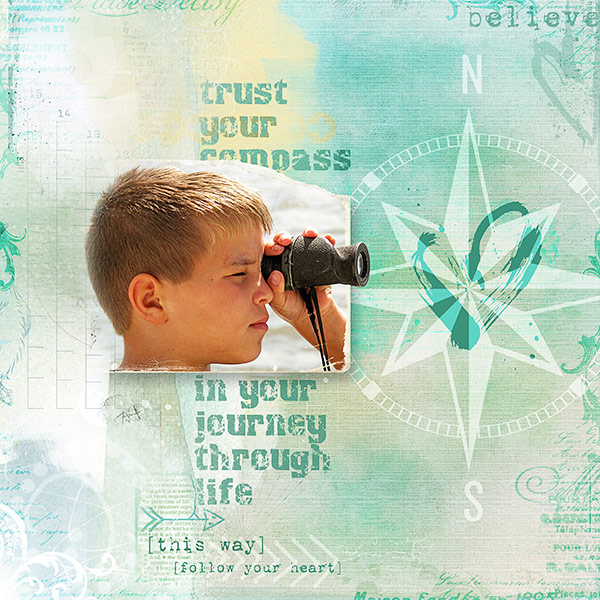
Trust Your Compass by Deborah Wagner. Supplies: Jana Morton – Heart Strokes 1, Heart Strokes 1 Overlays; Anna Aspnes – Art Play Palette Scholarly, Art Play Palette Seafoam, Art Play Find My Way, Art Play Heart; One Little Bird – Vagabond; Erica Zwart – Oceanview; Katie Pertiet – Letter Box Overlays, Winter Artistry Transfers, Charted Brushes No.1, Simple Classic Travel Overlays, Grungy Ledger Grids; Ali Edwards – Hand Drawn Arrows
Deborah Wagner says, “This is a photo of my son shortly after we adopted him. Orphanage culture is much different than family culture, and, at first, he had a difficult time finding his way. The page represents his struggle.”
“The left side of the page is layered with many brushes, transfers, and overlays. They partially cover the photo as if he is trying to make his way free. The opposite side of the page only has 2 layered stencils, the heart and the compass. He is making his way by believing in himself and following his heart. To keep the eye on the page, I also layered overlays, brushes and word art on the right edge.”
repeat a stenciled motif in different sizes and colors
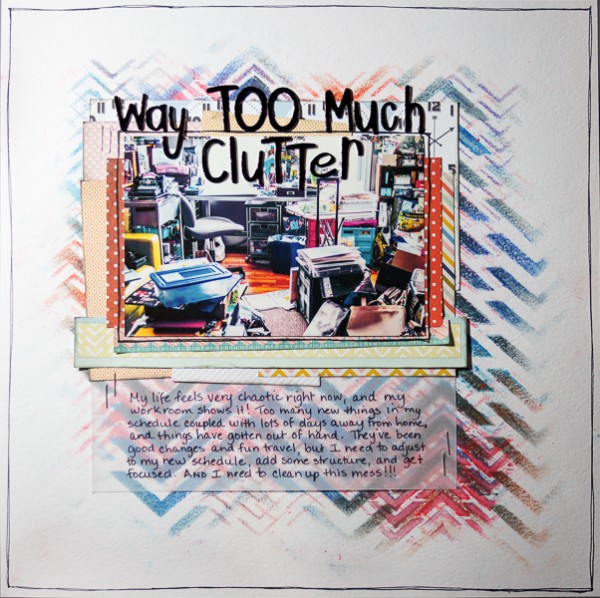
Way Too Much Clutter… by Marcia Fortunato | Supplies: Cardstock: Bazzill Basics; Patterned Papers: Studio Calico, Basic Grey, ki for Hampton Art, My Mind’s Eye; Gelatos: Faber-Castell; Stencils: Balzer Designs/The Crafter’s Workshop; Letters: American Crafts Thickers; Pen: Staedtler, EK Success; Other: staples (office supply).
Marcia Fortunato says, “This layout is about my frustration with the clutter in my workroom and my schedule.”
“I made the background beginning with a large chevron stencil by Balzer Designs and layering a smaller version of the stencil over the top. Gelatos were my medium, and I started with several shades of blue over parts of the large stencil, then added bits of black and orange. I then layered pink, red, and a bit of orange gelatos over the top using the smaller stencil.”
“I like using gelatos with stencils because I have more control over where I place the color than with wetter mediums such as spray mists, and they are less likely to bleed under the stencil. I colored onto the stencil and then rubbed the color onto the paper using my finger and a slightly damp paper towel or soft make-up sponge. I had to be careful when using the black gelato since it can easily overpower the other colors and make them muddy.”
cut your own stencils in a variety of motifs
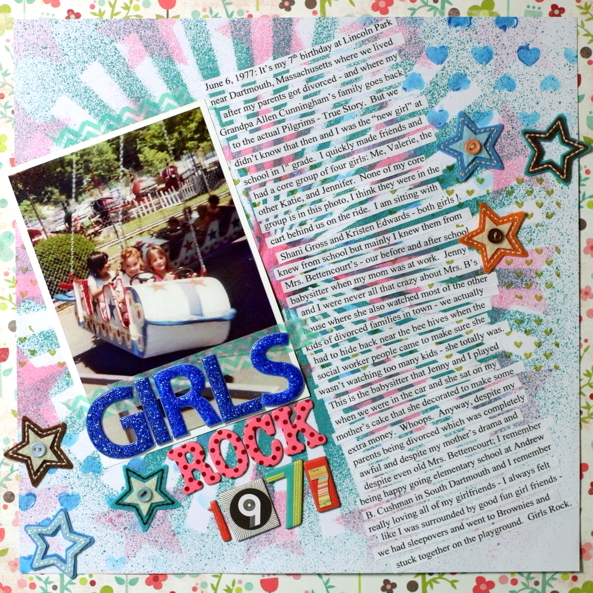
Girls Rock 1977 by Katie Scott | Supplies: My Mind’s Eye patterned paper; Maya Road and Heidi Swapp mists; American Crafts Thickers letter stickers; Fancy Pants chipboard numbers; Making Memories felt embellishments; Recollections heart background stamp and dye ink pad; Silhouette Cameo die cutter; white cardstock.
Katie Scott says, “Girls Rock is about my 7th Birthday and my memories of how my friendships with my girlfriends helped me get through a rough time in my childhood.”
“I used my Silhouette Cameo electronic cutting machine to cut three background stencils: a sunburst, a hearts pattern, and a stars stars pattern. I also used the leftover of a cut apart sheet to create a stencil of circles. I used mists, gelatos, and stamping ink to achieve a mixed media look. I tried to stay with cool colors for layering but did add one pop of warm color (the stars). Using the sunburst first made it easy to layer the stencils – it worked as my anchor for the rest of the elements.”
use digital brushes and blending modes for a layered stencilwork look
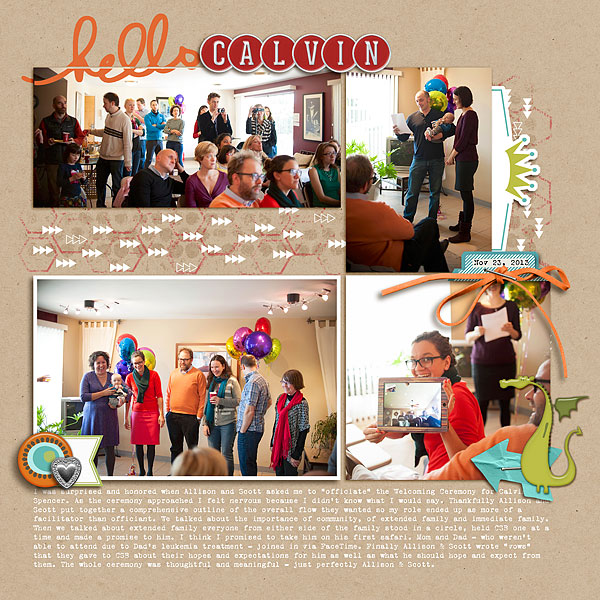
Hello Calvin by Heather Awsumb | Supplies: Evergreen, Daily Bulletin by One Little Bird; Spot Dots Brushes No 4, Almost There Brushes, Sweet Rose Element Pack, Dragon Trainer Element Pack, Banner Labels No 1, Little Layette Element Pack, Cardstock Tabs No 2, Gator Crossing Element Pack, Jingle Kit (alpha), Hello Story Brushes and Stamps by Ali Edwards
Heather Awsumb says, “This page tells the story of the Welcoming Ceremony for my nephew, and of how my sister and her husband asked me to officiate.”
“I layered three different digital brushes using a variety of blending modes in Photoshop Elements. One of my favorite blending modes – especially on kraft paper – is Soft Light because it gives the brush a subtle tone-on-tone look almost like a VersaMark ink pad. On this page I used Soft Light as the base for layering the other brushes.”
stencil a bold representational motif over subtle abstract background
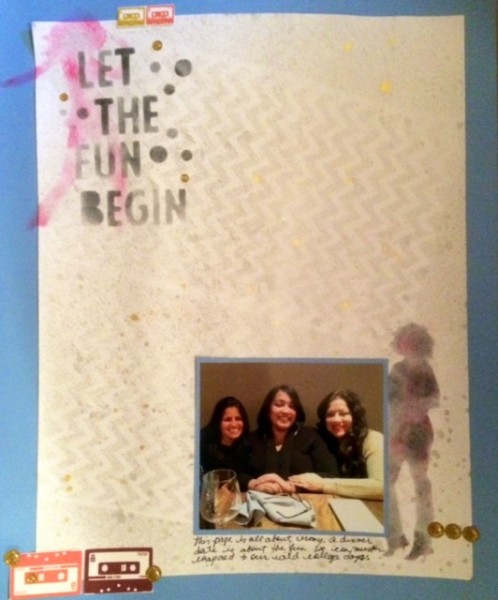
Let the Fun Begin by Rosann Santos-Elliott | Supplies: Mister Huey’s Chevron Mask; TCW 6×6 Template of women silhouettes
Rosann Santos-Elliott says, “The stenciled silhouettes of women here represent a more exciting time in the past for me and my college friends. Today all we can muster is an evening out at a nice restaurant from 7 to 10 pm. The silhouettes are bold, and the chevron background is more subtle so the stenciled words can stand out.”
stencil bold representational motifs over a graphic background
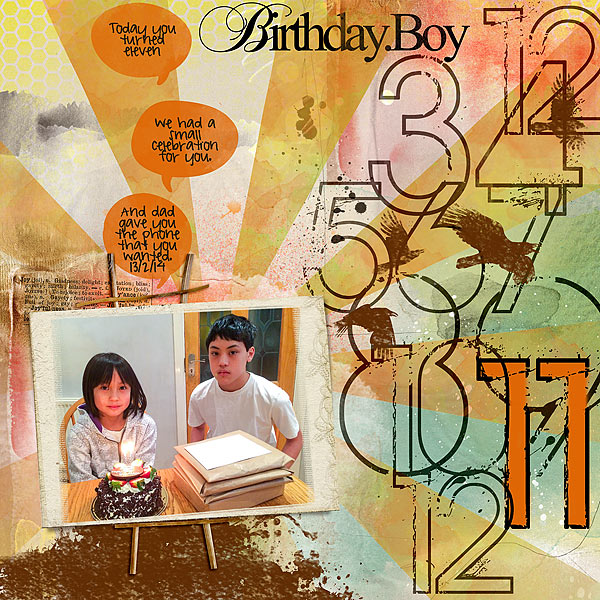
Birthday Boy by Audrey Tan | Supplies: Anna Aspnes: Birthday Wordart No1, Antiquated Frames No2, ArtPlay Palette Joyful, Numbered Overlays No2; Splendid Fiins: Knockout Starburst, Knockout Emerging Birds, Knockout Blah Blah; Mommyish & JM Designs: Sweet Side Of Life; Font: Pea Kelly Jelly
Audrey Tan says, “This page is about my son’s turning 11. I started with a starburst stencil, misting it onto a watercoloured background paper. I added stenciled birds and numbers. Even the journaling spots–speech bubbles–are stenciled.”
keep each stencil in place as you stencil subsequent layers
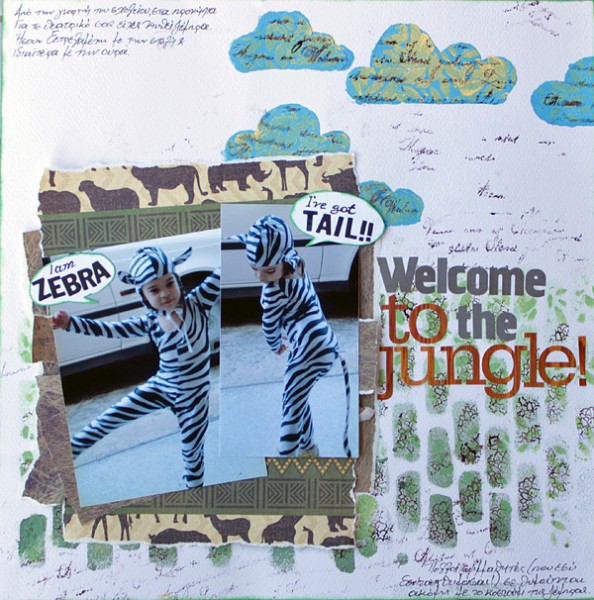
Welcome to the Jungle by Kiki Kougioumtzi | Supplies: Cardstock:Canson; Patterned paper: DCWV; Stencils: Prima, handmade; Alphas: Basic Grey, Studio Calico; Stamps: Viva Decor, Tattered Angels; Other: Acrylic paint and ink Ranger,Tattered Angel Glimmer mist.
Kiki Kougioumtzi says, “This is a layout about my daughter posing with her zebra costume for a school play.”
“I made my own background paper with plain white cardstock, stencils,paints and stamps. I used one bought stencil (foliage) and I made my own from mylar sheets (clouds and bricks). The stenciling was done in three steps. First step was acrylic paint for the clouds and glimmer mist for the bricks. For this first layer I choose stencils with lot of open space. When the first layer dried, I places the same stencils to the same positions and adhered everything with washi tape to my working surface so that nothing moves. Then I placed another stencil on top (foliage) with less open area and painted with acrylic paint. Without removing the base stancil, I let everything dry and then stamped with permanent dye ink.When using paint is better to use a sponge and dab the surface (versus using a brush and making brush strokes). This way you get more crisp images.”
with layered stenciling be sure to choose colors that layer (and mix) well
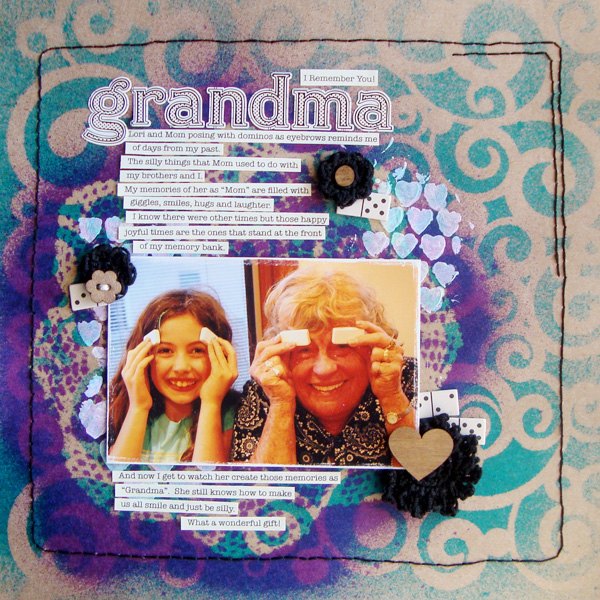
Grandma I Remember You by Michelle Houghton | Supplies: cardstock; Kraft, stencils; antique doily, The Crafter’s Workshop and Ranger, letters and dominos; Jenni Bowlin, wood veneer; Crate Paper, ink; Dylusions, gesso; Golden, flowers; crocheted by friend Dawn, twine; American Crafts
Michelle Houghton says, “My mom and daughter are playing with dominoes in the photo, and this reminds me of how joyful my mom was with us as kids growing up.”
“I layered three stencils as a base for my image. I used two store-bought stencils and an antique doily as my third stencil. On the doily and larger stencil I used spray mists to create bold bright colors. I liked the swirls in the large stencil that mimic the pattern in my Mom’s shirt and the curly hair they both have. The doily to me is a very Grandmotherly symbol. I added hearts because this page is all about the love my Mom has for me and my girls.”
“When layering stencils you might want to take a quick practice shot on a scratch sheet. I used two colors I knew would work together. They are both cool colors and layer well. I also knew that the gesso would actually activate those colors and that the mists would bleed up through and show.”

