
 Each month Michelle Houghton is taking a look at a medium and one or more ways to add it to your layouts. Other artists from the Creative Team at Get It Scrapped will add inspiration to fuel your imagination and get you scrapping.
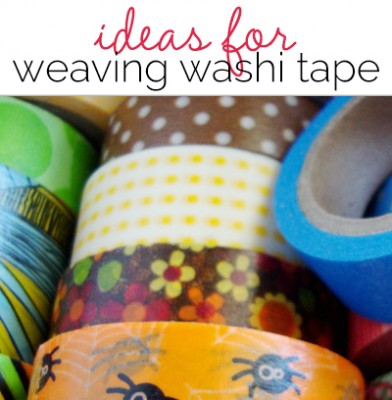
Do you have one or two rolls of Washi tape in your stash? Washi tape is on crafting tables all over the world now, and there are many ways to use it.
You can attach elements to your page with Washi tape, add it as a decorative element in strips, or cover an area then die cut or punch it to create a positive or negative shape with Washi. Most of these techniques fairly self explanatory, so let’s look at a technique that takes a little more know how and patience. We are going to weave with Washi Tape. I am going to show you a very small weaving and a large one just to get the ideas flowing.
small weaving
Step #1 – A smaller weaving will stick directly to the surface where you are working so grab your paper and the tape(s) you are using. We are going to use at the most 6 strips of Washi tape each 3 to 4 inches long. I am going to use 2 different tapes so you can see what I am doing more easily.

Step #2 – Attach just the end of 3 of your strips where you want your weaving to go. We want these 3 strips to run parallel to each other with very small gaps in between the strips.

Step #3 – Using your 4th strip stick one end down so it will run perpendicular to your 3 starting strips then run this strip over the fist strip under the second and over the third, attaching to the paper as you go.

Step #4 – Attach one end of your 5th strip then run it under, over, and under the original 3 strips.

Step #5 – Add your 6th strip running it over, under and over like strip #4.

You can add elements right on top of this, cut it out, punch out of it, treat it like you would a patterned paper or an embellishment that is attached to your page.

large weaving
To get any bigger then a 3 x 3 strip weaving gets tricky, the tape sticks to everything, and although Washi comes up easily it can start to tear your paper and itself. So to make a larger Washi tape weaving I would recommend starting differently.
Step #1 – Chose your paper and Wahsi tape(s), I will use two again so you can see what I am doing more easily. Chose which tape you are going to start with and starting with a longer strip about 10 to 12 inches fold the tape over on itself, sticky sides together. Leave about 1 inch hanging out so that you can stick it down to your paper.

Step #2 – Repeat this folding over process with about 6 to 8 strips of Washi tape. Attach each one side by side onto your paper so the non-sticky strips run parallel to each other with very small gaps in between each strip.

Step – #3 – Now tear off a strip from the Washi that you are going to run perpendicular to the first strips. This strip should be about 5 to 6 inches long. This strip is going to remain sticky so carefully attach the end to the paper right next to other strips where they are attached to the page and so this new sticky strip will run perpendicular to the others.
Step #4 – Run this strip over and under your non-sticky strips attaching it down to the paper as you go.

Step #5 – Repeat this process for 5 to 7 more strips, each time starting in the reverse, meaning, if the first sticky strip starts by going over then the next sticky strip will start by going under.

You now have a larger block of weaving. It is stuck down to your paper so you can cut it apart or use die cuts or punches on it without the weaving falling apart.

“Washi Weaving” + Your Scrapbook Pages
Now let’s have a look at how you might put this technique to use in your scrapbook pages.
In my own page “My American Girls” I’ve layered my large washi-woven mat behind an over-sized star that I cut from my canvas.

My American Girls by Michelle Houghton | Supplies: cardstock; American Crafts, Washi tape; Queen and Co., gold dots, sticker letters, Washi and bracket; SEI, mist; Heidi Swapp, ink; Uniball, small sticker letters; unknown
Using the “small weaving” technique described above, Amy Kingsford created a few small washi-woven patches, directly on her hybrid watercolor canvas. Amy says, ” I love the texture and pattern that this technique brought to my page and it was a fun , yet simple way to add to its mixed media feel.”

We Call Him Jack Frost by Amy Kingsford | Supplies: Cardstock: Recollections; Patterned Paper: Studio Calico; Acrylic Stars: Studio Calico; Alphas: Thickers by American Crafts; Flower: Dear Lizzy by American Crafts; Washi Tape: Jenni Bowlin Studio and Recollections; Digital Watercolor Background: Michelle Godin Designs.
Here Christy Strickler has added washi tape to leftover strips of cardstock. Then she cut slits in the paper and wove the washi strips through the slits.

You and Me: Sneakin’ Snacks by Christy Strickler |Supplies Patterned Paper, Vellum Die Cuts,Flair: Studio Calico; Jewels: Hero Arts; Tape: Studio Calico, Freckled Fawn; Chipboard:Amy Tangerine; Bow Tie: Freckled Fawn; Other: Label Maker
Now it’s you turn to try Washi tape weaving and add it to your art work! If you give this technique a try add it to our galleries and let me know here, I would love to see your creations. [mixedmedia]
