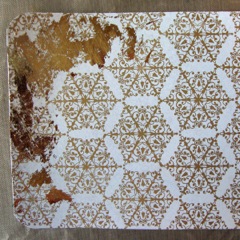
Since it is December and we are all surrounded by holiday colors and decorations I thought it was appropriate to look at a technique that brings one of the colors of the season right onto your layouts: gold. There are many ways these days to add gold onto your layouts with paint, mists, pens and pre-made elements. One lesser used technique is gold foil or leaf. Here are easy steps to add brilliant gold touches to your work.
What you’ll need
You will need gold leaf or gold foil. Both come in a variety of metallic colors I am going to use gold for both. I am using a Martha Stewart brand foil and Mona Lisa brand of leaf. The gold leaf that I found by Mona Lisa is in a complete set with adhesive, sealer, antiquing and red base.
You will need adhesive. I did some experimenting with the adhesives recommended for both products and a few that I had on hand as well. The adhesive that came with my gold leaf kit worked for both the foil and leaf. The Martha Stewart Transfer adhesive recommended for the foil also worked with both products. I tried a Quickie Glue Pen by Sakura and it worked very well with both the foil and leaf and allowed for small doodled lines. I experimented with two Tombo adhesives, both the Aqua and Multi use ones. The Aqua did not work at all. The Multi use one worked great with both and has a small and broad tip giving you more control. Lastly I tried my Scotch crafting glue and it did not work at all. The key that you are looking for is a glue that dries slightly tacky.
Lastly it is helpful to have an instrument for burnishing like a bone folder or craft stick for the foil and a big soft brush like a blush brush and a small paint or foam brush for the leaf. Many leafing instructions will also say you need cotton gloves but I am afraid I am a hands on kind of girl so I just got messy.
Working With Foil
Step #1 – Use your adhesive to coat an area of your work surface. I am using the Quickie glue pen and creating small doodles in the corner of my photo.
Step #2 – Patiently let it dry. This is the hardest step. Most of the adhesives need a good chunk of drying time. The pen is the fastest, but it still must be dry before you move onto the next step or it will not work. I would recommend doing several areas with glue and then getting another small project done so you do not rush the process.
Step #3 – Lay the foil on top of the area with glue. You want to put the silver side down this is actually the back side of the sheet.
Step #4 – Using flat tool burnish the area where the glue is located.
Step #5 – Slowly peel up the foil. If you have timed it well the gold will adhere to the glue leaving a bright gold pattern behind.
Here is my photo with foil, I used the Quickie pen on this one.
And here is another foil example; this time on a broader area with the Martha Stewart Transfer adhesive.
Working with Gold Leaf
Step #1 – You start in a very similar fashion on leaf products. Add your adhesives to your surface, I am starting with the one that came in my set and then set it aside to dry. Next you lay the gold leaf on top of the glued area. The gold leaf is often packaged with 3 layers; a thin plastic sheet, the gold leaf and tissue paper. When you lift up the first plastic the gold leaf adheres to it with static so they come together making it easier to handle. Lay the gold side down onto the adhesive with the plastic still on top.
Step #2 – Gently rub on top of the plastic over the gold leaf.
Step #3 – Carefully pull the plastic sheet away from the gold leaf.
Step #4 – Use a big soft brush to brush away the excess gold leaf. This can create a flaky mess on your work surface so you might want to work on an area easy to wipe off.
Step #5 – Here are two cards with gold leaf I used the included adhesive and also the Tombo adhesive. The second one that I used the Tombo on looks more textured because I used the crumbled scraps and flakes to adhere to the glue. To finish both it is helpful to paint on a sealer. My set came with one but the product recommended a few other options if you do not buy the set.
And here is all my gold tucked into my layout.

Shine on Lori by Michelle Houghton | Supplies: paper, letters, dots, rhinestones, Washi tape and die cuts; SEI, snowflake sequins; Jenni Bowlin, gold foil; Martha Stewart, gold leaf; Mona Lisa, adhesives; Tombo, Martha Stewart, Sakura and Mona Lisa
Now see how a few of the GIS Creative Team members have used gold foil and leafing in their own pages.
Kiki Kougioumtzi chose to use a different foil method. She used an iron-on made to be used on fabric. I love how she transferred the technique to paper crafting. Here is her layout and some tips she would recommend for the look she achieved;

Dance by Kiki Kougioumtzi| Supplies:Cardstock:Canson;Alphas:American Crafts; Rub-ons:Fancy Pants;Flower:Prima;Other:Tattered Angels glimmer mist;Metallic iron-on transfer for cotton fabrics.
Kiki’s steps: The iron-on is the big butterfly and the two swirls. To transfer them the manufacturer suggests iron with no steam and ironing over a tissue paper. BUT because I’ve put them partially on the photo and I didn’t want to damage it here’s what I did. I used a soldering iron with a small plate attached which has a smaller heating plate, so that I can control better where the heat goes. I first marked where I wanted my photo to go. Then I transferred the big butterfly directly onto the paper. My craft iron has 2 settings: high and low. I used the high. Then I let them cool a bit (the iron and the transfer) and placed my photo to position. With the low setting now I transferred the rest of the designs. The key to don’t damaging the photo (because it has a kind of coating that can melt with the heat) is to keep the iron moving around and don’t stay long in one place. It’s a step that needs a little patience due to the photo’s surface. Then I let everything cool before adding anything else. They resist water based colors (I believe acrylic washes too) and keep their shine.
Marie-Pierre Capistran says, “This is a page about my daughter’s first smiles. I wanted to have some touches of gold and the foil technique was very convenient to make the shapes I wanted and to add just little touches here and there.”
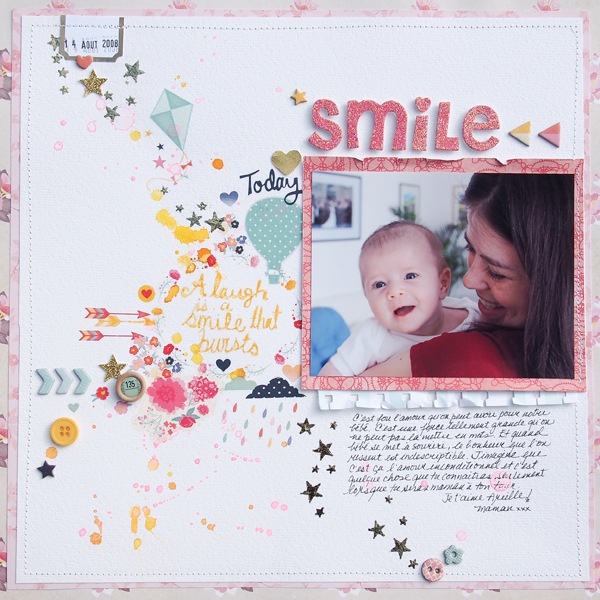
Smile by Marie-Pierre Capistran | Suplies: Carstock: Bazzill, Recollection; Patterned Paper: Dear Lizzy American Crafts; Rub-ons: Dear Lizzy Amercian Crafts; Buttons: Dear Lizzy American Crafts; Chipboard elements: Dear Lizzy American Crafts, My Minds Eye; Small tag: Studio Calico; Bouton: My Minds Eye; Letter stickers: MAMBI; Paint splatter: Gelatos from Faber Castell; Foil: Stix2; Punches: Kiskars, Stampin’UP!; Other: Copics markers, date roller stamp.
Marie’s steps: To adhere the foil I first traced some stars, using a stencil, and then I covered my stars with my Sakura Pinpoint roller Quickie Glue, making sure I passed on the lines I had drawn and even a little over them so they would not show. Make sure the glue is almost dry before adhering the foil, otherwise it won’t stick and it will smear the glue, leaving you with a spot of glue instead of a star.
Christy Strickler says, “After my son opened his gifts on Christmas Eve, our cats curled up under the tree to nap as though they were waiting for Santa.”
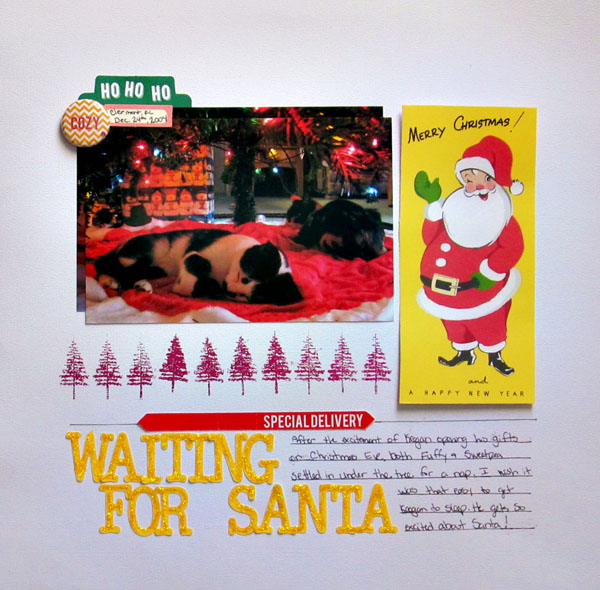
Waiting for Santa by Christy Strickler Supplies| Cardstock: Colorbok; Patterned Paper,Brads: October Afternoon; Letters: My Little Shoebox; Glitter Glue: Ranger; Foil: Making Memories; Adhesive Shapes: Colorbox;Die Cuts: Chic Tags; Flair: BlueBirdChic.com; Jewel: Hero Arts
Christy’s steps: I used a set of glue shapes designed for foil to create the line of Christmas trees. It was simple to lay the foil over them and add the metallic finish. It’s like using a metallic rub-on.
[mixedmedia]

 by
by 


