 Give your scrapbook layouts personalized, must-touch appeal by adding handmade touches from other crafts.
See how our team has used inspiration and techniques from quilting, crochet, embroidery, paper-cutting and jewelry making to their scrapbook pages, and be sure to see their tips for your layouts.
embroidery
Sian Fair says, “When I was a teenager I had a red duffel coat. When my daughter was little I bought her a red woolen coat. Thus, when I saw a kit to make a red felt Christmas decoration that was a coat, I just had to stitch it.
“I chose a paper with a grid pattern so that I could cross stitch a Christmas tree directly onto the page. I like to stitch on layouts to add texture. Here I think it draws attention to the “handcrafted” subject of my page.
Sian’s tips
- Use a grid print patterned paper as a base for adding cross-stitched embroidery. Be aware that the size of the grid on your page will affect the look of your finished motif: big squares will give you a loose look and very small squares a more traditional tighter feel.
- Start small – you don’t even have to complete an entire motif, you can stitch round other pieces on your page as I did here.
- Lightly pencil in the crosses before you start, and make the holes a few at a time so you don’t get confused.
- If something goes wrong, layer an embellishment over that bit!
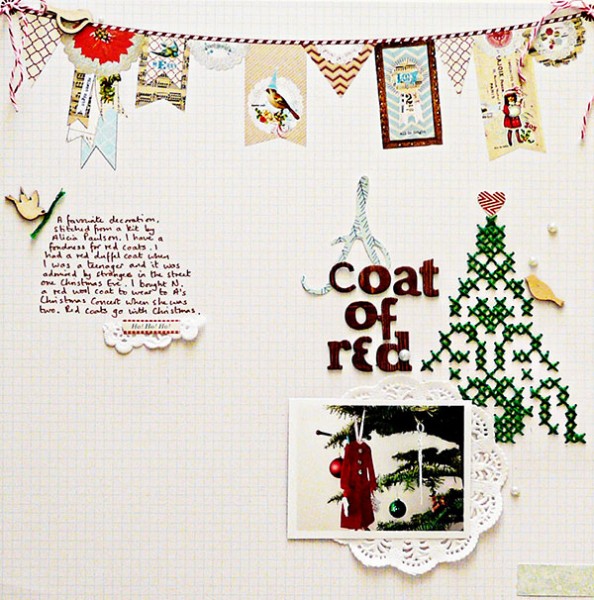
A Coat of Red by Sian Fair/ Supplies: Patterned Paper: Crate Paper, Alphas: American Crafts, Wood Veneers: Studio Calico,, Floss and twine from stash
crochet
Michelle Houghton says, “There are not many laps better than Grandpa Charlie’s, and my girls take advantage when we have time with him to get in lots of snuggles.”
“I used a full panel of crochet work as a base for my layout. I wanted the layout to be warm and cuddly, so making a mini blanket to build from seemed like a fun idea. It adds bulk, but I love the ombre in the yarn and the softness and texture of it.”
Michelle’s tips:
- Don’t be afraid to add hand-made touches to your layouts, even if you are not an expert. This is not a very good example of crochet work, but it still adds a homey and handmade feel and make the work more personal.
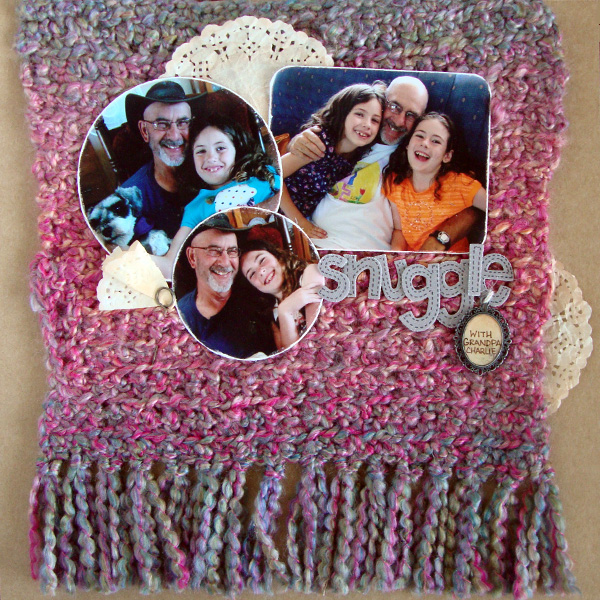
Snuggle by Michelle Houghton | Supplies: cardstock; Kraft, ink; Copic, doilies; Bo Bunny, chipboard letters and twine; American Crafts, stick pin; Tim Holtz, metal charm, yarn; unknown
quilting and jewelry making
Kristy T says, “This layout shows this photo of my daughter at Christmas time and will sit next to a divided page protector layout with more Christmas photos and journaling.”
“I was inspired by quilting and jewelry making. I created a white quilted background by stitching a variety of embossed white cardstock pieces(I embossed them with embossing folders). This work is easier if you stitch around each panel separately before adhering to the 12″ x 12″ canvas.”
“I also took inspiration from the metal elements and wire of jewelery making. I manipulated colored wires to make part of my title, and the Christmas tree and wire bow embellishments.”
Kristy’s tips:
- emboss paper blocks for tone-on-tone layering
- stitch around blocks before adhering
- shape colored wire into script title
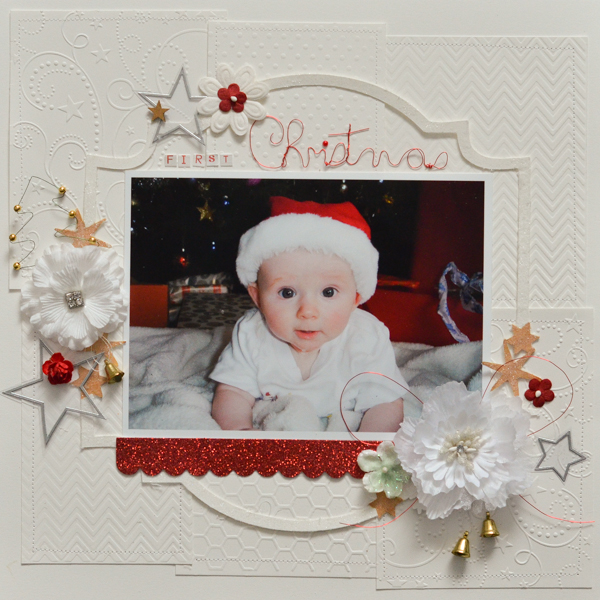
First Christmas by Kristy T | Supplies: Card: Artee; Flowers: Prima, Doodlebug; Wire: Unknown; Bells: Unknown; Alphas: Carolee’s Adorn-It; Glitter: Ranger; Paint: Ranger; Embossing Folders: Sizzix; Wood Veneer: Studio Calico; Border Strip: Teresa Collins; Cricut Cartridge: Lacey Labels; Beads: Unknown.
embroidery
Stefanie Semple says, “We went to visit a friend and my daughter took to their new puppy. Her enjoyment of the puppy was contagious.”
“Before I discovered scrapbooking, I sewed, dis cross stitching work and candle-wicking. I often add digital stitching to my layouts to add texture and dimension without having to worry about piercing my paper and breaking sewing machine needles. I love the sense of movement and dimension stringy elements add to my pages. The embroidered flowers add feminine charm and support the garden setting of the photos.”
Stefanie’s tips:
- Use embroidered flowers to break the borders of a grid/blocked design
- support a garden setting with embroidered flowers
- add movement and dimension with string and ties
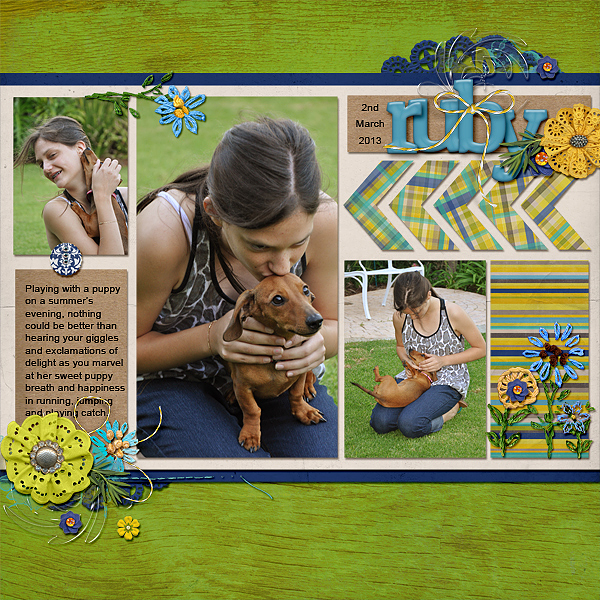
Ruby by Stefanie Semple | Supplies: Clever Monkey Graphics: Buttercups and Bubbles (kit) and Embroidery; Scrappy Creations by Melanie : Lined Up template.
quilting and embroidery
Kiki Kougiomtzi says, “This page has dual meaning: my daughter learning to stitch and the new badges she earned at her scout camp.”
“I used the hexagon shape commonly used in quilting to cut my patterned papers and build my background, and I embroidered for the word “new” in the title.”
“To do the embroidery work: I first traced the letters lightly with a pencil using chipboard letters as my pattern. I poked holes with a needle around the trace line and reinforced the back side of the paper with tape to prevent it from tearing. I wanted my embroidered letters to look like a beginner’s work, so my stitches are random and not in order. I didn’t use any knots at the end, but to prevent the thread from fraying I taped it on the back.”
Kiki’s tips for thick embroidered title:
- trace chipboard letters
- reinforce cardstock with tape on back side
- stitch randomly for homespun beginner look
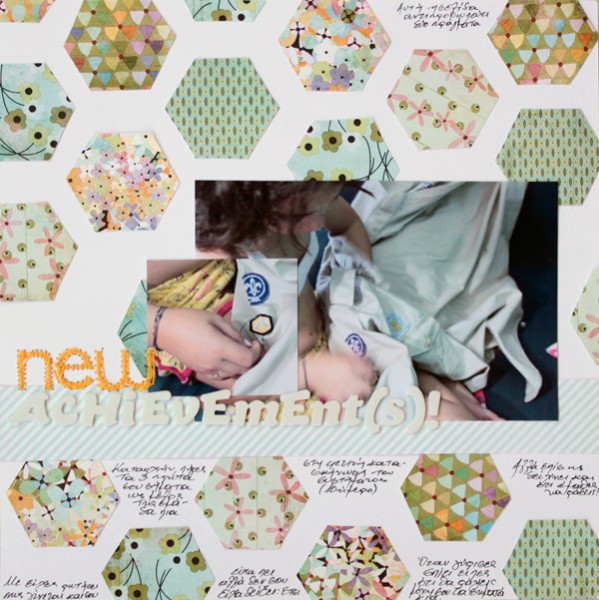
New achievement(s) by Kiki Kougioumtzi|Supplies:Cardstock:Canson;Patterned papers:American Crafts,Basic Grey;Alphas:American Crafts;Thread:DMC.
quilting and crochet
Lise Mariann Alsli says, “Every September my scrapbooking friends and I plan and arrange a big scrapbooking crop in Trondheim, Norway which is called ‘Trøndersaksa.’ This weekend is a lot of work, but a true bliss. This is a picture from last year’s crop where I painted my nails with the bird from our logo.”
“I have used both quilting and crochet as inspiration for this page. The background is made from pieces of fabric (from an old curtain, some small fabric samples and from my husbands jeans) in quilting style.”
“I have also used two small crocheted squares from my bed spread project that I doubt will ever see the day it is finished. Using fabric as base for a page (or any material other than paper) gives a whole new dimension to a project by adding touchable texture. It may make your pages a bit more bulky, but it is a really cool technique.”
Lise’s tips:
- use a fabric base for texture that engages the viewer’s sense of touch
- make a blocked fabric base with denim and prints
- use a crocheted granny square as your embellishment cluster foundation
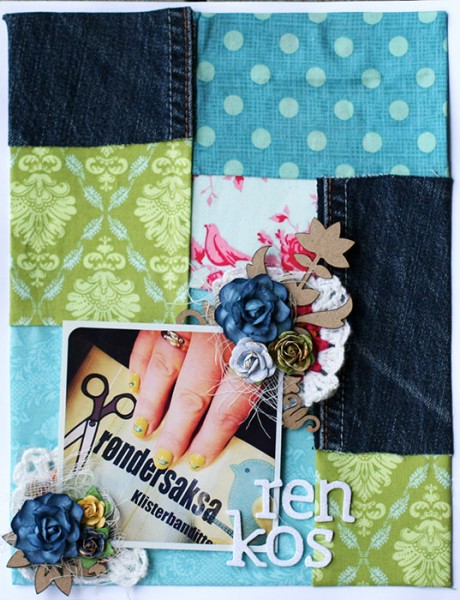
Pure bliss by Lise Mariann Alsli | Supplies: Cardstock: Bazzill; Fabric: Fabric samples, an old curtain, my husbands jeans; Alphabets: American Crafts (Thickers); Embellishments: Doily, Prima; Other: Crocketed squares, cheese cloth, chipboard from unknown maker.
crochet
Ronnie Crowley says, “This is a childhood memory about a blanket my mother made me for school. Because the blanket my mother made was of hand crochet, I want to replicate the look as near as possible.”
“When my mother made blankets she crocheted the individual flowers, and then combined them into a large piece. Its not a craft I have learned, but as a digital scrapper I didn’t need to know–I could replicate the look by adding lots of flowers and positioning them to look like they are connected as they would be in a blanket if I had actually made it.”
“When I started this assignment I had planned to make a page about my grandmother and her love to knit. When I started looking for knitted items to use in my layout I realized that the crochet flowers that I had were really like the flowers my Mum made when she would crochet this brought back memories of THAT blanket. Suddenly I knew this story was more important to me and one that I hadn’t documented previously. I allowed my supplies to provide the inspiration–which is a step away from my usual process of starting with pictures.
Ronnie’s tips:
- The next time you are struggling to find your mojo, check through your supplies and look at them to see if they will trigger a memory for you. Especially the pieces of ephemera available may bring back a memory you had totally forgotten.
- Use digital products and techniques to add crafty touches you don’t know how to do by hand.
paper cutting
Marie-Pierre Capistran says, “This is a page I made for my friend when she gave birth to her third little girl, as a keepsake.”
“I used the craft of paper cutting and to make a frame around the picture of the baby. I wanted it to resemble a birth announcement, framed.I made my papercut in several layers and I adhered every layer separately with foam dots over another so that the top layer is higher than the first and second one, creating a whole lot of dimension. I also made sure that some elements overlap the picture for some extra dimension.”
Marie-Pierre’s tips:
- Use layers of tone-on-tone paper cutting to frame your focal point
- Adhere each layer separately building each up with additional pop dots.


