
 Fussy-cutting refers to trimming a motif or image. It could be a silhouette that you trace and cut from solid paper or a motif from a patterned paper. You can fussy-cut from patterned paper with your scissors and craft knife or you can fussy-cut from digital paper with Photoshop tools.
Our team has a variety of examples below and they’re sharing their tips for choosing fussy-cut patterns and doing the actual fussy-cutting.
Marie-Pierre Capistran says, “I did this paper cut for a friend of mine who lost a child. It’s a Swiss technique that entails cutting a silhouette from a special paper (very thin, black on one side, white on the other so that we can draw a design on the back) with very small scissors and/or exacto knife and adhering it onto a white background. I also stamped and hand cut a balloon. To adhere my paper cut to the background, I used little touches of Stampin’UP! two-way glue. I left some branches unglued to add texture and movement.”
“Here are some cutting tips that I learned with this technique:”
- Always move and turn the paper, not the scissors, as you cut.
- When cutting inside space, like the hat and shirt of my little man, use an exacto knife and always cut toward you. Move the paper as necessary.
- A new blade and some sharp scissors can make a big difference while doing some paper cutting.
- Cut the paper all the way to the end instead of ending your cut too early and having to tear the paper.

Caroline’s Red Balloon by Marie-Pierre Capistran | Card stock: Bazzill, Stampin’UP!; Ink: Memento, Stampin’UP!; Paper: special paper cut paper; Adhesive: Stampin’UP! stampin’ dimensionals and 2-way glue.
Brenda Becknell says, “On this page, I fussy-cut the cute little penguins from one patterned paper and punched snowflakes from another paper. I use sharp micro tip scissors for cutting little images like this. If there are lots of interior cutouts or tight curves and corners, I use my craft knife. Large-scale prints are often what we think about for fussy cutting, but don’t forget about the medium-scale or image prints (like these penguins) and papers with preprinted borders or flourishes. All of these can work well for fussy cutting.”
“Whenever I start to fussy cut an image, I start by rough cutting around it, so I have a smaller piece of paper to work with. If there are lots of interior cutouts or tight curves and corners, I use my craft knife and cut those first, and then finish with my micro-tip scissors. Most of the time I leave a very thin border around the object. That makes any imperfections in the outside cutting less noticeable. If I’m cutting curved images, I try to turn the paper into my craft knife/scissors; it seems to help me get smoother cuts on the curved edges.”

All Bundled Up, Now Where’s the Snow? by Brenda Becknell
Patterned paper: Pink Paislee, Bella Blvd, Lily Bee; Cardstock: DCWV; Corrugated alphas: Pebbles; Alphabet stickers: Doodlebug; Glitter: Doodlebug; Acrylic paint: Martha Stewart; clear gems: Recollections (Michaels)
Deborah Wagner says, “I extracted flowers from patterned paper to use at upper left, and on the quote by Clara Balfour. Instructions for digital extraction follow.”
To extract an element from digital paper:
- select the Magnetic Lasso Tool and move around outer edges of the image, clicking until you reach the beginning and complete the shape.
- Select>Modify>Feather. Enter a value of 1-3 depending on the fuzziness of the image.
- Select>Inverse. Press delete.
- Use the Eraser Tool to clean up the image.
- Move the extracted image to your layout, and add a drop shadow.
“It’s easiest to use this technique when there are clear borders or lines around the image you are extracting.”

World Without Flowers by Deborah Wagner. Supplies – Designer Digitals: Katie Pertiet – Blendable Layered Template, DocuStacks No. 3, Chandra Solids, Water Star Brushes and Stamps No.1, Alandia Noel Kit, Catana Kit, Star Glows No. 1, Bead Scatterings No. 3, Spot Dot Flourishes; Mindy Terasawa – Doodly Flowers Kit, Love Bandit Kit.
Christy Strickler says, “I fussy-cut the paper shopping bags from a sheet of patterned paper using a craft knife. I like to fussy-cut from busy patterned papers or papers that don’t fit my style. The shopping bags were part of a themed paper about being Daddy’s little girl. I tend to document my son’s stories and our pets. Fussy-cutting allows me to extract what I need from a patterned paper so that I can make the image fit my story. In the case of my page, there were gift boxes next to the shopping bags that I cut to create my border. I cut off the gift boxes but part of the box pattern remained. So I hid this by layering the shopping bags and strategically placing buttons.”
Christy’s tips:
- Always use a sharp knife.
- Cut in small sections, lifting and rotating the paper as you cut- start with detailed or small sections first.
- If something delicate tears away, don’t worry. Use a glue pen to put it back. If necessary, you can glue both pieces down on your cardstock canvas.
- Sometimes, you might only have a partial image on your patterned paper. Use embellishments to hide by tucking fussy cut items under another layer.

The Paper Bag Princess by Christy Strickler Supplies| Patterned Paper: October Afternoon, Rusty Pickle; Alphas: Sassafrass; Buttons: Basic Grey; Chipboard: Tattered Angels; Ink: Ranger; Die Cut: K and Company; Marker: Bic Mark-it; Other: kraft cardstock
Adriana Puckett says, “Fussy-cutting is one of my favorite ways to stretch my stash and embellish my pages. Any patterned paper with a medium to large design is a candidate for fussy cutting. I cut flowers from this gorgeous piece of patterned paper in Cosmo Cricket’s Acorn Avenue line, and then I layered the flowers around my focal photo. I always use my Cutterbee non-sticky scissors for fussy cutting.”

We Do Family Style by Adriana Puckett | Supplies: Patterned paper: Cosmo Cricket Acorn Avenue line; Cardstock: Bazzill Basics; Embellishments: pearls in flower centers – Jenni Bowlin; chipboard stickers – Cosmo Cricket; Letters for title: “we do” – Jenni Bowlin; Family Style – AC Thickers; Page sketch: PageMaps
Adryane Driscoll says, “There are two digital fussy-cuts on this page: the doily and the bird. To extract the doily, I used the magic wand tool. The first cut was around the entire doily. Then, there were many tiny cuts for the holes in the lacework. For the bird, I used the lasso tool and roughly cut around the bird. Using the “darken” blend mode (which caused the background around the bird to lighten and disappear), I was able to blend the bird into the rest of the brushwork in the cluster.”
“Digital fussy cutting is relatively easy with the magic wand, quick selection, or lasso tool. I find that the magic wand tool works better for more complicated cutting because you can cut small areas accurately. The lasso tool is great for a fast cut where you are going to take what you’ve cut and blend it. The eraser tool is also available for fine tuning difficult areas. Enlarging the area you are cutting helps accuracy. I think digital cutting is a lot like cutting paper in that the simpler the design, the easier the cut.”

Time by Adryane Driscoll: Credits: Anna Aspnes I ArtPlay Palette Fall, ArtPlay Palette Metro Graffiti, ArtPlay Palette Sweet Baby, ArtPlay Palette Encapsulate, Dripped Stains Nos. 3 and 5, ArtPlay Palette Easter Chicks, ArtPlay Solids Girl Craze, Stitched LoopdaLoops White No.1, ModGrunge FotoBlendz No.2, ArtPlay Palette Pumpkin Patch, Scissored Scallop Masks No.2; WarpingFrames No.2, ArtPlay Palette Shabby Christmas; Pattie Knox: Pin Its Pearls; LauriAnn Some Kind of Wonderful; and Katie Pertiet: Conifere Element Pack
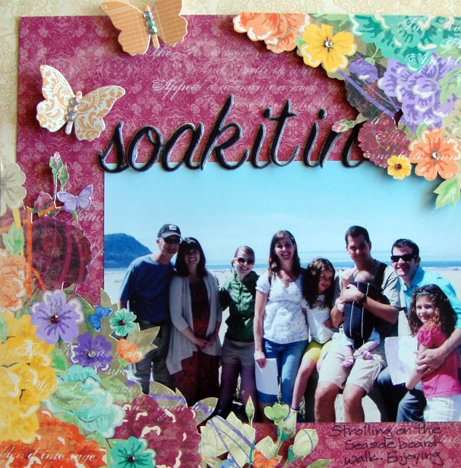
Michelle Houghton says, “The upper right corner and lower left corner on this page are fussy cut from patterned paper. I used micro scissors and an X-acto blade to cut my paper. Patterns that have defined shapes or edges are easier to cut. Open stripes or dots become difficult to decide where to cut. I have a tutorial that goes over a lot of cutting tips here at Get It Scrapped. I would also recommend deciding where you are going to cut BEFORE you begin cutting. Decide which details will be included and which will be excluded.”

Soak it in by Michelle Houghton | Supplies: Papers – Bo Bunny, Sticker letters – American Crafts, Butterflies – Jenni Bowlin, Jewels – Mark Richards and Hero Arts, Ink – Sharpie
Amy Kingsford says, “On my digital page ‘I Heart Seattle’ I used fussy-cutting in two different ways. First I used my magic wand tool to select and extract the shape of the state of Washington to create a fun peek-a-boo effect and the appearance of layers. The fact that the shape was originally a solid white on a solid grey background made this a snap. I set my tolerance to 30 with anti-alias and contiguous checked.”
“Then I used my magnetic lasso tool to cut around a portion of this burst with clouds patterned paper that I used to set the scene for the top half of my layout. I prefer to use the magnetic tool over the magic wand when dealing with patterns this way I can simply trace around the area I wish to extract–CTRL+clicking along the way to make sure my desired path is selected.”

I Heart Seattle by Amy Kingsford | Supplies: Gennifer Bursett: When Skies Are Grey, Snippy Alphabets, Spring Menagerie; Ardent Sparrow: Isabella Elements, Mabel Elements; Creashens: Bare + NecessitiesTapes; Wild Blueberry Ink: State Love; Robyn Meierotto: Cut It Out Layered Frames; Karla Dudley: Because of You Papers, Calypso Alpha Stickers; Ju Kniepp: Washi Chevrons No. 1.
Kiki Kougioumtzi says, “I’ve been admiring this architectural statue all my life. It is so detailed that I wanted to support the photo with an equally detailed pattern paper without stealing attention from the photo. I chose neutral colors and all the cream pattern paper details are fussy cut.”
“I used very fine tip scissors for the outer edge and a craft knife and lots of patience for all the other cutting. The key is to use a new blade and work from the inside out. I think every paper that has clear designs can be fussy cut.”

Jewel of the past by Kiki Kougioumtzi|Supplies:Patterned papers and Chipboard:Bo Bunny;Alpha stickers:Webster’s Pages;Other:Ranger distress ink.
Debbie Hodge says, “I did lots of fussy-cutting on “Posing.” The digital photo frame has a fussy-cut look and made a great base. I digitally fussy-cut a blue medallion from patterned paper and then replicated it and placing a series of 5 medallions below the photo. Each is topped with a gem.”
“The feather was fussy-cut from pattterned paper and “stickerized” for definition. To “stickerize” a fussy-cut motif: select the area it fills in Photoshop by CTRL+Clicking on the layer palette thumbnail, expanding the selection by 10 pixels, adding a layer beneath the motif, and filling this enlarged selection with white. Add a drop shadow to the white-filled layer.”
“The peacock was also cut from patterned paper. The paisley was made with a digital brush. I stamped the brush outlines in white then selected the inside areas, filled them, and clipped blue paper to this fill.”
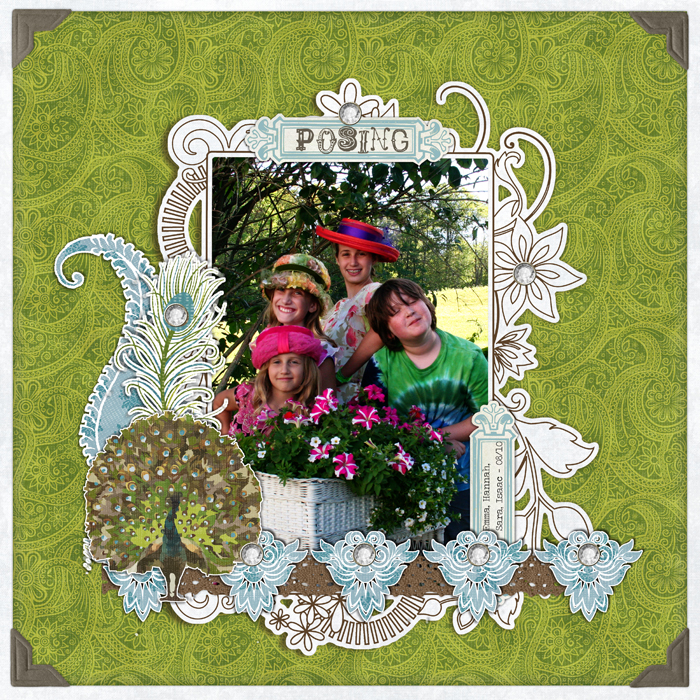
Posing by Debbie Hodge | Supplies: Peacocking Paper Pack by Jesse Edwards; Lace Essentials No. 01, Hannah Breeze Kit, Photo Corners: Colors No. 01DoodleDo Frames No. 05 Brushes and Stamps by Katie Pertiet; Awanui Kit by Lynn Grieveson; Summer Simplicities Solids Paper Pack Mindy Terasawa; Spiced Jewel ElementSet by Anna Aspnes; MonBijoux, Traveling Typewriter fonts
[current]
