
by Tami Taylor

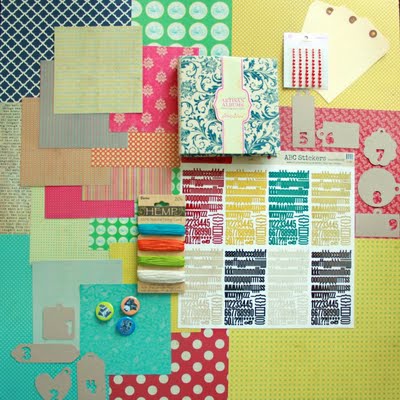
Here's a page kit Tami built from her stash. Read on for tips and approaches to building your own page kits.
Whether you’re off to a crop or scrapbooking at home, kits can speed up your scrapbooking.
Using a kit eliminates many of the decisions you face when you sit down to scrapbook. The kit creator has already put time and thought into selecting products that will work well together–so that you don’t have to.
If you stick with what is in the kit you’re using, you eliminate time spent deciding whether to use the cantaloupe or peach-mist cardstock. Plus it’s a pretty cool way to keep stash organized for quick starting your scrapbooking.
Purchasing scrapbook page kits
If you’re interested in treating yourself to new scrapbook supplies, purchasing a kit is a great way to get a variety of coordinated supplies while saving money.
How it works
Kit clubs often have a membership price and/or a single-kit purchase price. You can usually save money by becoming a member, and, most importantly, you are guaranteed not to miss a kit. Kits are popular and they do sell out, so if you love the kits a club offers, joining will ensure you don’t miss any offerings.
If you want to join a kit club, check out the membership policies in addition to the product. Are you allowed to skip kits you don’t like? Can you cancel without penalty? How long is the membership obligation? What day is the kit fee charged to your account?
Selecting a kit
When choosing a kit, begin by looking through past kits the club has offered. See if the product choices the owner makes match the products you would use. You probably won’t 100%-love every single item, but take this as a challenge to branch out a little and try to incorporate those items into your pages. You may find this to be just the inspiration you need. You can also gift those few products you don’t like to your favorite scrapbook friend.
Willow Traders is a forum dedicated to kit lovers. Register and check out the subforum called “Full List of Kits.” It’s a pretty amazing list of the many kit clubs out there.
Check out Noell Hyman’s article at Paperclipping.com on choosing a kit club to join. There are lots of kit club suggestions in the comments area.
I used this kit from Trish Turay’s Work In Progress Kits to make 4 layouts shared in this article. I loved the colors of this kit, and that big red and white polka dot paper was a must have. Plus those little buttons with the camera images on them, adorable!
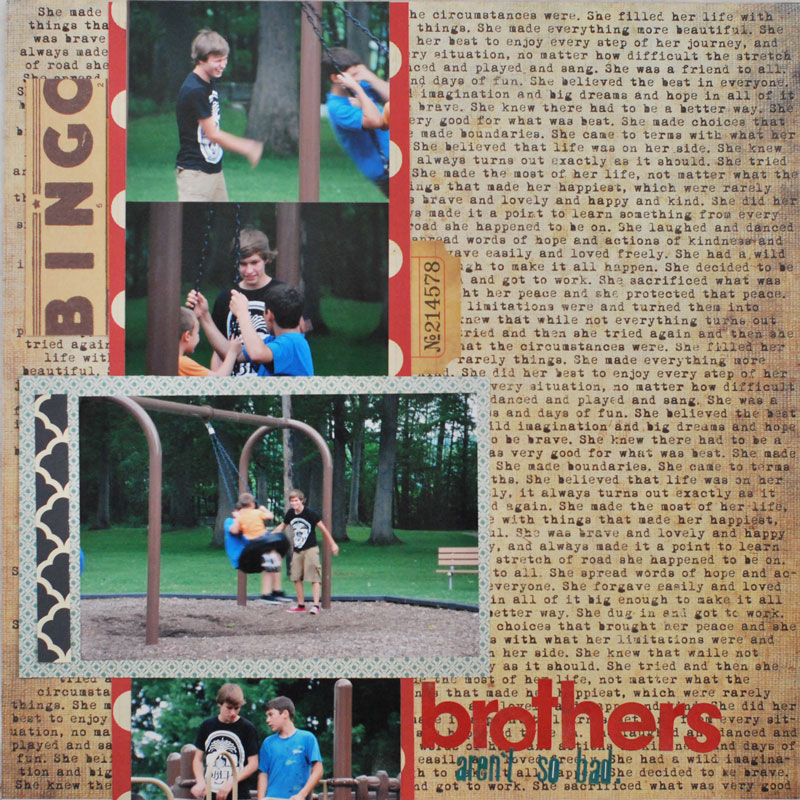
The text print patterned paper made a great background canvas for my page about brothers, and I used a band of the red polka-dot paper to mat my smaller photos. Look for the rest of that red paper in my other layouts below.
How to make your own scrapbook page kits
If you’ve got stash to be used, building your own kits is a great way to get started using it up. Gathering product together this way saves you time when making scrapbook pages. Here’s an approach for building your own kits good for making at least four pages.
To get started, study the last two or three layouts you’ve made that are typical of your page-making approach.
How many pieces of paper to include?
Remember, your goal is to pull together product for making at least four finished scrapbook pages. This is a calculation you’ll make once–and then tweak as you move forward making more kits.
Here’s a look at my thought process for deciding on how many papers to include in my own kits.
Take a look at your own pages and get an idea for how many pieces of patterned paper and cardstock to include in your own kit. As you move forward you can tweak this number
Here are three recent layouts of mine that I’m taking a look at as a guide for building kits.

Start by figuring out how many papers you need in a kit. In addition to background papers, I pulled from 3, 3, and 9 different patterned papers on the layouts above. Some of the patterns on the last page were from the “b” side of double-sided pager. This means that including 2 to 5 papers for layering along with 4 sheets for background canvases will do the job for me. Since I like choices I’m going to favor the right side of that curve and include 5 patterned pieces and 4 cardstock pieces for backgrounds for a total of 9 pieces of paper, on average, in my kits.

Choosing papers
As you choose your papers think about:
Backgrounds. Do you prefer cardstock or patterned paper? A mix of both?
Mats, layers, strips, and other pieces of paper. Just how much cardstock and patterned paper do you use on pages? And in what proportions? Do you tend toward heavy layering, judicious use of paper strips or block, or something else along that continuum?
Mixing product from different manufacturers or sticking with one. Using papers from a coordinated manufacturer line will save time and ensure things really work together. Mixing papers from multiple manufacterers might be the kind of work you love, though, and it’s a great way to use your stash.
I like to draw primarily from one manufacturer for my patterned papers–unless I don’t have enough to fill the kit, and then I’ll pull in other papers.
If you prefer to mix papers from manufacturers, follow your instincts and choose papers that coordinate well and that also incorporate contrast in color, pattern scale, and pattern density.
Here’s a second page I made with the Work In Progress kit I showed you at the beginning of this article. See how Trish chose patterns and colors that mix well. The blue and red work well together while adding a contrast and these colors are repeated on multiple papers. Dots and stripes mix well with many other patterns. The large scale, low-density polka dot paper works well with the tighter smaller prints on the other papers.

Including embellishments
Manufacturer embellishments. Do you have any embellishments made specifically by the manufacturer of your papers to coordinate with the papers you’re using? Reach for these first. You might also have goodies you’ve picked up because you couldn’t resist them! See what you can combine.
Versatile embellishments. Be sure to include standard embellishments. Look to your recent pages. Are you frequently using a brad or a manilla tag? How about ribbon or buttons or journaling blocks? Understand what you like to use, and select these versatile pieces to coordinate with the colors, styling, and mood of the papers you’ve already chosen.
How many? When you look at your recent layouts as a guide, you’ll need to look at several, since the amount of embellishing you do on one page may be quite different from that on another. (My sample pages above are a great illustration of how greatly a level of embellishing can vary from page to page.)
As you pack more kits you’ll get a better feel with how many embellishments you should include. Just remember to make a mental note when you’re done with a kit how many embellishments you had left over.
When I’m making my kits, my embellishments usually fit in a standard sandwich-sized zip-top bag.
Don’t forget letter stickers
How important are title and lettering to you on a layout? What kinds and sizes of alphas do you use? Do you take the opportunity to work in contrasts between alpha sizes, fonts, styling, and colors? Let the answers to these questions guide your choices.
For me titles and lettering are an essential part of any layout. I love mixing alphas so I always aim to include 2 to 3 alpha sets in each kit. My favorite combination is to include one mini alpha, one alpha in basic black or white, and then a third in some bold color that will contrast with my papers and really pop on my page. I also know that I’ll be able to use letter stamps. I keep them handy when I’m at home and I bring them to crops. I consider them a basic tool for scrapbooking. I like lots of options when it comes to my titles.
That little something extra
The last thing to add to your kits is a little “something extra.” Look for piece that will add strong visual interest and perhaps even fun to a page. Look through your stash for something you haven’t used because it’s challenging you or because you’re saving it for the “right” project.
Great candidates for this “something extra” in my own stash are:
- the Prima Marketing vine that I purchased four months ago and still haven’t gotten on a page
- handmade confined collages from when I was trying a new technique
- a bottle of spray ink
- a stamp I haven’t used in awhile
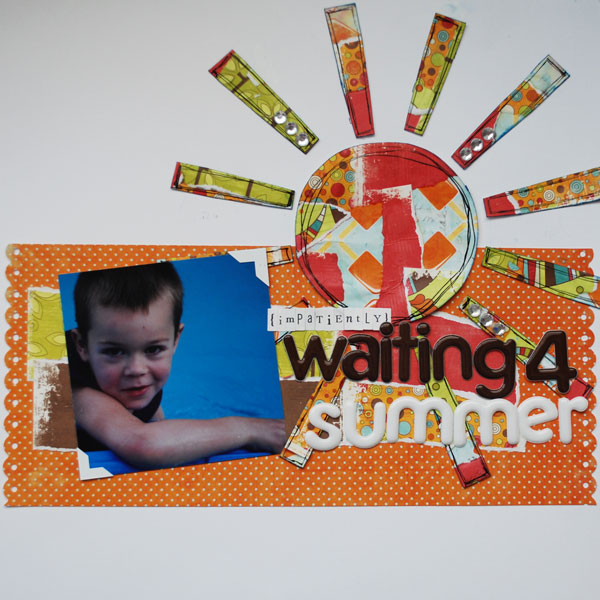
I made this kit beginning with Basic Grey’s Lime Rickey papers. I added felt, brads, and buttons that coordinated by color. The red alphas were chosen to pop against the blue and green papers. For my “something extra” here I included two die-cut papers that I’ve had for a while but haven’t used.
Storing kits

A craft keeper or 2-gallon zip-top bag both make great storage for your page kits. Many kit clubs send their kits in bags and you can reuse those for your homemade kits.
If you’re making lots of kits you can organize them by color scheme (brights, darks, etc.) or theme (holiday, birthday, etc.). I keep about a dozen kits on hand and love looking through them to choose which one I’ll work with next.
Using Kits
Have fun and get lots of scrapbooking done! I made four pages from the Work In Progress Kits I showed you at the beginning of this article. What’s more, I made those four layouts in 50 minutes, and I have enough product left over for three more layouts, at least.
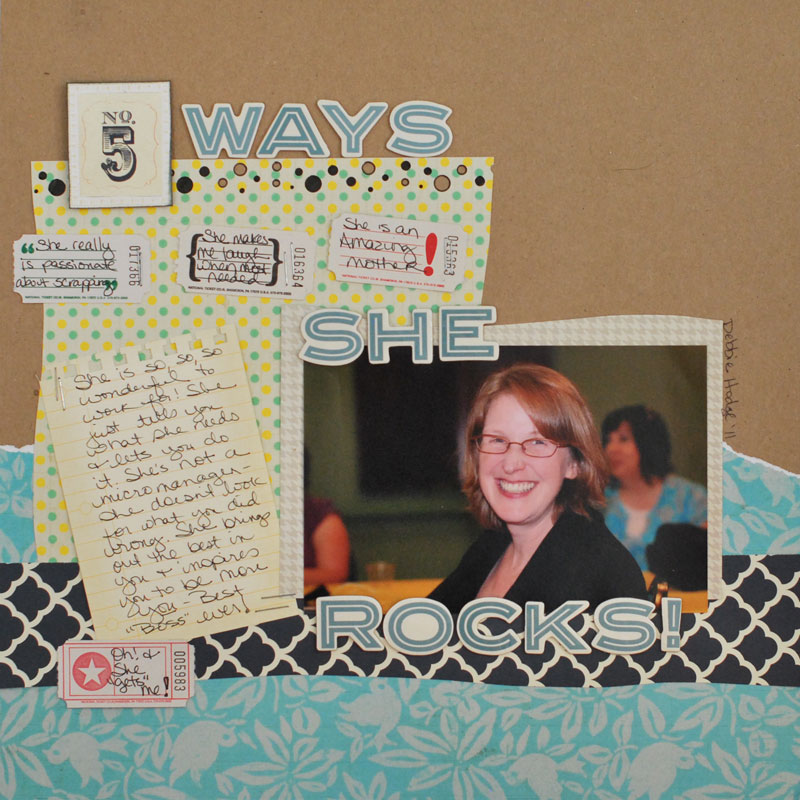
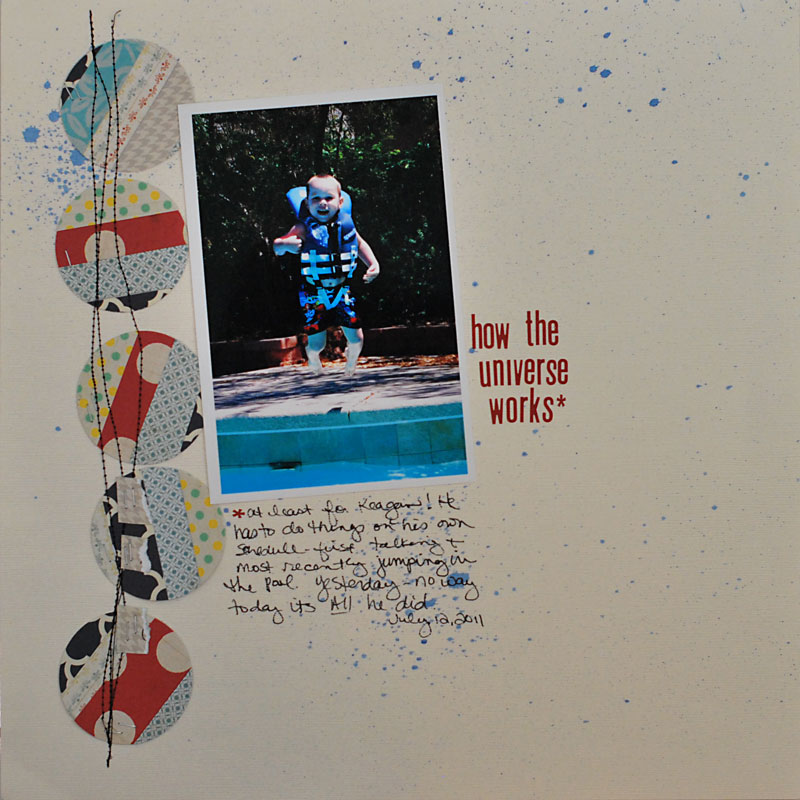
Here are two more pages made from the Work In Progress kit. A good kit will give you product that works well together while yielding different looks. The first two pages I showed combine lots of red and blue and brown and are dense with detail and pattern. These two pages below are lighter, incorporate more white space, and use the blues and yellows from the kit.
So what do you think? I think this is a great way to start approaching all those goodies you’ve been acquiring. Kit them up and be ready to scrapbooking awesome pages in a jiffy! I’d love to see the kits you make on your own, so link us up in the comments.
[ttaylor]
The July issue of Masterful Scrapbook Design is all about speeding things up. Join us!
In-depth seminars, focused lessons, live webinars (with video & audio recordings), and annotated galleries make membership at Masterful Scrapbook Design an inspiring and instructional value. Join now and grab a discounted bundle of archived issues.

