By Pattie Knox
Wrapping your words around or inside of a design element can pack a powerful punch when used in your digital art journaling. Unfortunately, while newer versions of Photoshop contain text on a path capability, versions prior to PSCS and all versions of Photoshop Elements are lacking this feature. There IS a way that you can create text circles if you know about the secret weapon hidden in the Polar Coordinates feature however!
(NOTE: Circular text created with this method will be one-half the size of the canvas you begin working with. For example, if your goal is a 3 inch circle … you’ll want to start out with a 6 inch by 6 inch canvas.)
1. From the File menu, point to New, and select Blank File.
2. Enter the following values:
- Width: 6 inches
- Height: 6 inches
- Resolution: 300 pixels/inch
- Color Mode: RGB Color
- Background Contents: Transparent
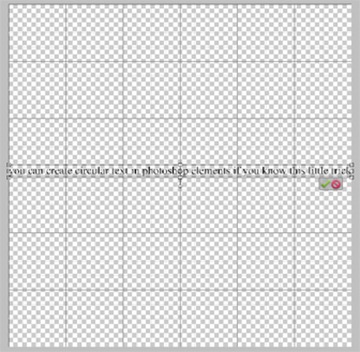
3. From the View menu, select Grid to activate the grid. This will help you determine the exact vertical center of the canvas … which is where you want to type the line of text.
4. From the Toolbox, select the Text tool. Choose a font and set the font size.
5. Type a line of text that fits snugly against the left and right side of the canvas as shown in the illustration below.
Press CTRL+T (CMD+T) to access the Free Transform tool and stretch the text to meet the edges if necessary.
6. From the Image menu, point to Rotate and select Layer 180. This ensures that the text on the top of the circle will be right-side up when created.
To keep the text from stretching out of shape when formed into a circle we need to adjust the height of the letters.
7. Press CTRL+T (CMD+T) to access the Free Transform tool and look to the Options bar at the top of the screen.
To prevent the width from changing along with the height, uncheck the box next to Constrain Proportions and enter a value of 250% for Height. (Width should stay at 100%)
8. Working in the Layers panel (palette), right click the text layer and choose Simplify Layer from the pop up menu.
This prevents you from editing the contents of the text layer, but is necessary as PSE will not allow you to apply a filter to a text layer otherwise.
9. From the Filter menu, point to Distort and select Polar Coordinates.
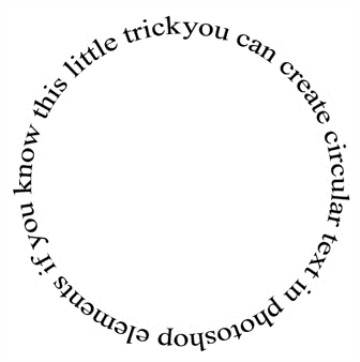
10. Check Rectangular to Polar in the dialog box that appears and click OK to commit the change.
Presto! You have a circular element formed from text.
[pknox]
[learndigi]


