 For many of you, Ali Edward’s “One Little Word” has become an important part of establishing your yearly goals, as well as a great foundation upon which you can grow creatively throughout the year. But for those of you who may be new to the concept, “One Little Word” started out as an alternative to the customary “resolution.” Ali Edwards used the idea in 2007 to help people focus their efforts towards reaching their goals more effectively. It has since turned into a “movement” in which thousands of people participate annually. They choose a single word to focus on all year long and to guide their actions, thoughts and and endeavors.
This year my word is CREATE. I love creating things. I love the feeling of accomplishment and inspiration that comes from making something from scratch and sharing it with others. And I want to bring this feeling into all of the aspects of my life this year, from creating enjoyable meals for my family to creating a nurturing home for my children–I hope to create something beautiful each and everyday!
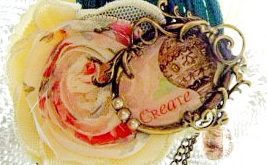
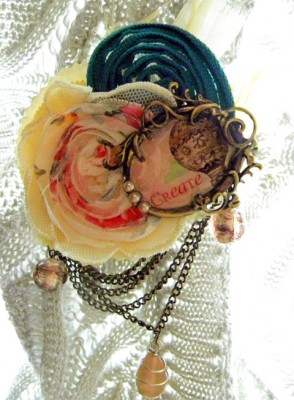
To help remind me to be inspired by my “One Little Word,” I’ve created this brooch from two pieces of repurposed jewelry—in hopes that when I put it on each day–I am reminded to create wonderful things in all that I do.
- Old or outdated Jewelry
- Brooch Clip or Chain (depending on whether you are making a brooch or pendant)
- Acrylic or Glass Pebble (same shape and size as charm) or Dimensional Glue
- Vintage Paper, Ephemera, Rub-ons, Stamps, or Digital Brushes
- Misc. Fabrics
- Beads, Baubles or Sprays (optional)
- Small Piece of Chipboard
- Ink, spray, sanding paper or other distressing materials
- Hot Glue Gun
- Clear Gel Medium
- 3 in 1 Jewelry Tool or Needle Nose Pliers
1. Start by removing pendants or brooch clips from your old and outdated jewelry. Save your chains and findings because they have potential for future projects.
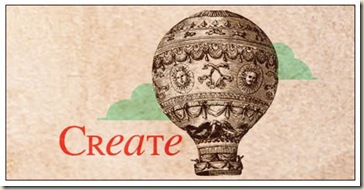
2. Using your vintage-style stamps, rub-ons, and paper (or perhaps your digi supplies)–design your charm’s image in a shape and size that corresponds with your re-purposed charm.
3. Perform any distressing techniques to your image to reinforce the vintage feel of your charm.
4. If your charm does not have a back, make one from chipboard and adhere it to the back of your charm. Then adhere the back of your finished image inside of your charm (or onto your make-shift chipboard backing). Finish your charm by adhering the front side of your image to the back side of your acrylic topper or glass pebble using a thin layer of clear gel medium.
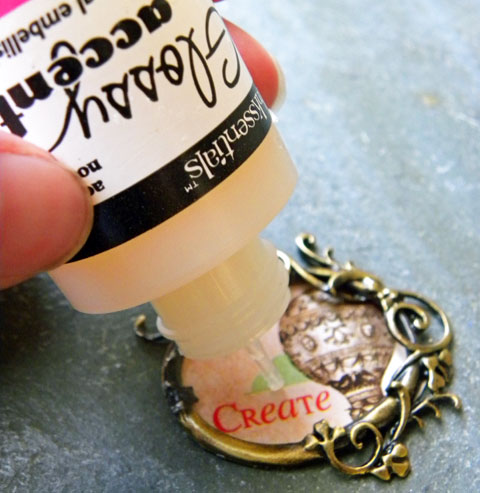
5. If you are using dimensional glue (such as Glossy Accents or Diamond Glaze), in place of a pebble or topper, then you’ll want to cover the front side of your image with a generous layer of the glue, paying close attention to the edges. Allow plenty of time for drying and pop any bubbles that may form with a pin.
6. Once your charm is finished you can adorn it with beads or baubles to finish it off. It may be necessary to use jump rings (or links from an old chain) & your needle nose pliers at this point for attaching them.
7. Now you’re ready to choose your fabric flowers. In my brooch I used a few different premade styles that I had on hand, but if you wish to make your own— Craftaholics Anonymous has tons of great fabric flower tutorials for you to check out! Consider the following when making your selection:
- Don’t choose several bulky designs as you will most likely be layering them on top of each other.
- Choose fabrics that vary in color and print, weight and texture to construct your flowers from. This will create both interest and balance in your finished brooch.
- Don’t forget your finishing touches like beads or brads for your centers or perhaps a bit of feathers or Stickles along the edges.

8. Now its time to piece everything together. Using your hot glue gun, work from the bottom up, layering your flowers on top of your brooch clip. Add your charm and any finishing touches. (Note: This could also easily be converted into a Necklace, by simply adding a chain.) And now you’re ready to be reminded of your “word” in style!
Download Your Vintage Charm Printable Here
This printable consists of one sheet containing 3 customizable designs and 3 finished designs in varying shapes (square, circle, rectangle and oval). The customizable designs allow you to add your own word using your stamps, rub-ons or even your own handwriting, once you’ve printed them out. While the finished designs come with words already printed on them. If you need to resize your charms try using your Adobe Reader software or your printer’s software to print the pdf at a percentage of the original size.
This Freebie is for personal use only. Big thanks to Gypsy Chick for permission to use her “Steampunk Brushes” for this. Font is Will & Grace from Harold’s Fonts.
[akingsford]


