by Tania Willis
 While bleaching and dyeing are both acceptable ways to alter your fabric, there is yet another option: today, I will focus on a two fun fabric projects using reinker drops.
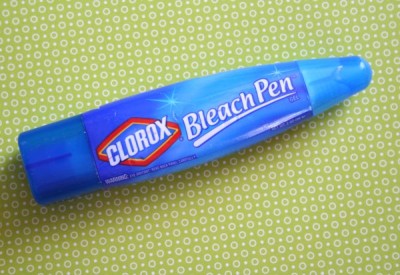
(Note: If you wish to bleach a portion of fabric for use in on your scrapbooking layouts, I highly recommend using the Clorox Bleach Gel Pen so you have more control over where your bleach lands. A super fun technique to try is painting some of the gel (a little goes a long way) onto bubble wrap and “stamping” it onto your fabric to create a bubble pattern that will bleach out the stamped portion of your fabric. Once the bleach dries, the fabric may be used directly on your layouts)
Re-Inker
It stands to reason that if you can use dye and bleach on your fabrics, then you can also use re-inker. Re-inker is a dye solution sold as an economical alternative to buying a whole new inkpad. With just a few drops you can add new life to a dry stamp pad. I’ve found that it has many other uses, though–especially when playing with fabrics for your layouts. I will warn you this is a bit messy and takes some special care and time to heat-set and cure. It is, though, so very worth the mess for the end result.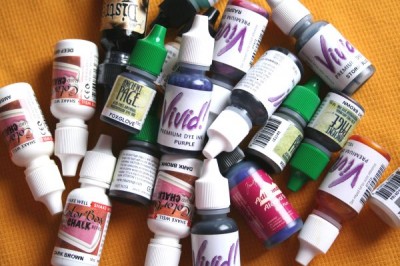
Make Your Own Spray Mist
A very popular trend right now is to use spray mist. But, boy, can buying all those individual colors add up! I decided to try using what I already had on hand—reinker—to see if I could get the same results. It worked!
All you need is a fine-mist water bottle, which is easily found in the travel-sized section of your toiletry aisle (usually for less than a dollar), paired with a few drops of re-inker. It’s the frugal way to create your own colored mist that is so popular among those who scrapbook, art journal, and stamp!
Here’s how:
 1. Fill small fine-mist spray bottle with ¼ cup or less of water.
2. Drop 2-3 drops of re-inker into water. (Use more for more vibrant color, less for lighter color.)
3. Replace spray bottle lid and shake to distribute color.
4. Spray fabric with mist, holding bottle 6-8” from fabric.
5. Allow mist to soak into fabric for approximately 10 minutes.
6. Iron fabric dry with the iron set on a hot, dry setting.
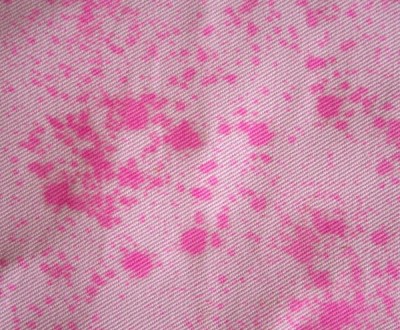
Here’s an example of the homemade mist made from reinker sprayed onto a light pink canvas material.
The other way I love to use reinker on fabric is to find fabrics that have a tone on tone pattern, like white on white. The white print on the white fabric acts as a resist so you don’t have to attempt to stamp & emboss the pattern to create your resist. The work is already done for you!
Now, roll your sleeves up and get ready to play with some re-inker to alter your fabric! (NOTE: If you don’t have re-inker, this project can be done using markers or hi-liters as well)
Supplies:
– Light-colored fabric
– Re-inkers in various colors
– Old Rag or Washcloth
– Newspaper
– Computer or Notebook Paper
– Iron
– Ironing Board
– Spray Bottle with Water
– Cardstock
– Misc. Scrapbook Supplies
1. Iron wrinkles out of your fabric. If you use a fabric with a tone on tone print, meaning a white print on white fabric, you will find that the printed areas work as a resist to the ink creating a really cool effect. I suggest looking in the 100% cotton fabrics for a white or cream with tone on tone.
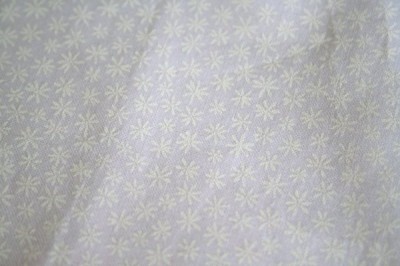 2. Prepare your work surface by laying down several layers of newspaper.
3. Lay a washcloth or other super absorbent cloth flat on your newspaper.
4. Lay your fabric over your cloth.
5. Apply small amounts of re-inker to your fabric. Most of it will seep through rather quickly, but if you have ink that puddles, use the nozzle to spread ink. (NOTE: If you don’t have re-inker, you can attempt the same technique using fresh markers. Allow the tip of the marker to bleed onto the fabric as desired.)
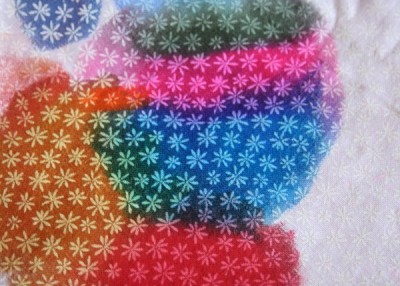 6. Continue applying ink as desired.
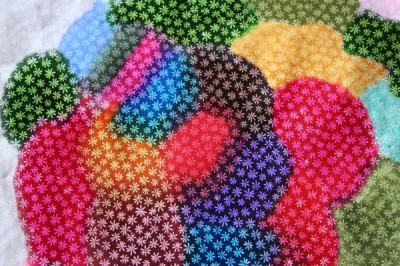 7. Allow fabric to air dry for 30 minutes.
8. Afterward, continue the drying process with a hot, dry iron by sandwiching the fabric between layers of computer paper or notebook paper. The paper is a way to ensure you don’t transfer ink to your iron or your ironing board cover. It also helps absorb the excess ink.
9. Some inks will still have the tendency to transfer after being heat set until they have cured.
10. I allowed my fabric to completely dry and cure for 2 days prior to completing my project.
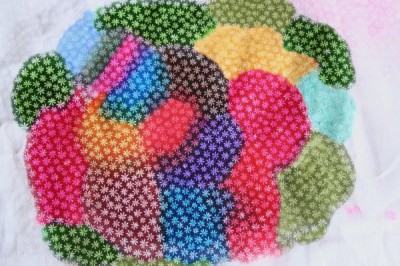 11. After the 2 days, I simply cut my fabric around the outermost edge of the ink and adhered it to a piece of cardstock.
12. Decorative hand stitching was added, but is not necessary. After stitching was added, the piece was further embellished.
 13. The fabric piece was then used as a tree topper. If you desire another shape, you can create a template prior to inking your fabric and then as you ink the fabric, hold your template over top to visualize whether or not you’ve covered enough of the fabric with ink.
[twillis]

