If you’re new to this series by Michelle, you can find all of her tutorials here: Copic Marker Tutorials.
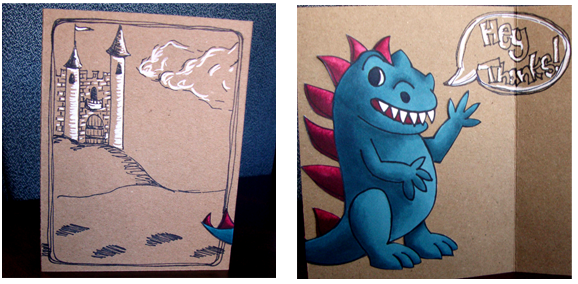
So here he is, my favorite image so far, meet Izzy! He was intended as a dragon but I realize he could double as a dinosaur or even an alligator. I did something a little different today on your print out, instead of changing size I changed direction to give you some options on positioning Izzy. So when you are ready, print out your sheet of dragon/dinosaurs or change one to suit you, and gather your Copic markers to have some fun. Click to download printable pdf of “Izzy.” I used BG72, BG75, BG78, R83, R89, Special Black 110 and I needed the colorless blender to complete my image. 
 Izzy has a lot of separate body parts so I took one part at a time. By shading only one section at a time my ink stayed wet and blended much more easily. However for your tutorial it seems a little redundant to repeat the same three steps over and over for all five sections. So instead I will give the basic instructions and include photos of each of the body parts on each of the steps. I divided Izzy into five sections his belly, arms, legs, tail, and head after each step I will show you a photo of how each of these sections looks at this point. Clear as mud? Excellent! Let’s get started.
Step #1 – Let’s start with our lightest body color, I am using BG72 for my Izzy. I am shading the majority, if not all, of the work area with this lightest shade using small circular stroke to get nice even coverage.
Step #2 – Next you add your middle color, for me this is BG75. On my example I have the light hitting Izzy from the front so my middle shade will come from the back to the front on all the different sections. Some of the areas to notice are where one body part runs into another, often times creating extra shadows, for example in between the toes, or at the top edge of the back leg. Go back in with your lighter marker and using those small circular strokes blend your two colors together where they meet.
Step #3 – Last on the main body add your darkest shade, on mine BG78. Again this will come from the back and underside of Izzy. There are some smaller details on the face in particular to add dimension to all the bumps. This third shade is very small, remember it is used only to push that edge one step back not your whole image. Go back in with your middle and then your lightest marker to blend your colors together.
Step #4 – Once you have completed all 5 sections of Izzy going through steps 1 through 3 over and over again you can move on to his scales and a new color! I chose a deep red for my scales but he could have any color running down his back. The scales are small so I only used two markers and this time because of the color I worked in reverse. Reds tend to be a little trickier to work with so you might want to experiment a little of to the side if you love your image so far. I started with my darker shade on this step, R89, and filled each scale, I did three scales at a time.
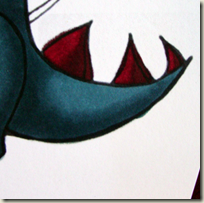
Step #5 – Next I came in with my lighter shade, R83, and this time added highlights. Work lightly and brush your marker from the highlighted edge into the scale. This step takes very little ink so tread gently.
Step #6 – After all of your scales are completed fill in Izzy’s eye and nostril. I just used 110 Special Black for this but you can vary this as well. I needed a tiny bit of clean up in the corner of his eye and mouth so I used the colorless blender and “pushed” some of the ink that had bled over back into it’s lines.
All done and ready to pop out of a card for a friend or grace a scrapbook page. Have fun with Izzy, and special thanks to Isaac who inspired him!
[mhoughton]


