
If you had asked me a little over a year and a half ago if I ever thought it possible to design and print my own fabric from home to use on my scrapbook pages and hybrid projects, I would have said “NO!”
That was before I fell in love with digital scrapbooking…before I found Photoshop…and way before I became motivated to find great new ideas for using my digital scrapbooking supplies in fun and exciting ways! I made these magnets last week with ErinInk digital papers and printable cotton fabric sheets: Tutorial for Fabric Magnet Set.

You can imagine how excited I am to share 5 FABULOUS ways to use your digital supplies to design your own fabrics!
Notes about resources and supplies: Check out the variety of printable fabrics available at Amazon: printable cotton fabric sheets. If you’d like to print your fabric designs by the yard for larger personal craft projects, check out Spoonflower. Here you can import designs and have them printed on a variety of fabrics, cut to order!
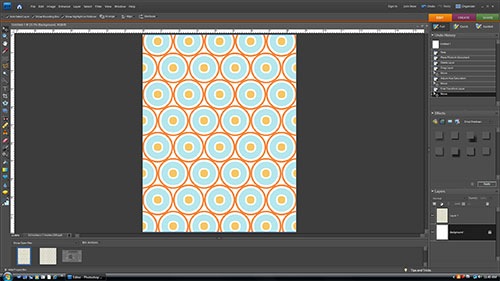
1) USE DIGITAL PAPERS
Printing own your fabric is easy as one…two…three…when converting your favorite digi papers to fabric! So give it a try. Drag your favorite digital papers onto a blank 8.5 X 11 doc, resize to your liking and print onto a printable fabric sheet. Who knew it could be so simple? I used digital paper from ErinINK’s Pamper Yourself Kit.

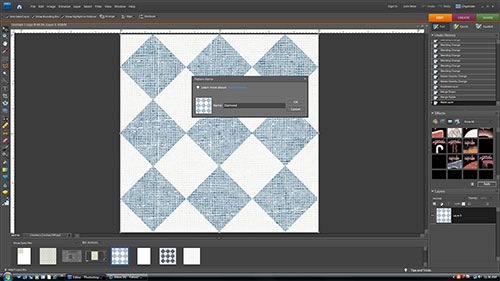
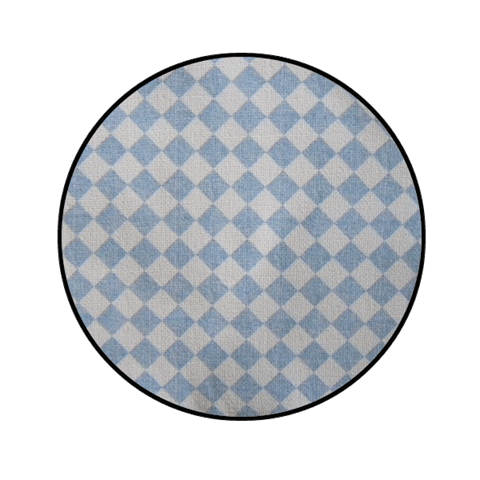
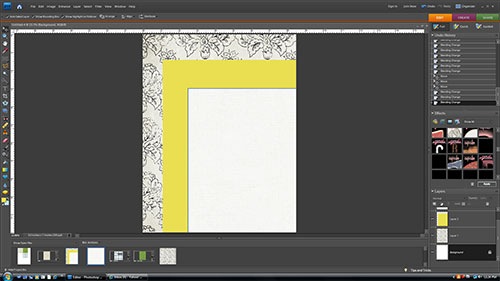
2) USE CUSTOM SHAPES
You can use the preset custom shapes that come with Photoshop or custom shapes that you’ve added to your arsenal.
– In Photoshop create a 2” x 2” document and fill it with shapes as I’ve done with the diamonds here. Define this as a pattern. (>Edit >Define Pattern)
– Open a new 8.5” x 11” document, add a new blank layer, and fill it with the pattern you’ve just defined. (>Edit >Fill)
– Add texture with a filter (>Filter >Texture >Texturizer) or by “erasing” with a distressing brush or with an action. I used Atomic Cupcake’s Rub-On Action.
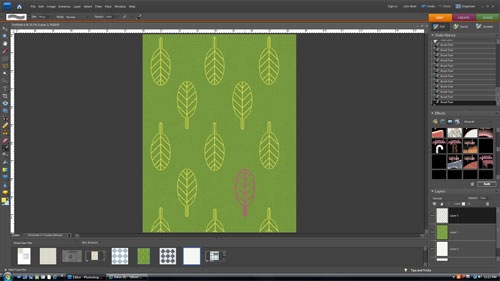
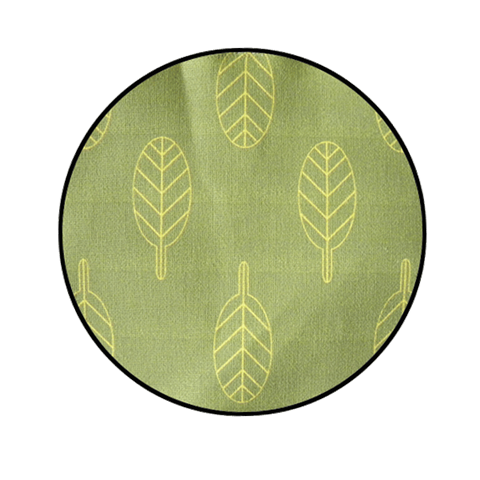
3) USE PHOTOSHOP BRUSHES
Comparable to digital stamps, Photoshop brushes make designing your own fabric prints a breeze! Just choose a brush you like, load it and stamp away! Use the Brush Menu Bar to alter the size, opacity and angle of your brushes and remember to place your brushes on separate layers so they can be removed or repositioned easily. I used CU Leaves Brushes by lauraskathi at Memory Scraps.
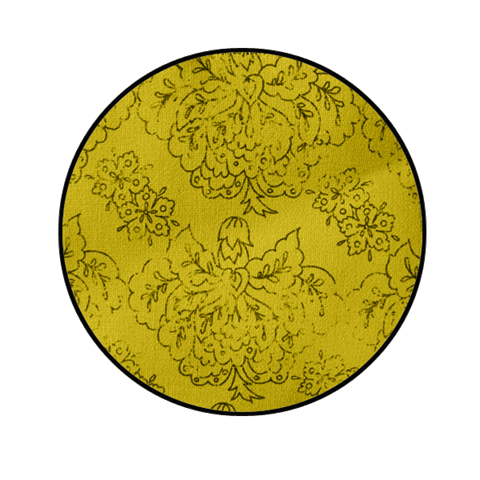
4) USE DIGITAL OVERLAYS AND TEXTURES
There are so many great textures and overlays out there that will make creating your own fabric a cinch…find a pattern you like and pair it with the color of your choice for a fabulous custom design! Try out all of your different blending modes when merging your overlays and color filled layers–you’d be surprised what you’ll come up! I used Amanda Rockwell’s CU Layer Me Overlays with “Color Burn” blending mode.
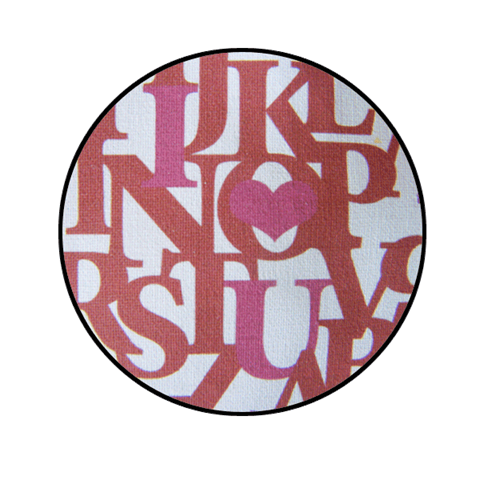
5) USE DIGITAL ELEMENTS
While stickers, doodles, word art and other “flat” elements tend to work best, really the sky is the limit! Soon, your only problem when designing you very own fabric, will be deciding which elements to use! Once you’ve dragged your first digital element onto your working document, just hold down the ALT key while clicking on your element to generate copies. Then position your copies to create your overall pattern. I used Digital Word Art from Luv U 4ever by Emily Powers (freebie at Memory Makers).

I can’t wait to see all of the fun fabric creations you all come up with! Happy Crafting!
[akingsford]
