by Debbie Hodge
Are you a paper scrapper who loves the looks of the many digital products available? Would you like to incorporate those flourishes, grunged overlays, elaborate photo frames, and many other elements not readily found in your paper stash into your paper designs? Read on for 5 ways to add digital touches to your paper pages–5 ways to have a little “Hybrid Happiness.”
use a digital element as a “rub-on” for your photo
Before you print your focal-point photo, open it in Photoshop. Open a digital element. It could be a flower or flourish or clock or . . . you name it and you can most likely find a digital version. Select the element and then expand your selection–start with about 10 pixels. Insert a layer beneath your element and fill the selected area with white. Merge the two layers. Lower the opacity just a bit, and drag it onto your photo. Print your photo at home or save it and upload to a processor for printing. Then — scrapbook it!

Before I printed this cute photo of my son with stuffed animals coming out of his shirt, I layered a digital rub-on (Pick Me Up Rub-ons from DesignerDigitals.com) on it. And then . . . I scrapped it with paper supplies!

The journaling spot on coffee mates is a digital element printed to cardstock and trimmed. The digital brushwork at top left and bottom right (Graphic Pop Brushes by Katie Pertiet at DesignerDigitals.com) were printed to yellow patterned paper.
use a digital journaling block
Open a digital journaler in Photoshop. Type your journaling onto it and save. Print to white cardstock. Trim it out, and layer it onto your paper page.
add flourish to your canvas
Open a canvas in Photoshop that is the same size as your scrapbook page — or the mat you’re working with for your scrapbook page. Open (or use a brush) a large flourish or other design. Color it to your preference and play with positioning, then print and mount the rest of your page upon it.
make a digital title block
Print all or part of your title to patterned paper or cardstock, then embellish with paper elements. Make sure you use realistic drop shadows on your digital title work to get a great look.

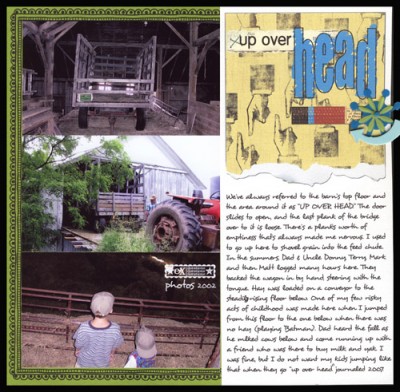
The white band on the right side of "Up Over Head" is a piece of white cardstock upon which has been printed: digital patterned paper with a torn edge, the title words, and journaling. This band was then mounted onto the green mat (which has also had a doodled border printed to it). Chipboard and acrylic embellishments finish it off.
frame a collage
In Photoshop, arrange several photos inside of a digital frame and print the whole block as one piece. Trim it and add to a paper page.

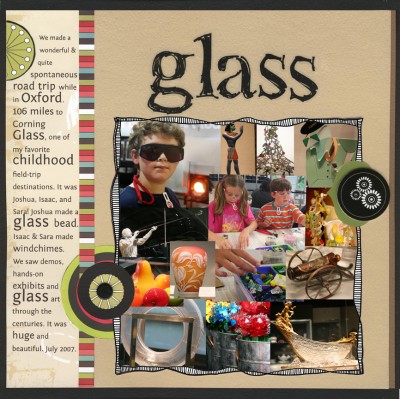
A digital frame brings order to this 14-photo vacation collage. I layered several photos behind the frame, then erased all of the extending photo edges. Once the block was printed to photo paper, I trimmed, mounted, and embellished.
So what do you think? Are you already using some or all of these approaches. Are there any you’re ready to go try? Need a suggestion for digital product or tutorials? Link us up to your hybrid pages.
[learndigi]

