“Fun-Filled” Frames
Grab two dollar-store frames, papers, fabric, and embellishments. Use Amy’s template or make your own themed arrangement.
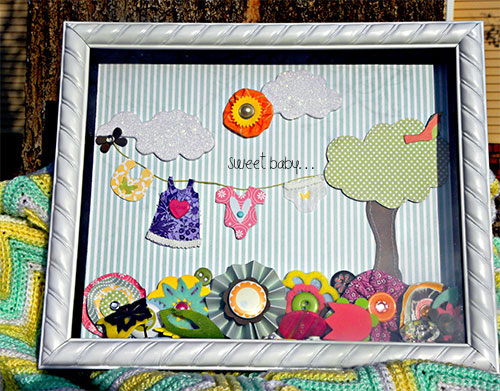
Loose decorations were handmade with instructions from TaniaWillis’ Embellishments: Beautifully Handmade class here at Get It Scrapped. They include: paper posies, felt flowers, pleated rosettes, yoyos, epoxy buttons and medallions.
supplies
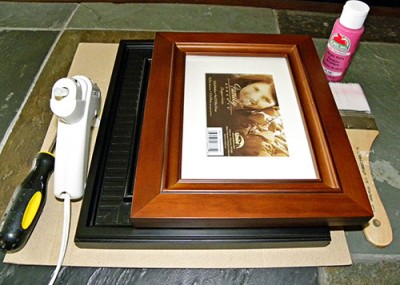
- 2 frames (for the same size photo)
- hot glue or other strong adhesive
- paint (if necessary to match up to different colored frames)
- chipboard (if necessary-to replace the original backing on your frame.)
- screwdriver (if necessary to remove and replace hanging fixtures, etc)
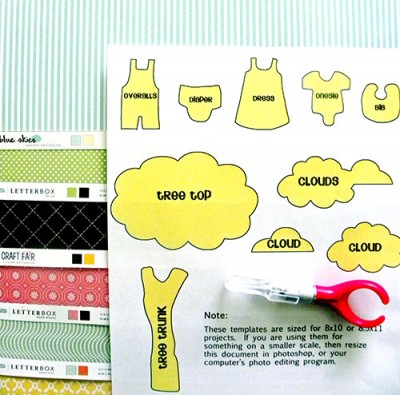
- felt, fabric, foam, paper, glitter chipboard and others embellishments for creating your picture (My “Sweet Baby” collage here was inspired by the newly-released “Dear Lizzy” line from Elizabeth Kartchner for American Crafts.
- template for baby clothes – click to download template.
- loose flowers & felt cutouts in my frame were handmade with instructions from TaniaWillis’ Embellishments: Beautifully Handmade class here at Get It Scrapped. They include: paper posies, felt flowers, pleated rosettes, yoyos, epoxy buttons and medallions.
how-to
prepare the frame
1. Start with two frames for the same sized photo. They don’t have to be the exact same overall size or color, they just need to have the same size of viewing window in both frames. The frames I’ve used below are both for 5×7 media, but are different colors and finished sizes.
Keep in mind that the depth of the two frames put together will be the depth of your shadowbox, and, thus, two slim-line frames aren’t great choices. If you can’t find two frames at home that work, try visiting your local dollar store—you’ll be surprised by their selection.
When deciding which frame will be in the front and which in the back, remember a flush frame would be better suited for the back, while more ornate frames are better suited for the front. Size doesn’t necessarily matter. However, if you have a smaller frame in the back, you will most likely need to hang your shadow box to display it, rather than have it sit on a surface.
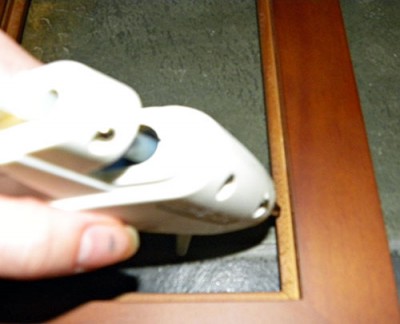
2. After you’ve decided which frame you want to be in the front, remove the glass, any packaging and the backing from the frame. Place it face down on a flat surface and apply a thin line of hot glue or other strong adhesive along the inside ledge of the frame—where the glass sits. Replace the glass quickly before the glue dries. This will make the rest of the construction process 10 times easier!
3. Remove glass, packaging and backing from your second frame, and place it face-down onto the back of your front frame to make sure that the frames sit flat and that the viewing windows line up.
NOTE: If the overall sizes of your frames differ, mark the placement for your smaller frame onto the larger frame to ensure accurate placement.
4. Place adhesive on the “smaller frame” and then adhere it to the larger frame, using your placement markers as a guide. Press down–flattening the hot glue–to avoid a large gap in the seams between the two frames. Clean any excess glue off the sides of your box before it dries.
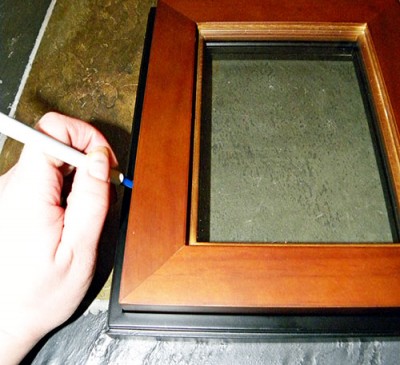
5. If both of your frames are visible from either the side or the front and they are not already the same color, you may want to repaint both of the frames one color. I like the contrast between my two frames, so I’ve chosen to leave mine as is.
create your picture and loose decorations to display in the shadowbox
1. Cut chipboard to the same size as the back panel for the frame in the back of your shadowbox (or use the backing that came with the frame). Cut your background paper to the same size and adhere.
2. Cut template elements from your choice of papers, fabric, felt and other materials.
3. Arrange and affix elements to create your design. Important to note:
- Keep all of your elements and photos at least a 1/4 of an inch from the edge of your background so that the shadowbox can be easily opened and closed and none of the elements are hidden by the shadows of the box.
- If you are planning to fill your frame with goodies as I have done, keep all of your photos and elements 1 to 1.5 inches up from canvas bottom.
4. Make and/or gather loose decorations to put into your shadowbox. I included paper posies, felt flowers, pleated rosettes, yoyos, epoxy buttons and medallions all handmade with instructions from TaniaWillis’ Embellishments: Beautifully Handmade class here at Get It Scrapped.
fill your shadow box
1. With your shadow box face down, first fill with loose elements. Important notes:
- Use a variety of sizes, colors and textures in your elements that you choose to fill your frame with, to create interest.
- Try to use elements that are double-sided. For your elements that have a definite back or front you may want to consider adhering the backs to your background and then including elements that are double sided and can circulate freely in the bottom of your frame to fill in the space.
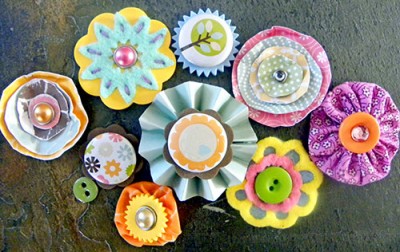
2. Put your background collage into the frame as you would the original backing for the frame.
3. Re-attach your hanging fixture if it was removed and your shadowbox is ready for display!
Hope you enjoy trying this project idea out and I wish you all a “fun filled” spring!
[akingsford]
[current]


