by Pattie Knox
Using a Custom Brush with the Clone Stamp
Custom Brushes are extremely popular among digital artists—and for good reason. Often thought of as the digital equivalent of rubber stamps, brushes are indispensable tools for adding flair to your work.
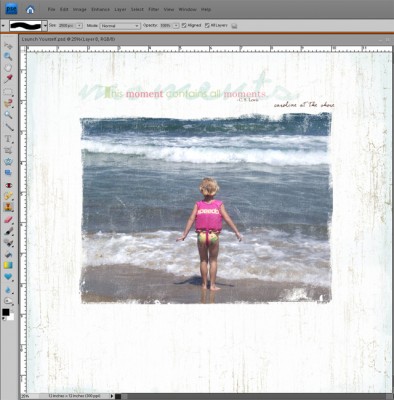
Here’s a quick trick using a custom brush with the Clone Stamp tool in Photoshop or Photoshop Elements to create the look of a masked photo in a snap! You’ll begin with two documents open in your workspace — the layout in progress and a photo.
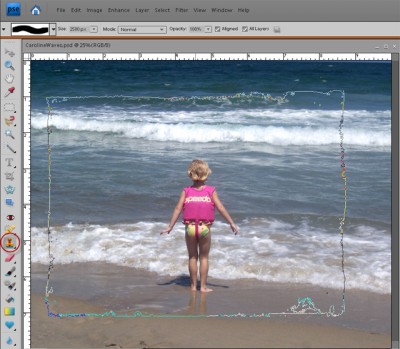
- Click directly on the photo to make it the active document.
- Select the Clone Stamp tool from the Toolbox.
- From the Options bar click the Show selected brush presets drop-down menu.
- Double click the brush of choice to load.
- Position the cursor to cover the desired area of your photo. (Resize the brush by pressing the [ or ] keys to increase or decrease the brush diameter )

- Press ALT (OPTION on Mac) while clicking once on the photo to sample the image.

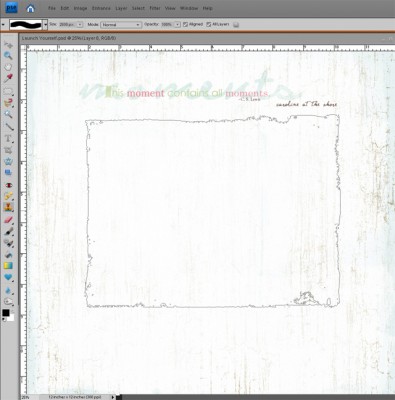
- Switch to the document containing your layout in progress.
- In the Layers palette, create a new blank layer above all other layers.
- Position the brush and click the left mouse button once to “stamp” the image onto the new blank layer you created.

Looks fabulous doesn’t it? (We won’t tell anyone how easy it was if you don’t!)
[pknox]
[learndigi]


