The first step in learning how to scrapbook is getting your photos in order.
Storing your photos in a chronological and hierarchical order will help you know what you have and find the photos you want when you want them for making scrapbook pages and albums.
As you take photos, cull close duplicates, photos of low quality, and photos that just don’t make sense. Store the rest of your photos with clear labels.
organizing digital photos
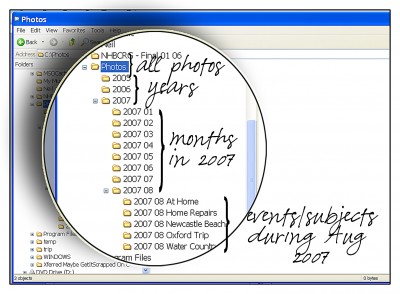
 Create a system of file folders that lets you easily browse and find photos. I use a hierarchical and chronological method that starts with a folder for each year. Within each year folder, I create 12 month folders. Within the month folders, are subject folders.
Note that the year and month follow all the way down to the subject folder names. Note also that the year is first and the month is given in a two-digit number (i.e., August is “08”). This way, an alphabetical sort of folders will also result in a chronological sort.
organizing photo prints

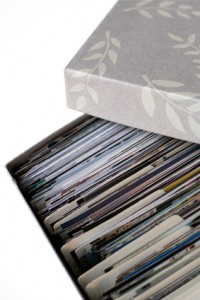
Store prints in acid-free photo boxes and use tabbed index cards to identify groupings. Sort the photos by year, and within year by month, and within month by subject. Use a tabbed index card for each subject and on each tab identify all three of: year, month, and subject.
example:
Aug 2007 Beach
Aug 2007 Home Repairs
Each month, include an “At Home” or “Around the House” or “Etc” category to hold those few photos that don’t really have a subject. Store them sorted by date.
a plan for scrapbooking your photos
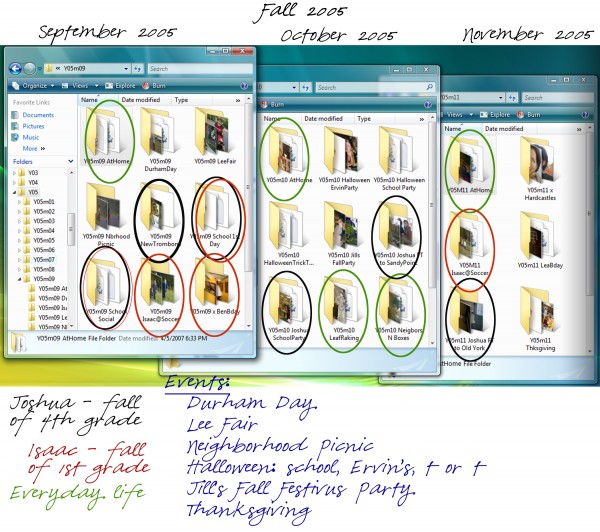
The following is an approach for looking at the photos you have and figuring out just what you want to scrapbook and how to scrapbook them. I like to take a look at my photos by my “family seasons.” By “family season,” I mean a time period during which I take groups of photos that could be combined with others in that season. For example, the fall months of September, October, and November have a lot of overlap in my life, so I consider those photos together. On the next page is a shot of my computer screen with folders for September, October, and November, 2005, all showing. If you’re working with prints, pull out those tabbed index cards I talked about in the last class and use them the same way.

Looking at these folders together, I then pull out a pen and paper and make a list of my logical groups over those months. In this example, several of the folders cover my oldest son’s fall semester as a 4th grader and several cover my youngest son’s fall semester as a 1st grader. Once I know what those folders are, I can figure out just how I want to scrapbook them, doing things like combining the field trips and class projects for one son onto a two-page spread. I circled all of Joshua’s relevant folders in red – and I’ll either make a list to refer to or use my photo-browsing software to tag them or put them into a digital album. (When I do this, my software doesn’t actually move or copy photos anywhere, but, rather, it puts a reference or pointer to those shots.
One big category for me during any season is “Everyday Life” – those around-the-house, goofing-off, odds-and-ends kind of moments. Getting them grouped together is a big help in getting a to-do list made. In the illustration above, I circled all of those folders in green. Finally, I’m left with several events and a couple of odds and ends folders. I list the events and now I’m ready to consider each event, to figure out how many pages to give to it and just which photos to get printed.
Related links for organizing your scrapbook photos
Organizing Everyday Life Photos
Organizing Events Photos

